![Learnyst Logo-25-1.png]](https://support.learnyst.com/hs-fs/hubfs/Learnyst%20Logo-25-1.png?height=40&name=Learnyst%20Logo-25-1.png)
E-Sign lets you require learners to digitally sign a contract when they buy one of your products. Signing is powered by Zoho Sign (Beta). If you only need learners to read and accept your terms without a signature, use the simpler Terms and Conditions option instead.
Before you start
- Your payment gateway must be Cashfree.
- Your contract document must be a PDF under 5 MB.
- A contract can be built in Zoho Sign only once, so have your final document ready.
- Only a Published contract can be attached to a plan or sent to learners.
Create and publish your contract
Step 1: Open Contracts
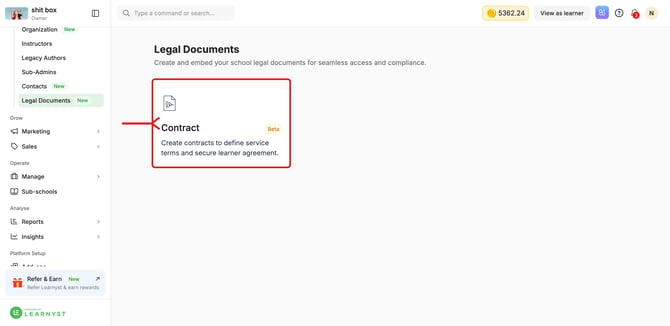
In the left navigation, go to Users → Legal Documents and click the Contract card.
Step 2: Click Create Contract
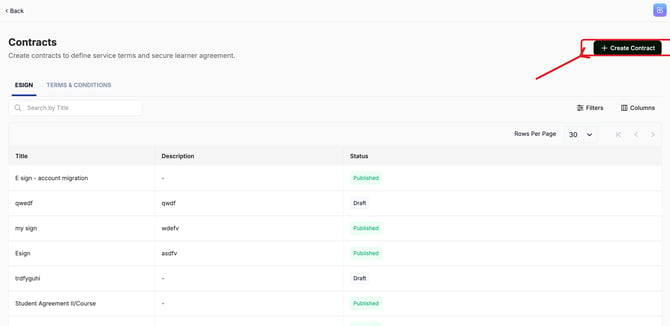
On the Contracts page (with the ESIGN and TERMS & CONDITIONS tabs), click Create Contract.
Step 3: Fill in the contract details
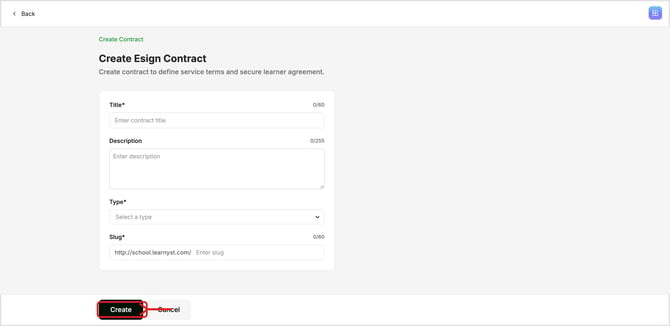
On Create Esign Contract, enter a Title, an optional Description, set Type to Esign, and enter a Slug. Then click Create.
Step 4: Upload your document
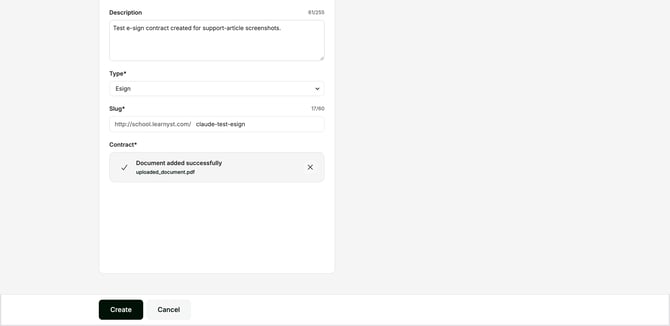
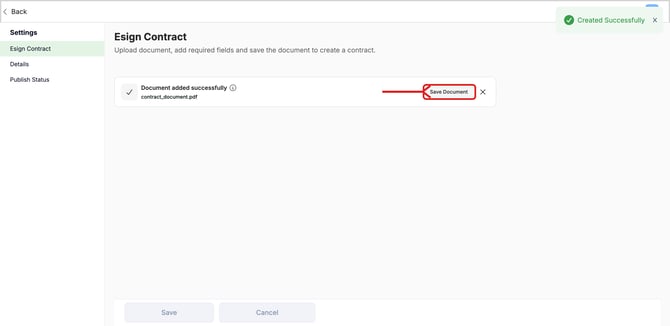
Drag your document in, or browse your files to select it. You'll see Document added successfully once it's uploaded.
Note: The document must be a PDF under 5 MB.
Step 5: Open Zoho Sign
On the contract editor (Esign Contract, Details, Publish Status), click Save Document. This opens Zoho Sign.
Step 6: Add the signer fields
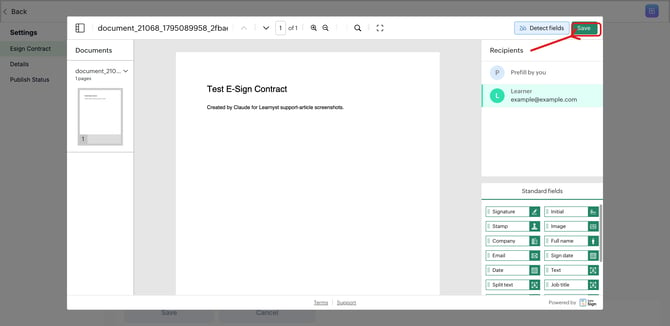
In Zoho Sign, the recipient is set to Learner. Drag the fields you need onto the document, such as Signature, Full name, Sign date, Date and Text. Then click Save.
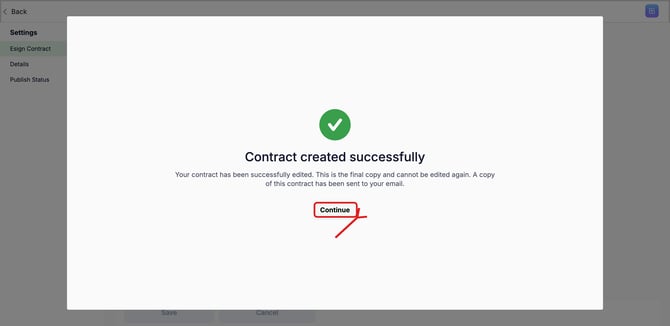
Note: You'll see a message that this is the final copy and cannot be edited again. Click Continue.
Step 7: Publish the contract
Open Publish Status, choose Published (instead of Draft or Archived), and click Save.
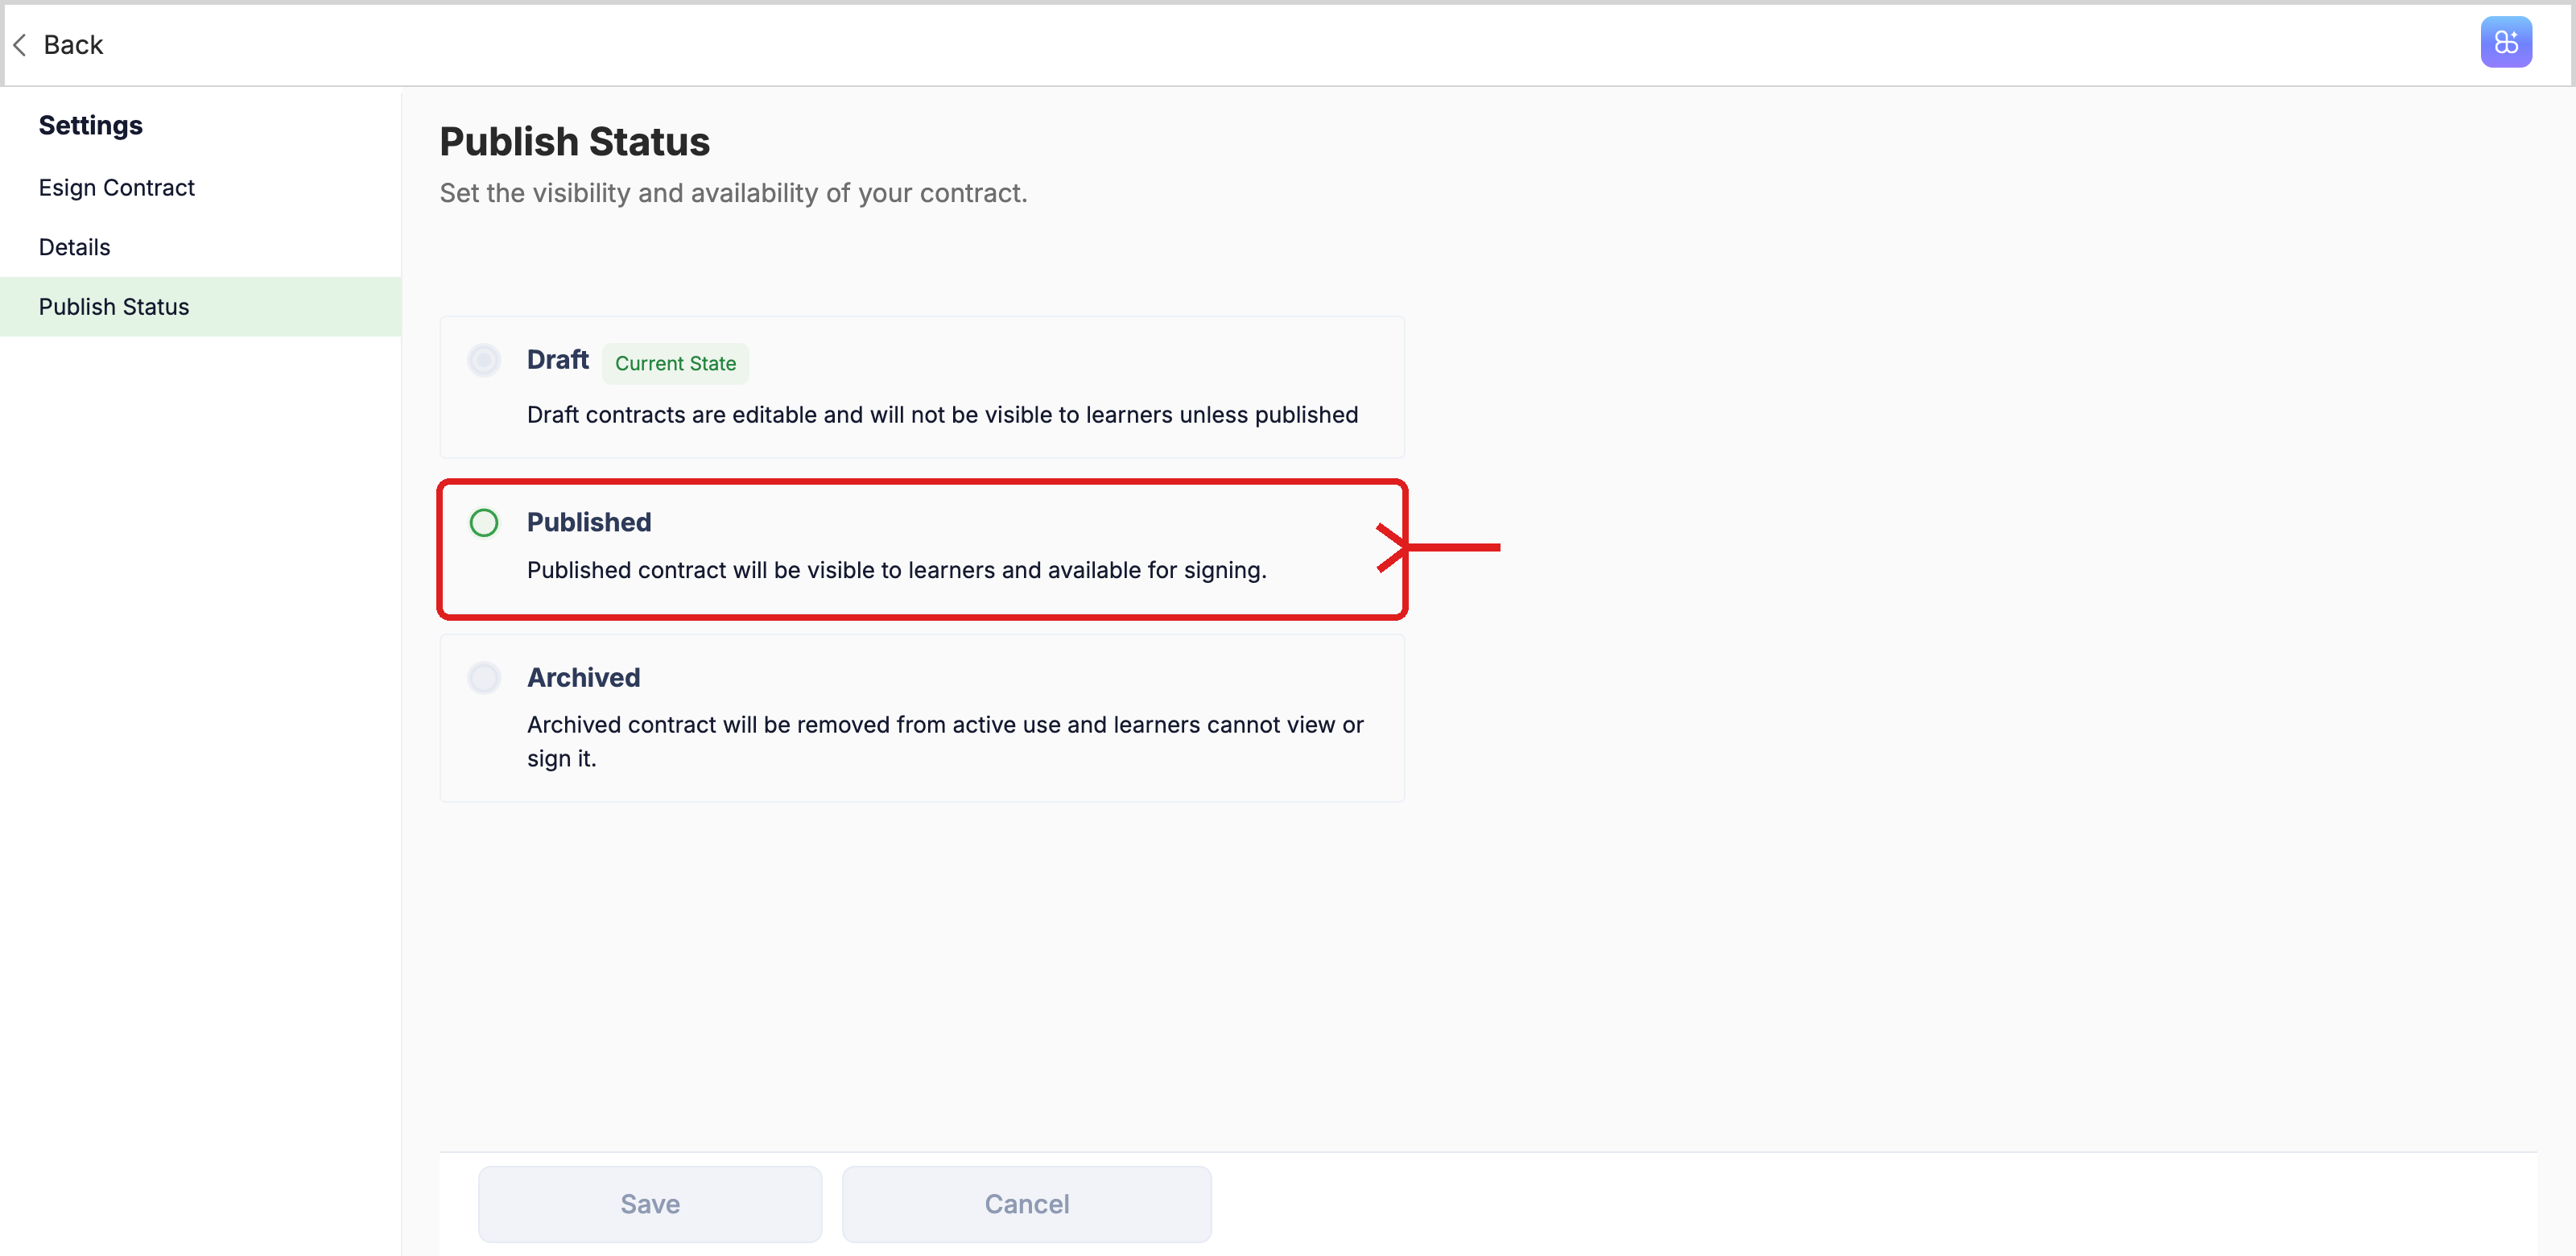
Your contract is now published and ready to be attached to a pricing plan.