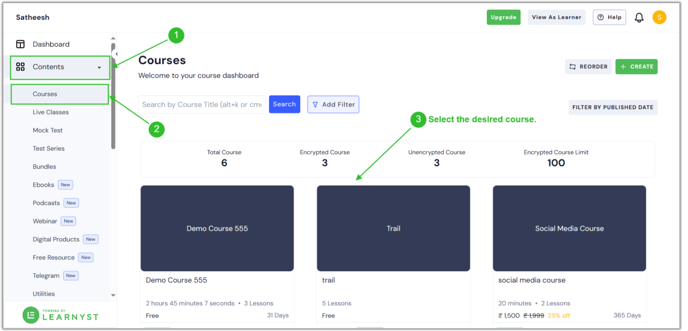
- To add attachments to your classes, go to Contents > Courses and select your desired course.
- Now, select the lesson you want.
.png?width=688&height=331&name=attach%20(1).png)
- You'll land on this page. Once you've uploaded the lesson's content, you can add the attachment.
- If you wish to include a link in the lesson, click the Add link option.
.png?width=688&height=331&name=attach%20(3).png)
- Here, paste your link and click the Save button.
.png?width=688&height=331&name=attach%20(2).png)
- You can also add attached files from your local or cloud storage by selecting the Browse option.
.png?width=688&height=331&name=attach%20(4).png)
- Here you can see a list of options, such as My Device and Google Drive, to upload files. Now I select the My Device option.
.png?width=688&height=331&name=attach%20(5).png)
- Now you can select the file from your local storage. Once you have selected suitable files, click on the Open button.

- Now you've attached the file from the local device for your learners to download.
.png?width=688&height=331&name=attach%20(6).png)
- You can upload a maximum of 10 attachments.
- The maximum size for each file can only be 3 GB.