- When you open an account with Learnyst, the web address of your school will be a Learnyst subdomain, such as yourschoolname.learnyst.com.
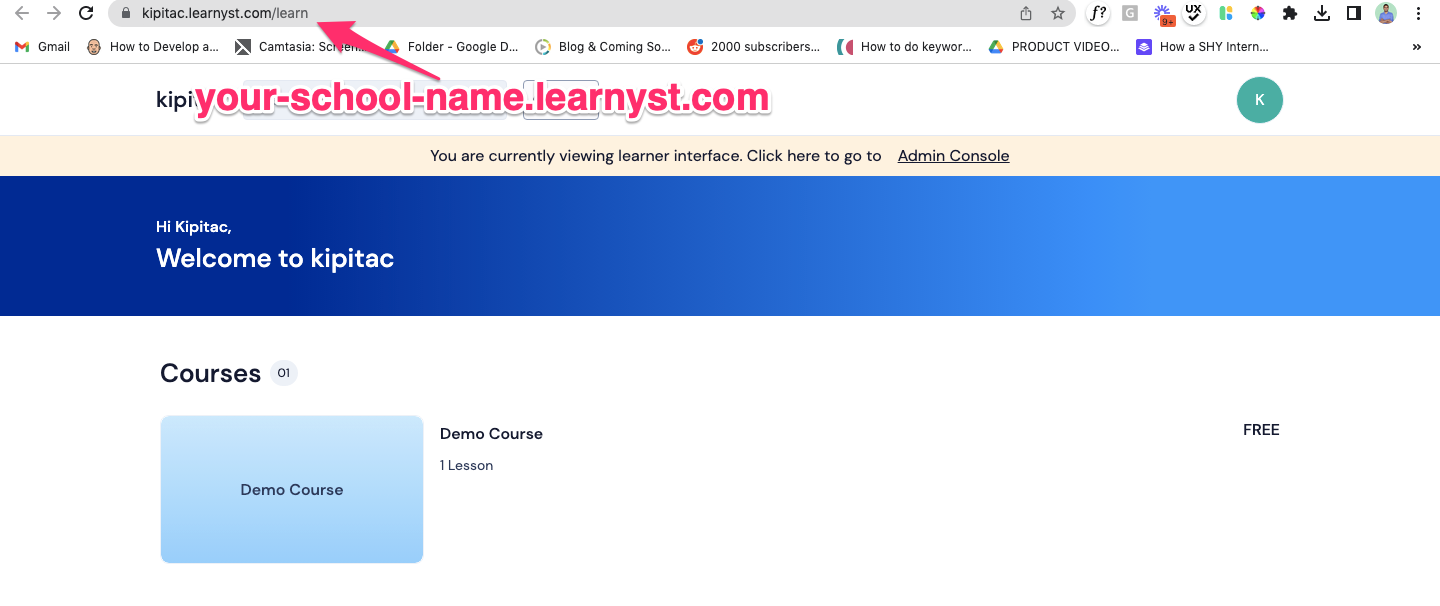
- You can map the subdomain of your own domain (yourschoolname.com) to your default learner page. This feature is called domain mapping.

- How Domain Mapping Works
- There are different Internet Domain Registrars that you can use to set up your own custom domain and map it to your Learnyst subdomain.
- Let's see how to map your Learnyst account to your custom domain on Godaddy.
-
Login to your Godaddy dashboard and click on Manage DNS

-
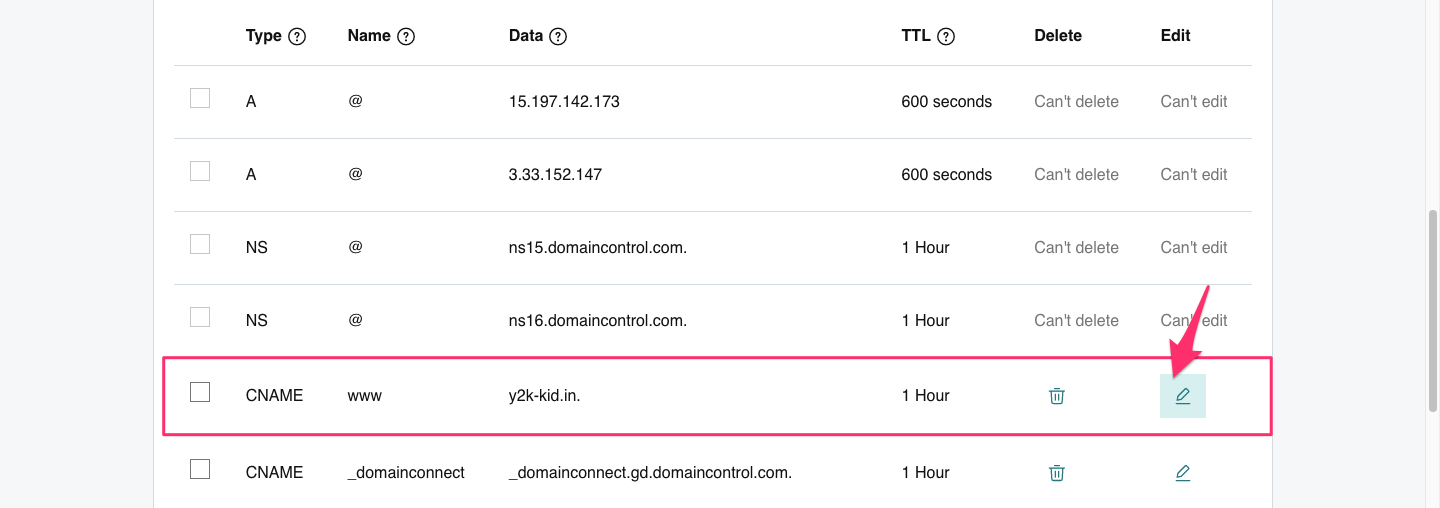
Now scroll down to the DNS records within DNS management. Here, you will find 2 Cname records.
-
Click on the Cname record that displays your custom domain
-
This opens up the Cname record. Here, you've two ways to edit your Cname.

- #1. Map your Learnyst account to your custom domain
-
To map the Learnyst account to your custom domain (www.y2-kid.in), first, go to your admin dashboard >website&apps > website and copy the DNS mapping Cname

-
Next, go to the Godaddy DNS management page and paste the DNS Cname within the value field and click Save.

- #2. Map your Learnyst account to a sub-domain:
-
You may have an existing website that you don't want to disturb. In that case, you can map your Learnyst account to a sub-domain of your website.
-
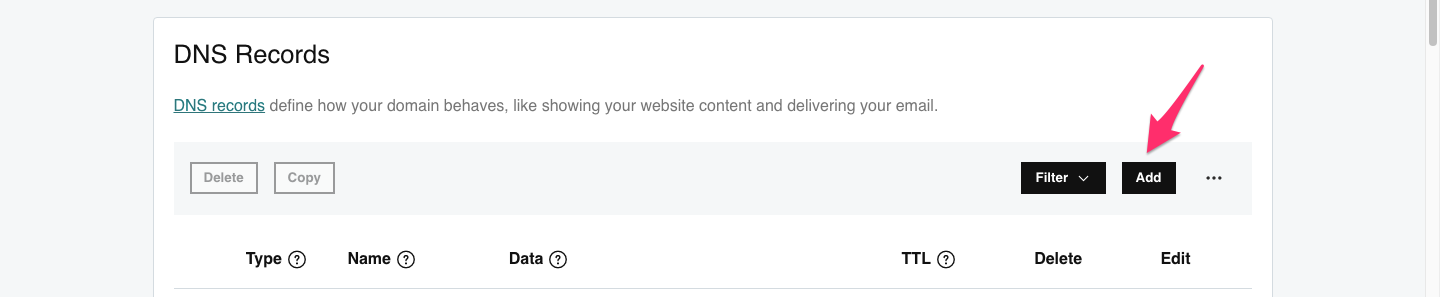
To do that, within the DNS management page of Godaddy click on Add.
-
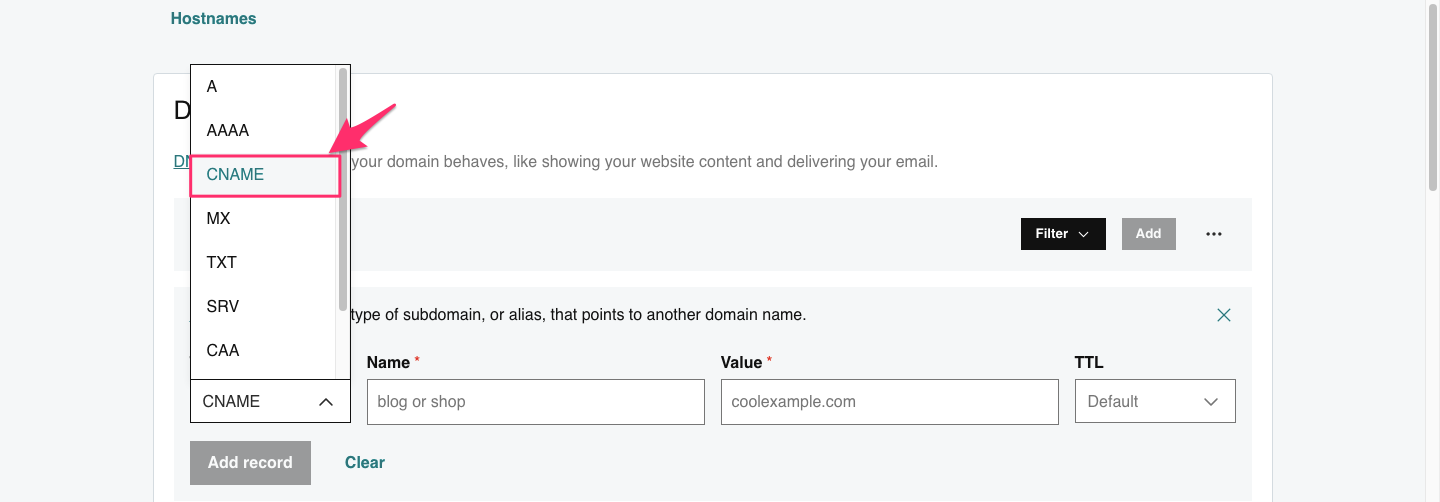
Select the Cname record type from the drop-down list
-
Within the name field, enter the sub-domain value. For example, if you want to map your Learnyst account to courses.y2k-kid.in, enter courses within the name field.
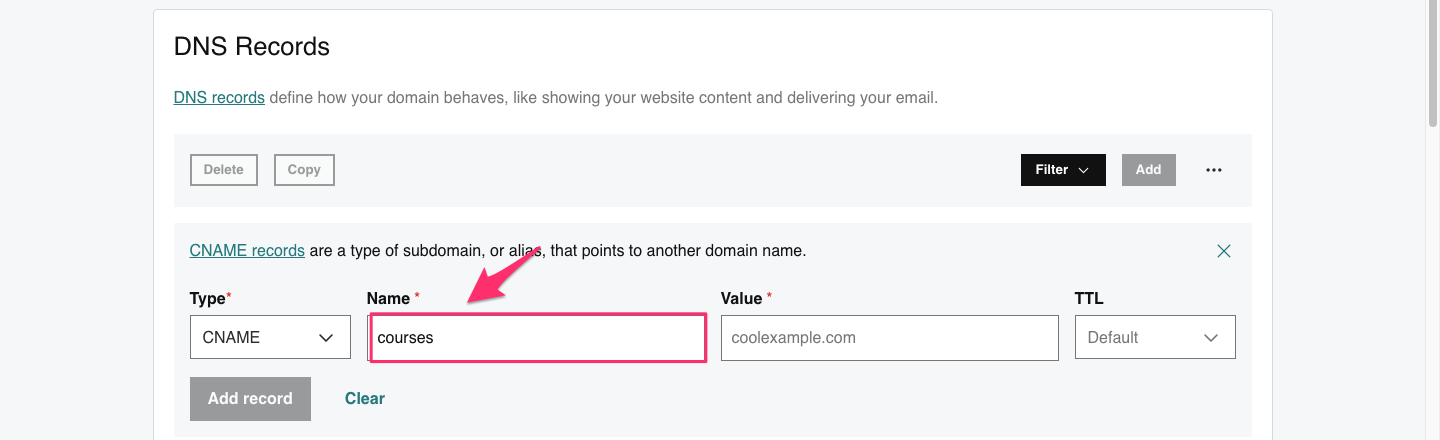
-
Next, go to your admin dashboard>website&apps> website and copy the DNS mapping Cname
-
Within Godaddy's DNS management page, go to Cname record, paste this within the value field as shown and click on Add record.
.png?width=670&height=318&name=Learnyst%20Custom%20domain%20%20(1).png) Note: You can keep the TTL field as default.
Note: You can keep the TTL field as default. -
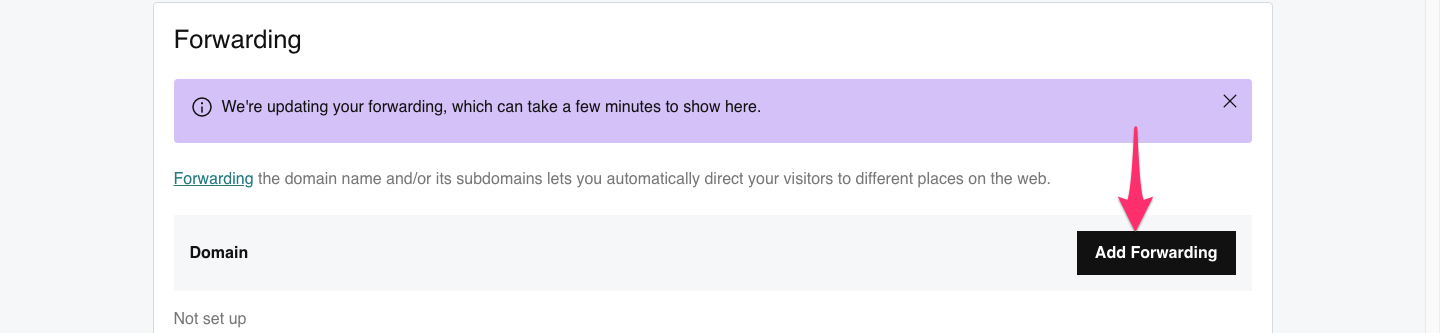
If you have configured your main domain (www.mycustomdomain.com for example) to your Learnyst account, you need to add a redirection as well so that mycustomdomain.com redirects to the same page. To do so,
-
Scroll down a little more until you see the Forwarding. Click on Add Forwarding
-
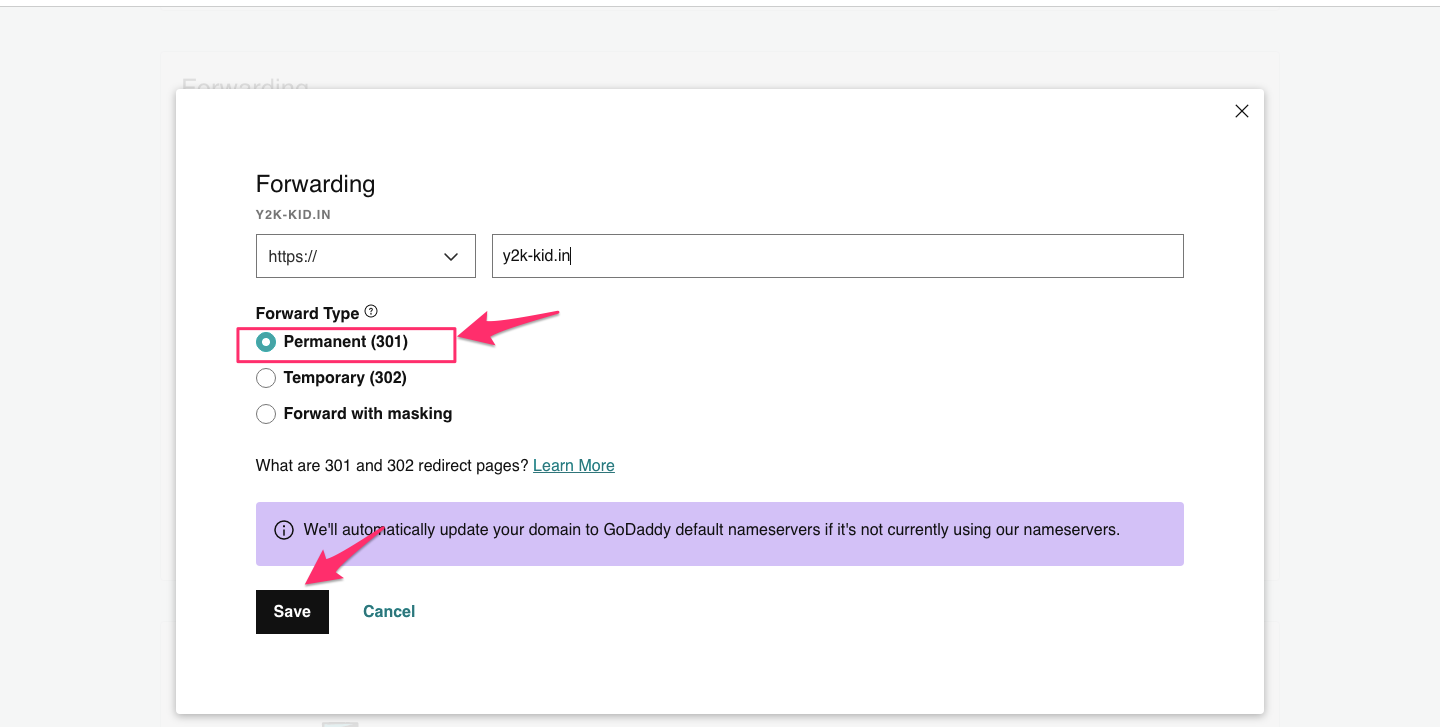
Now, enter your URL and select the Permanent(301) redirect option and click Save.
-
Finally, to complete the domain mapping process, go to your admin dashboard and paste your custom domain within the add custom domain textbox.
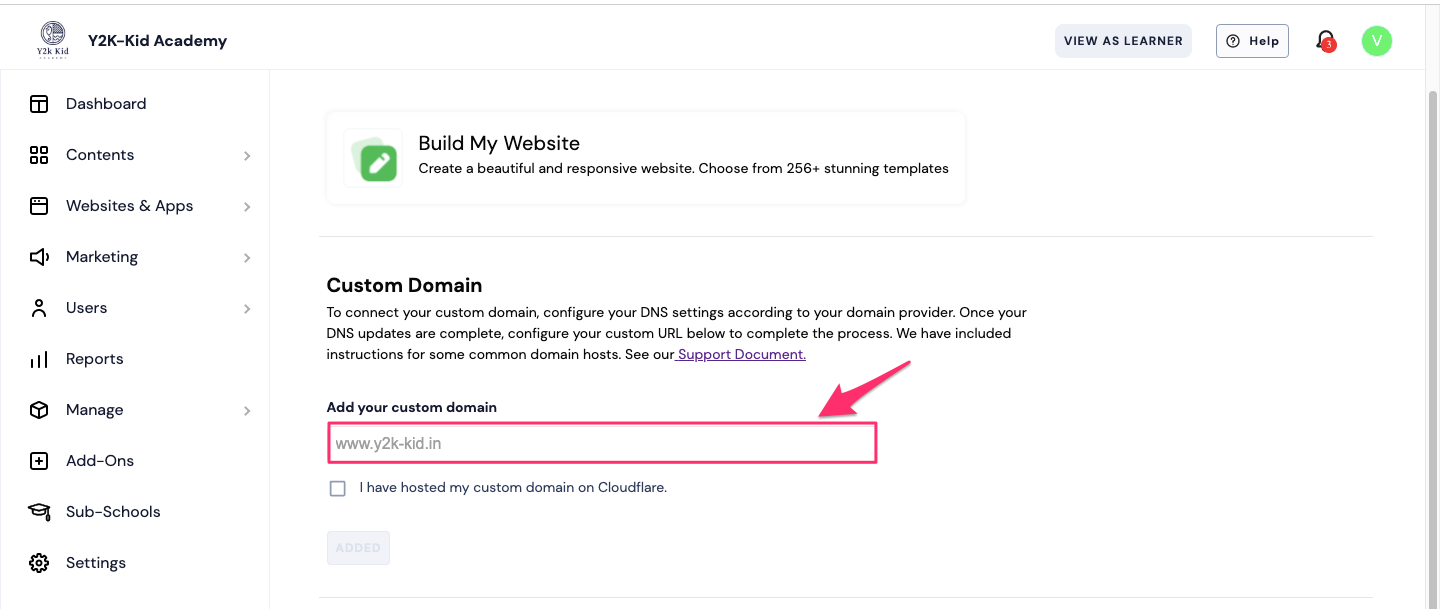
- This maps your Learnyst account to your custom domain. Next, you can go ahead and add important pages like privacy policy and terms of service.
- Do you have a custom domain in Hostinger? Here's how to map Learnyst to your Hostinger account.
- Did this answer your question? Thanks for the feedback There was a problem submitting your feedback. Please try again later.Yes No No results found