Please migrate to any of the paid plans in Learnyst to use the custom domain feature.
-
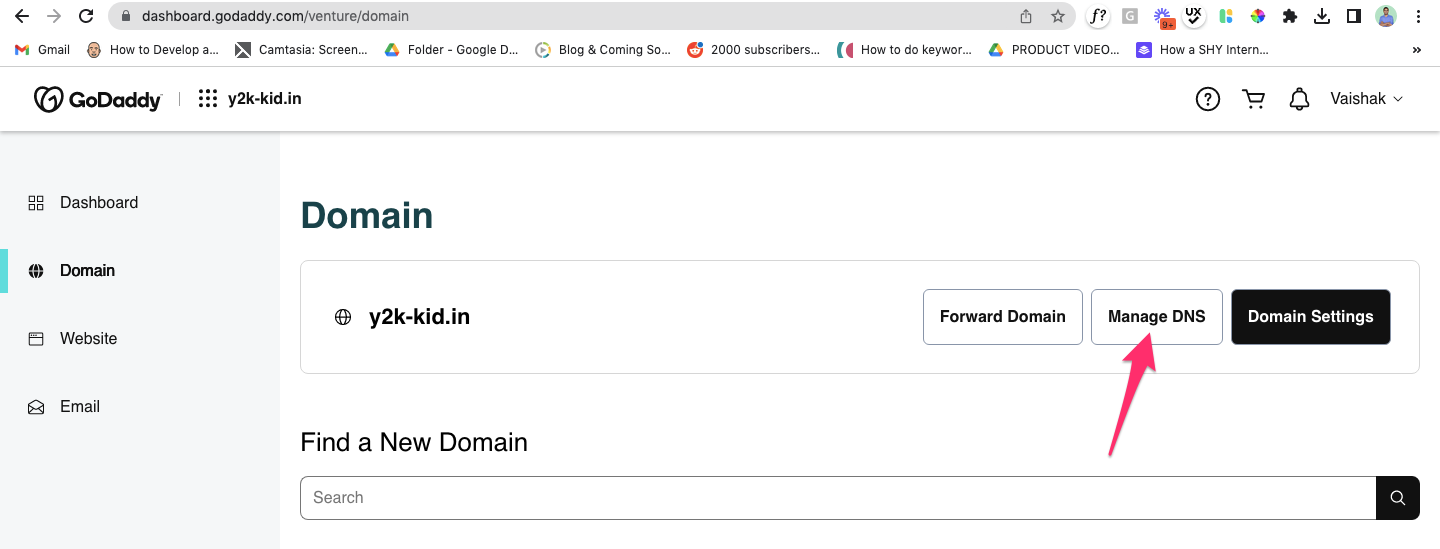
Login to your Godaddy dashboard and click on Manage DNS
-
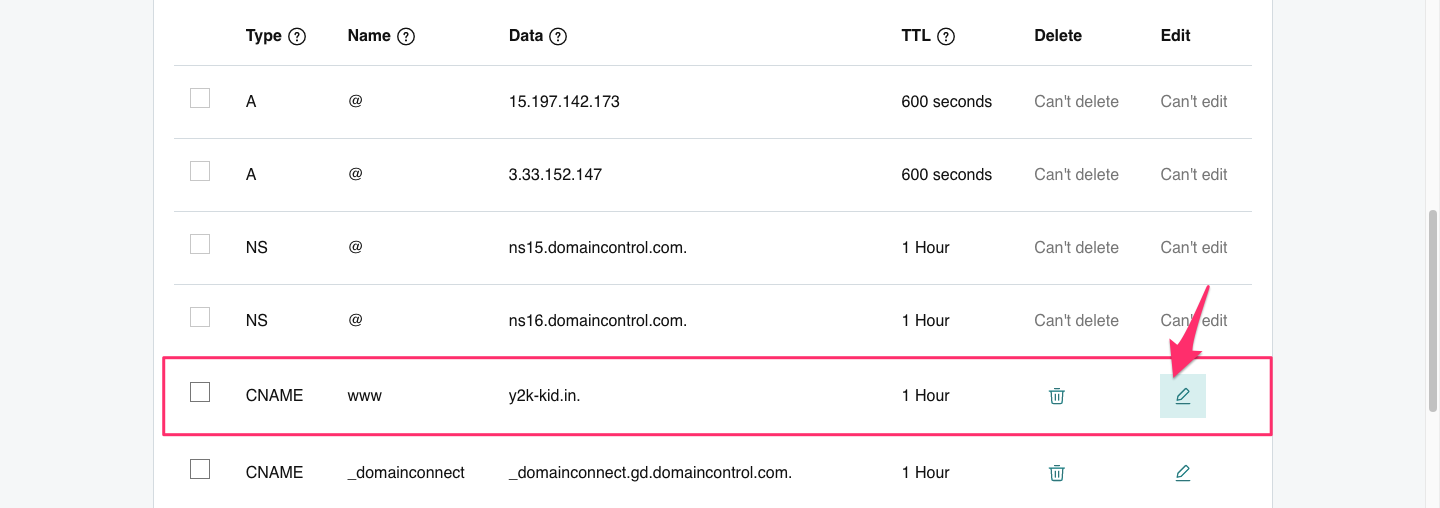
Now scroll down to the DNS records within DNS management. Here, find 2 Cname records.
-
Click on the Cname record that displays your custom domain
-
This opens up the Cname record. Here, you've two ways to edit your Cname.

#1. Map your Learnyst account to your custom domain
-
To map the Learnyst account to your custom domain (www.y2-kid.in), first, go to your admin dashboard >website&apps > website and copy the DNS mapping Cname

-
Next, go to the Godaddy DNS management page and paste the DNS Cname within the value field and click Save.

#2. Map your Learnyst account to a sub-domain:
-
You may have an existing website that you don't want to disturb. In that case, you can map your Learnyst account to a sub-domain of your website.
-
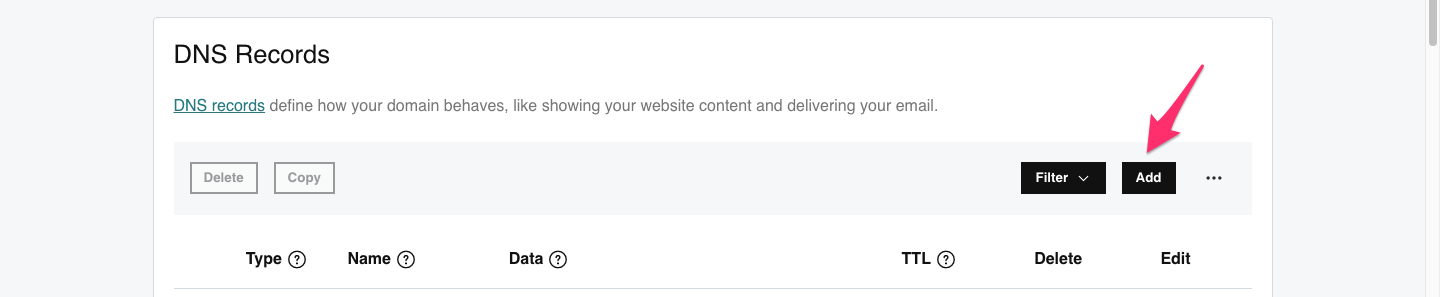
To do that, within the DNS management page of Godaddy click on Add.
-
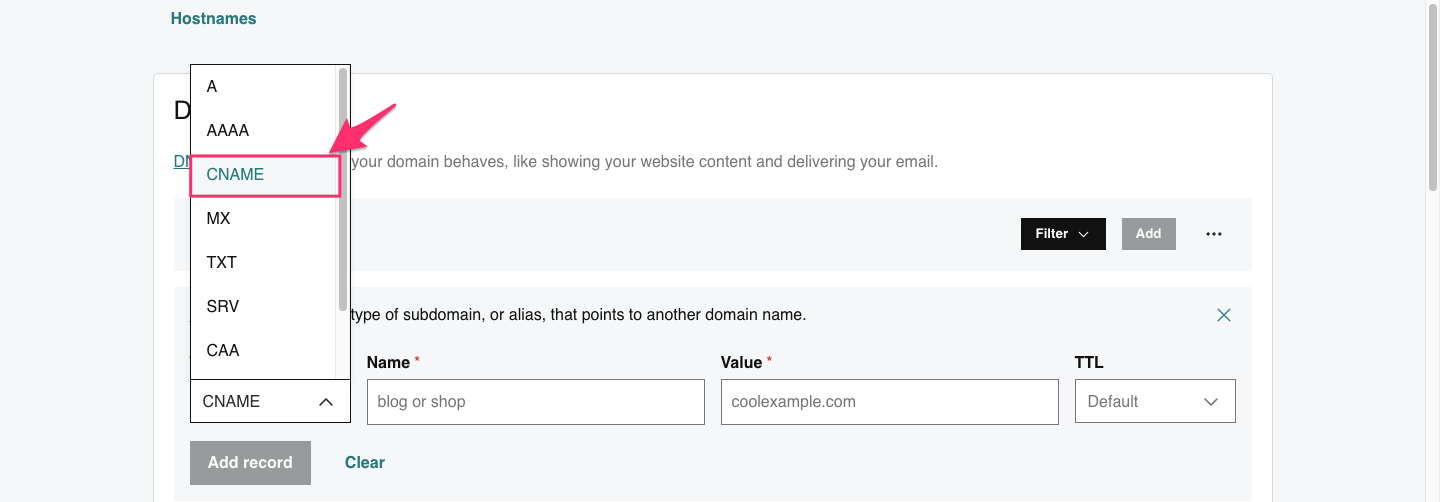
Select the Cname record type from the drop-down list
-
Within the name field, enter the sub-domain value. For example, if you want to map your Learnyst account to courses.y2k-kid.in, enter courses within the name field.
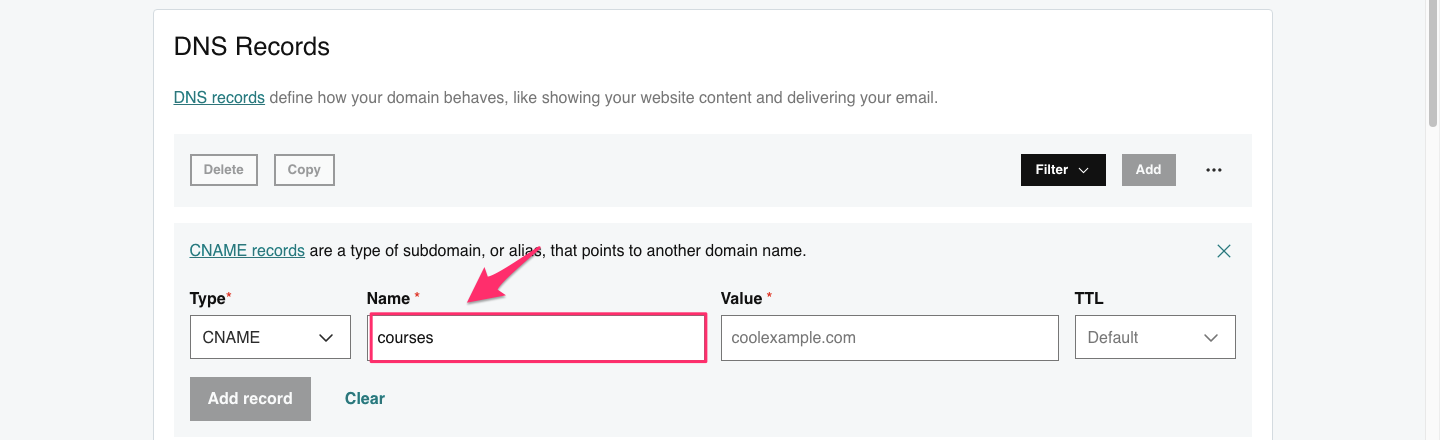
-
Next, go to your admin dashboard>website&apps> website and copy the DNS mapping Cname
-
Within Godaddy's DNS management page, go to Cname record, paste this within the value field as shown and click on Add record.
.png?width=670&height=318&name=Learnyst%20Custom%20domain%20-%20godaddy%20(1).png)
Note: You can keep the TTL field as default.
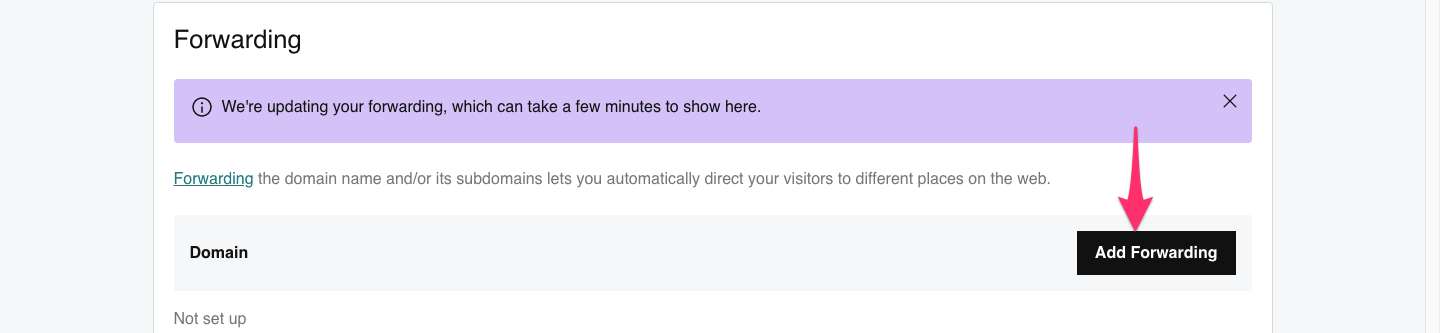
If you have configured your main domain (www.mycustomdomain.com for example) to your Learnyst account, you need to add a redirection as well so that mycustomdomain.com redirects to the same page. To do so,
-
Scroll down a little more until you see the Forwarding. Click on Add Forwarding
-
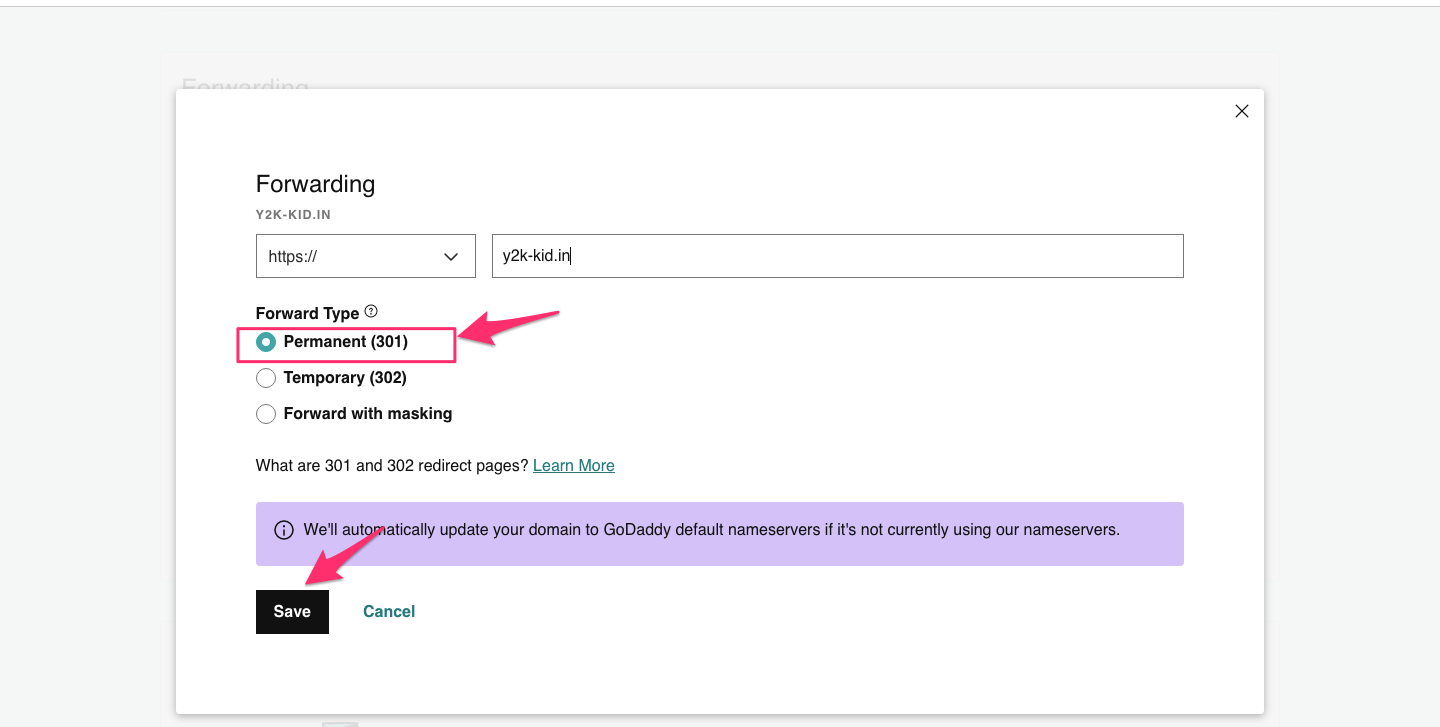
Now, enter your URL and select the Permanent(301) redirect option and click Save.
-
Finally, to complete the domain mapping process, go to your admin dashboard and paste your custom domain within the add custom domain textbox.
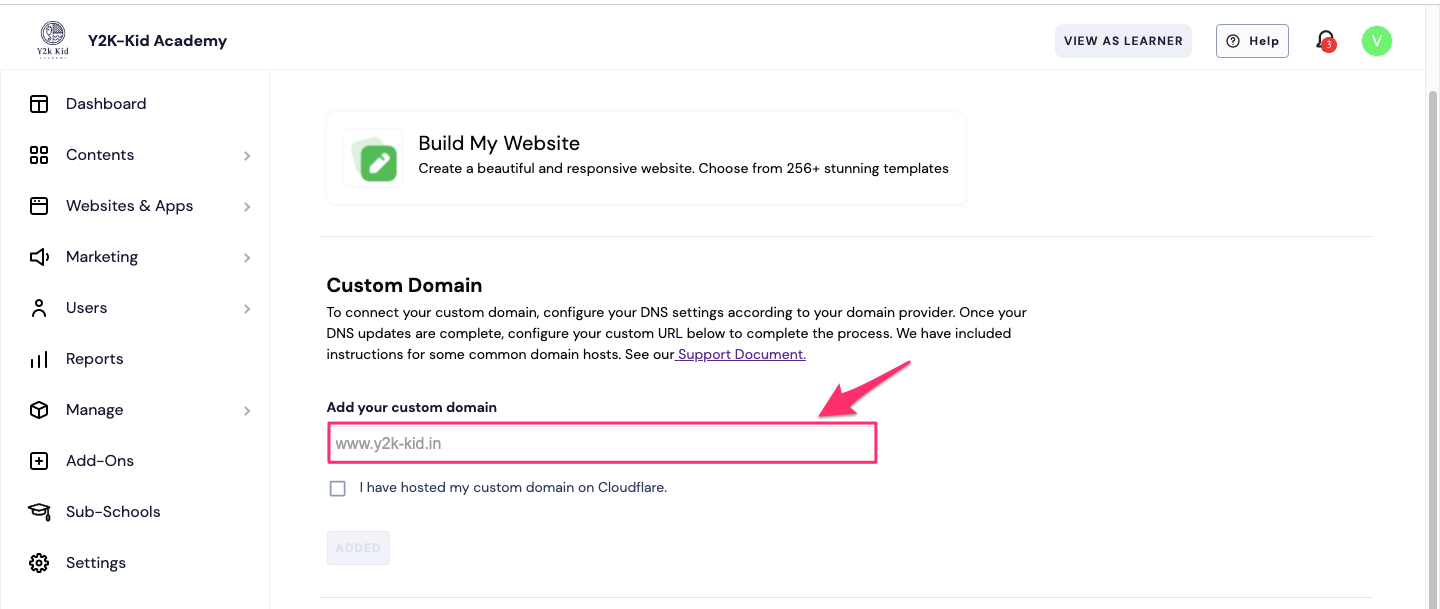
This maps your Learnyst account to your custom domain. Next, you can go ahead and add important pages like privacy policy and terms of service.
Did this answer your question? Thanks for the feedback There was a problem submitting your feedback. Please try again later.Yes No No results found