Search engine optimization helps your website to be on the top of the online search results. An SEO-optimized site attracts more E-traffic, which results in better business opportunities.
Here's how you can make your website search Engine Optimized using Learnyst,
-
Add website title and description
-
Add a logo to your school website
-
Add favicon to your school website
Add website title and description
Add a logo to your school website
Add favicon to your school website
Add Website Title and description
-
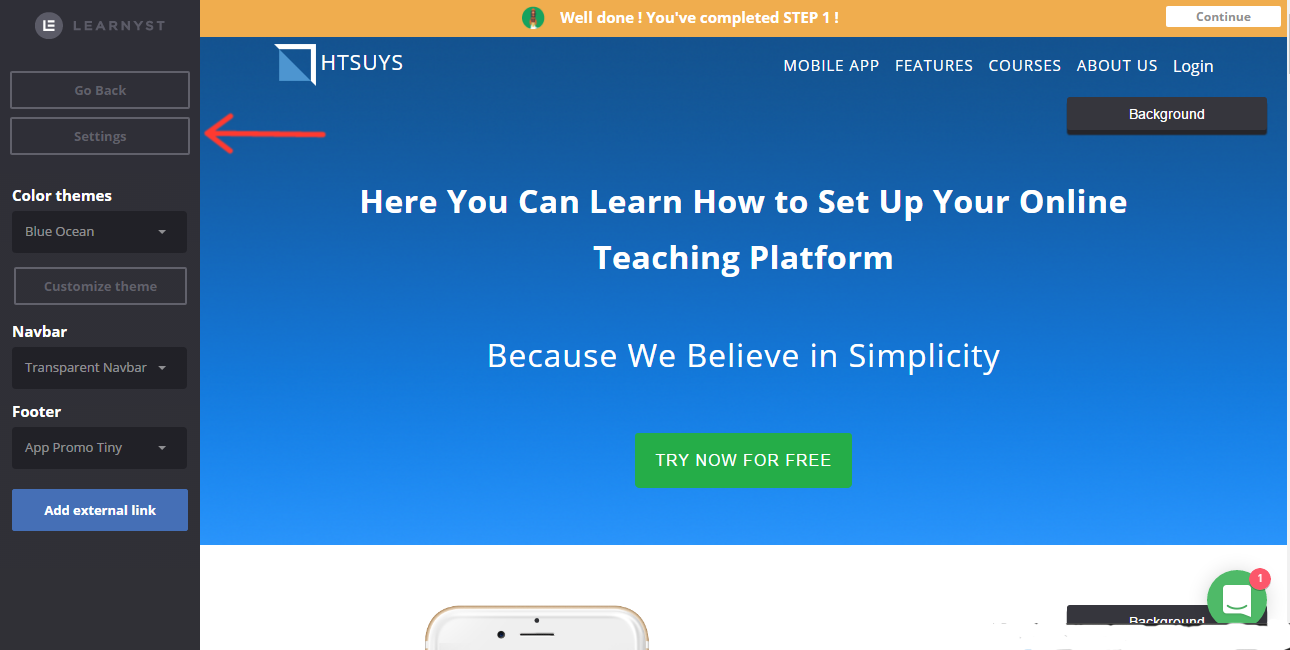
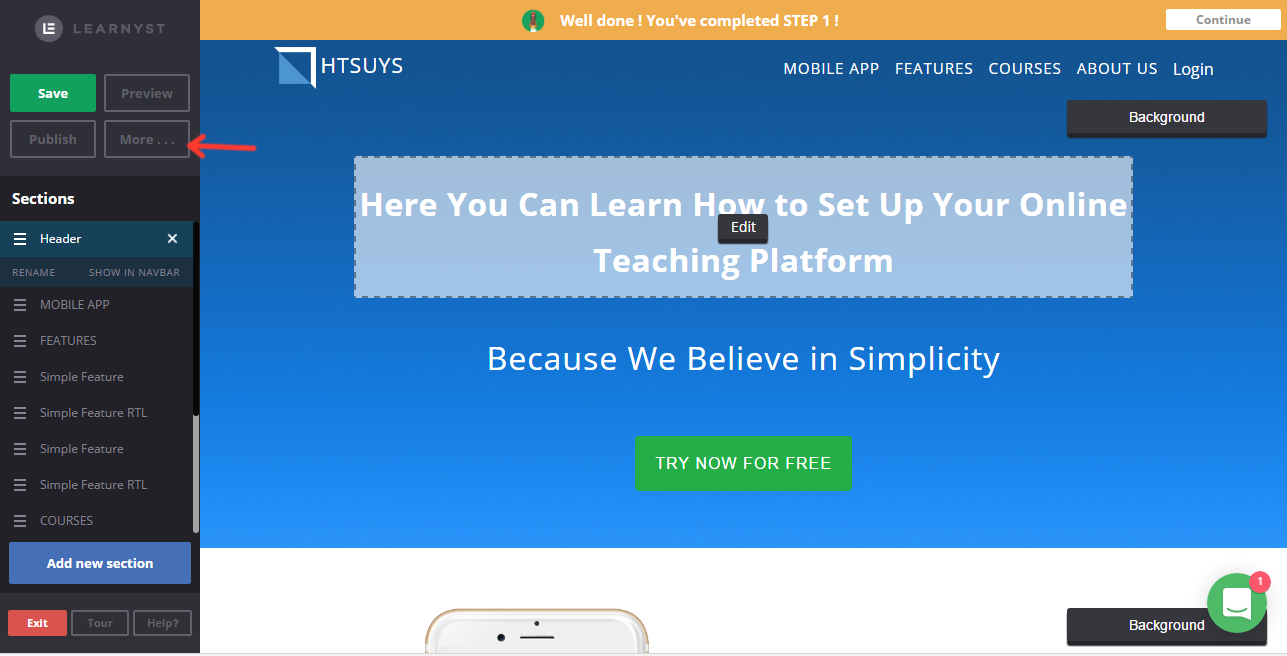
Login into Learnyst as Admin and from admin dashboard go to Website builder > More > Settings > A Title & URL.
Login into Learnyst as Admin and from admin dashboard go to Website builder > More > Settings > A Title & URL.
-
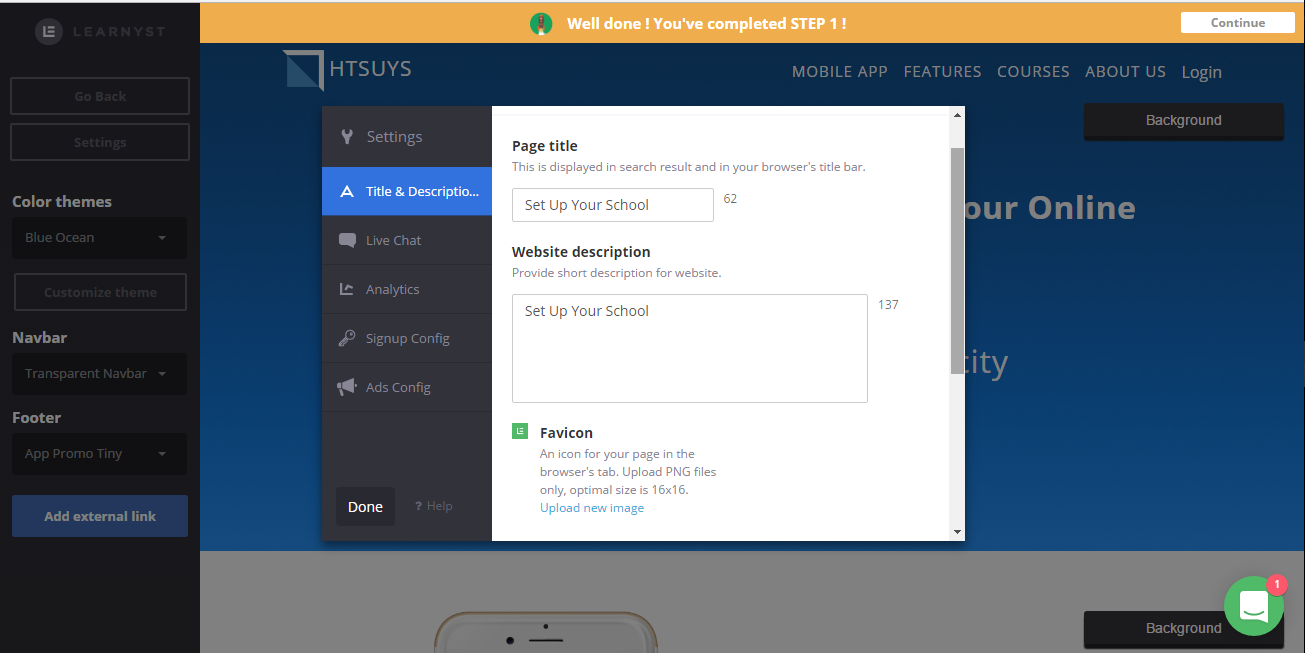
Enter your school name in Page Title text field and provide short description in Website description text field for the website.
Enter your school name in Page Title text field and provide short description in Website description text field for the website.
-
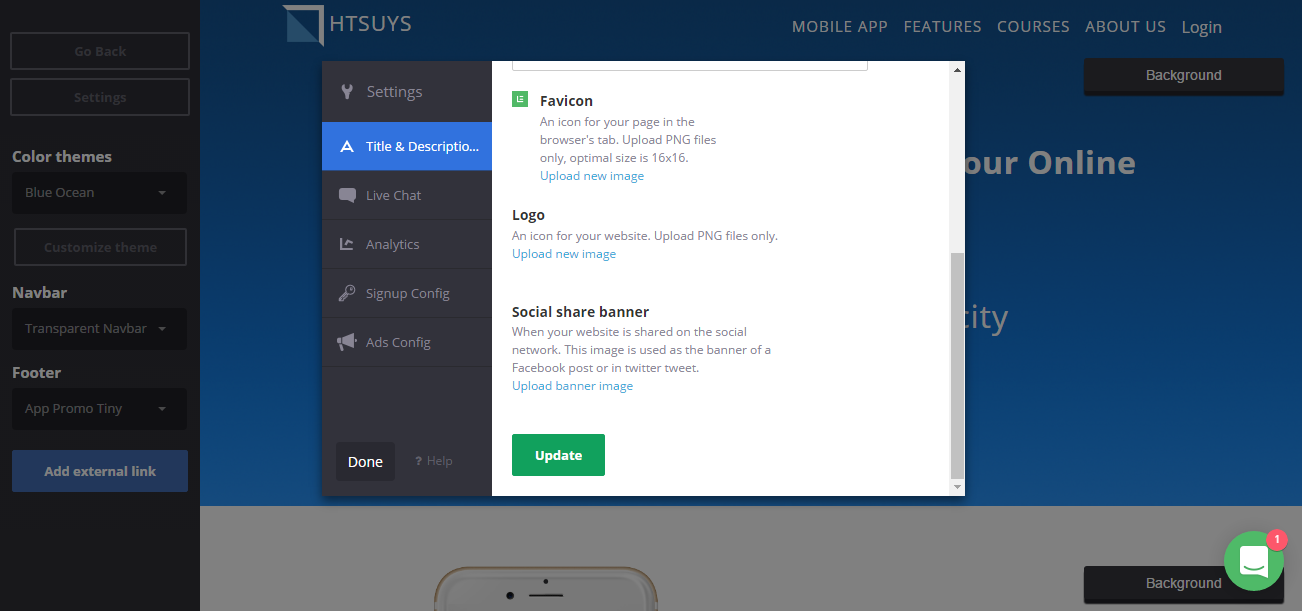
Click on Update button the Update success message received and then press Done button to save the changes made for Title and Description Tab.
Click on Update button the Update success message received and then press Done button to save the changes made for Title and Description Tab.
-
Click on Go Back button and press Save and Publish button to make your changes live.
Click on Go Back button and press Save and Publish button to make your changes live.
Add logo to your school website
-
Login to Learnyst as admin. From admin dashboard go to
Login to Learnyst as admin. From admin dashboard go to
-
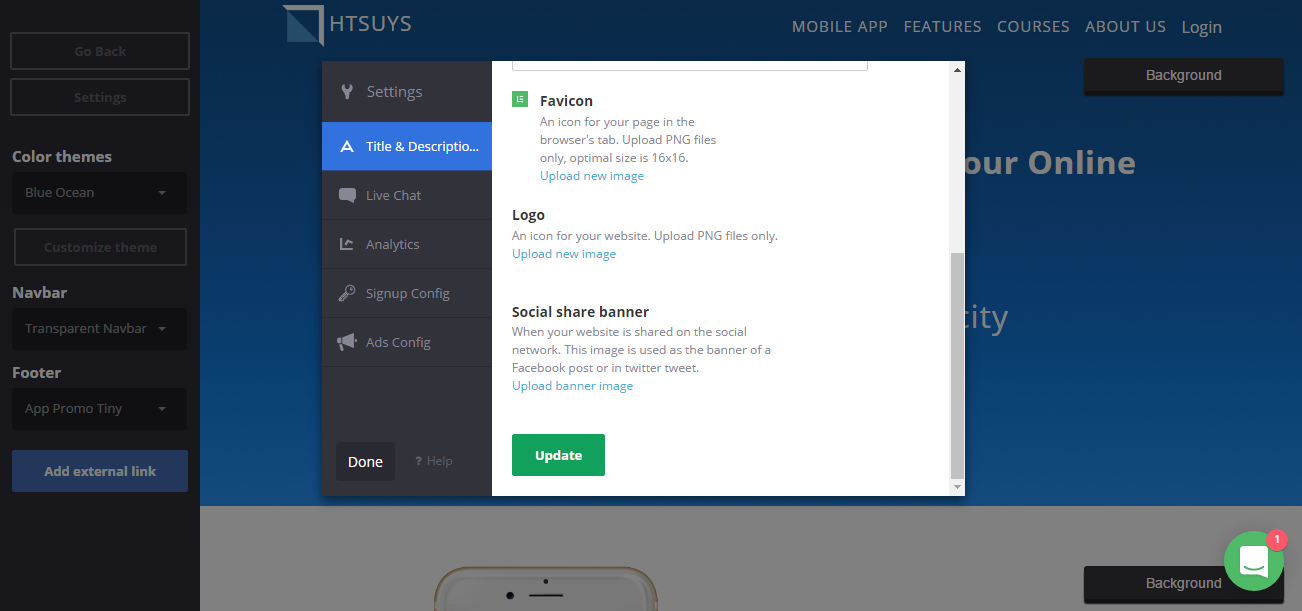
Website builder > More > Settings > Title & Description > Logo.
Website builder > More > Settings > Title & Description > Logo.
-
Click on Upload New Image.
Click on Upload New Image.
-
Choose the picture from the computer or just drag and drop the image file to upload as logo.
Choose the picture from the computer or just drag and drop the image file to upload as logo.
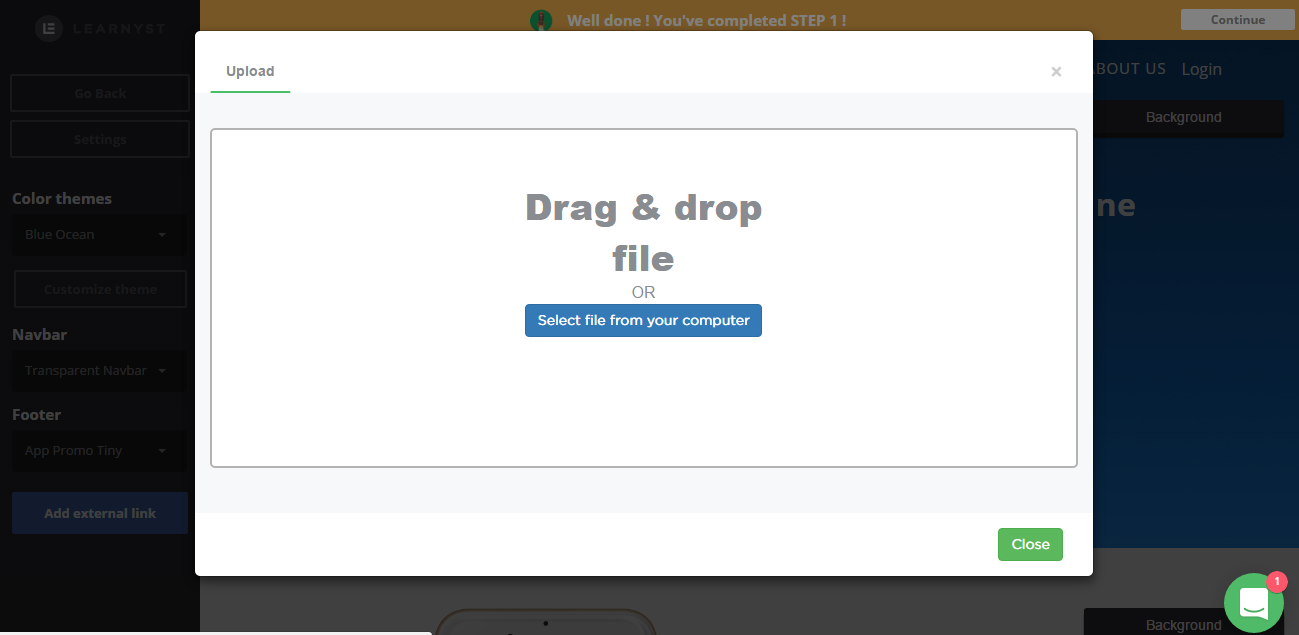
[Note: The Image file uploaded can also be cropped to the selected size by pressing on "Save Cropped Image" button or as uploaded by clicking on "Skip cropping" button]
-
After clicking on Select, your image shows up as logo in the settings page. Click on Update and click on Done to complete the settings.
After clicking on Select, your image shows up as logo in the settings page. Click on Update and click on Done to complete the settings.
-
Click on Go Back and press "Preview", to preview your website for the changes and press "Publish" button to publish your website so that the user can view the changes made to your website.
Click on Go Back and press "Preview", to preview your website for the changes and press "Publish" button to publish your website so that the user can view the changes made to your website.
Add a Favicon
-
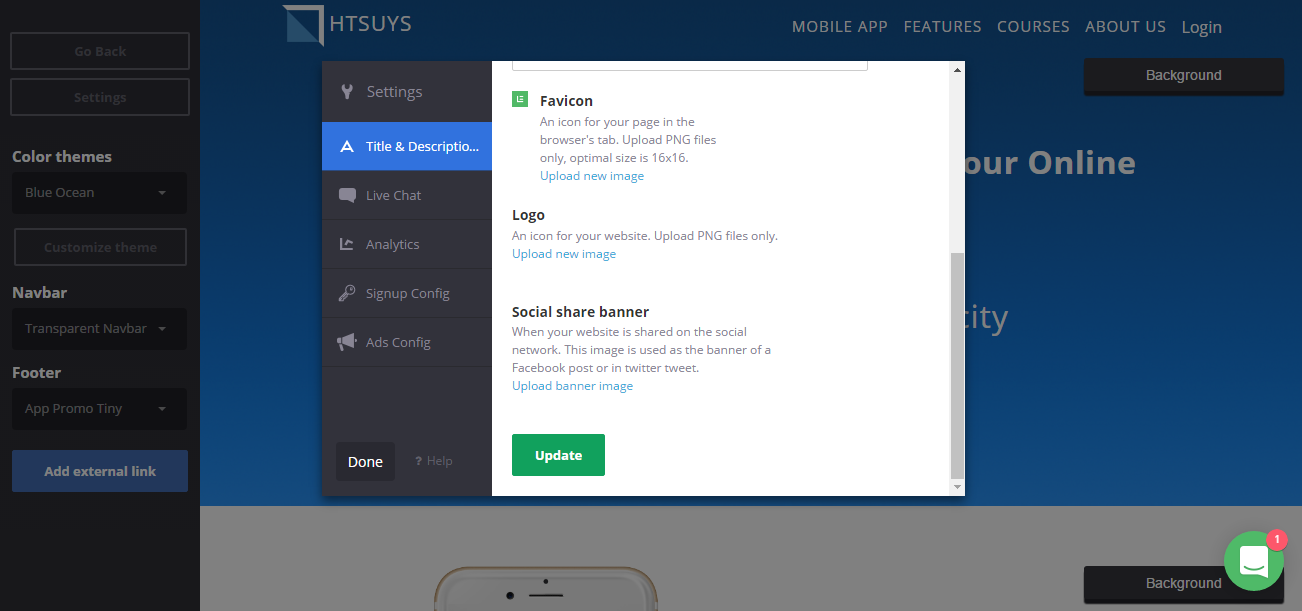
Login into Learnyst as Admin and from admin dashboard go to Website builder > More > Settings > A Title & URL > Favicon.
Login into Learnyst as Admin and from admin dashboard go to Website builder > More > Settings > A Title & URL > Favicon.
-
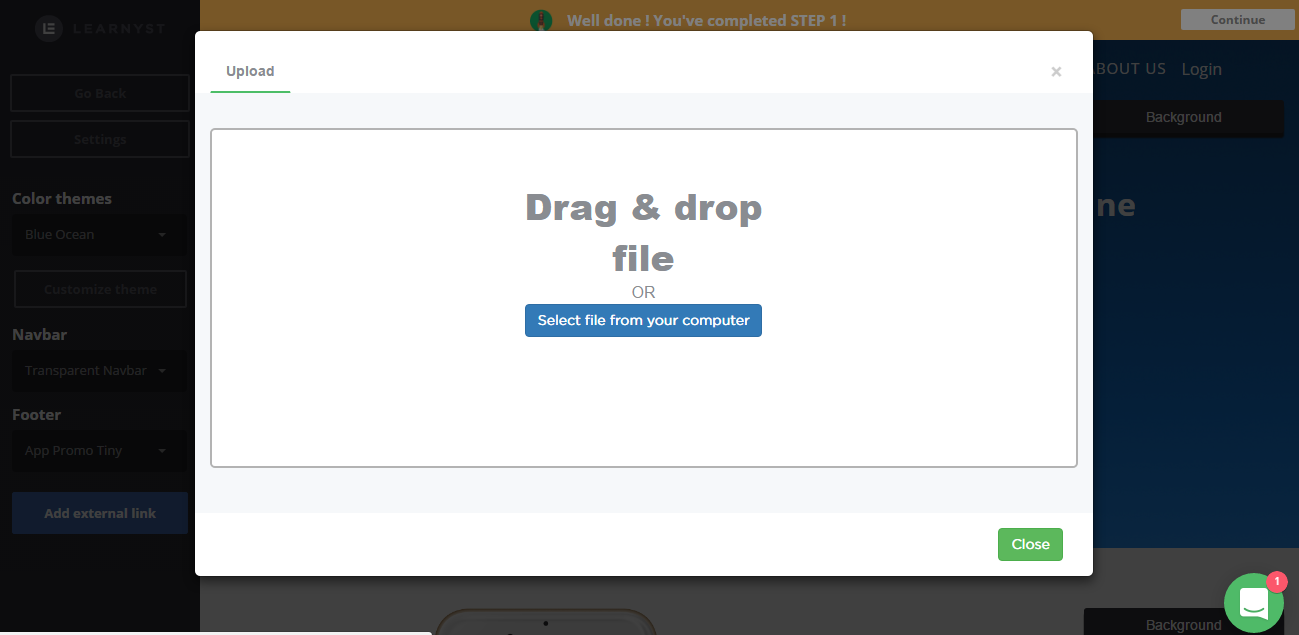
Click on Upload New Image. You can upload image from your local drive. Click on Select. The favicon image is updated in the Favicon image field.
Click on Upload New Image. You can upload image from your local drive. Click on Select. The favicon image is updated in the Favicon image field.
-
Once done click on Update button. Success message appears and then Click on Done button. Then Click on Go Back button and you can Save and publish the changes to your website.
Once done click on Update button. Success message appears and then Click on Done button. Then Click on Go Back button and you can Save and publish the changes to your website.
Did this answer your question? Thanks for the feedback There was a problem submitting your feedback. Please try again later.Yes No No results found