In this document we will cover these details:
Tables can't be imported directly. Please insert an image of your table which can be found here.
Tables can't be imported directly. Please insert an image of your table which can be found here.
Note: Want help with creating your own course website?
Login to this free online course using your admin email and access the course from our teach101 website.
-Aug-24-2023-01-53-23-2408-PM.png)
Alternatively, you can check this complete YouTube playlist after Feb 3rd, 2023.
The New Website Builder
Using the new Learnyst site builder, you can build a beautiful, responsive website with multiple pages.
You can choose from 120+ build-in free templates, customize the designs to suit your brand & create a new website in minutes. You can do all this without coding.
The Existing Website Builder ( What happens?)
Going forward, we won't be supporting the existing website builder. So, to make any edits to your site, you will be using the new website builder.
Please note that students will still see your old website until you publish the changes.
Next, let's see how you can edit your existing website using the new website builder.
How to Publish Your Website Using The New Website Builder?
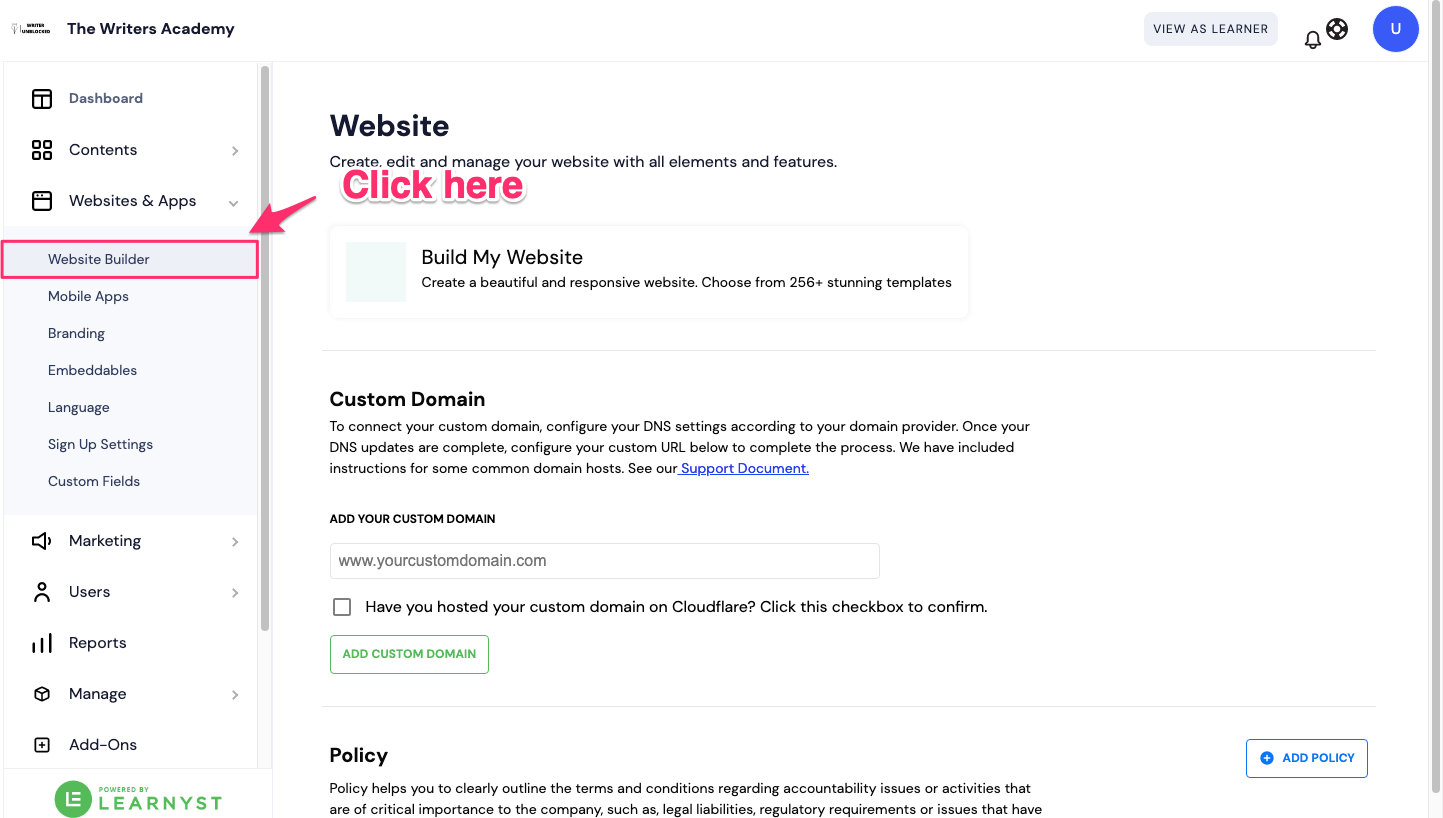
Click on Apps (website) and click on the website builder
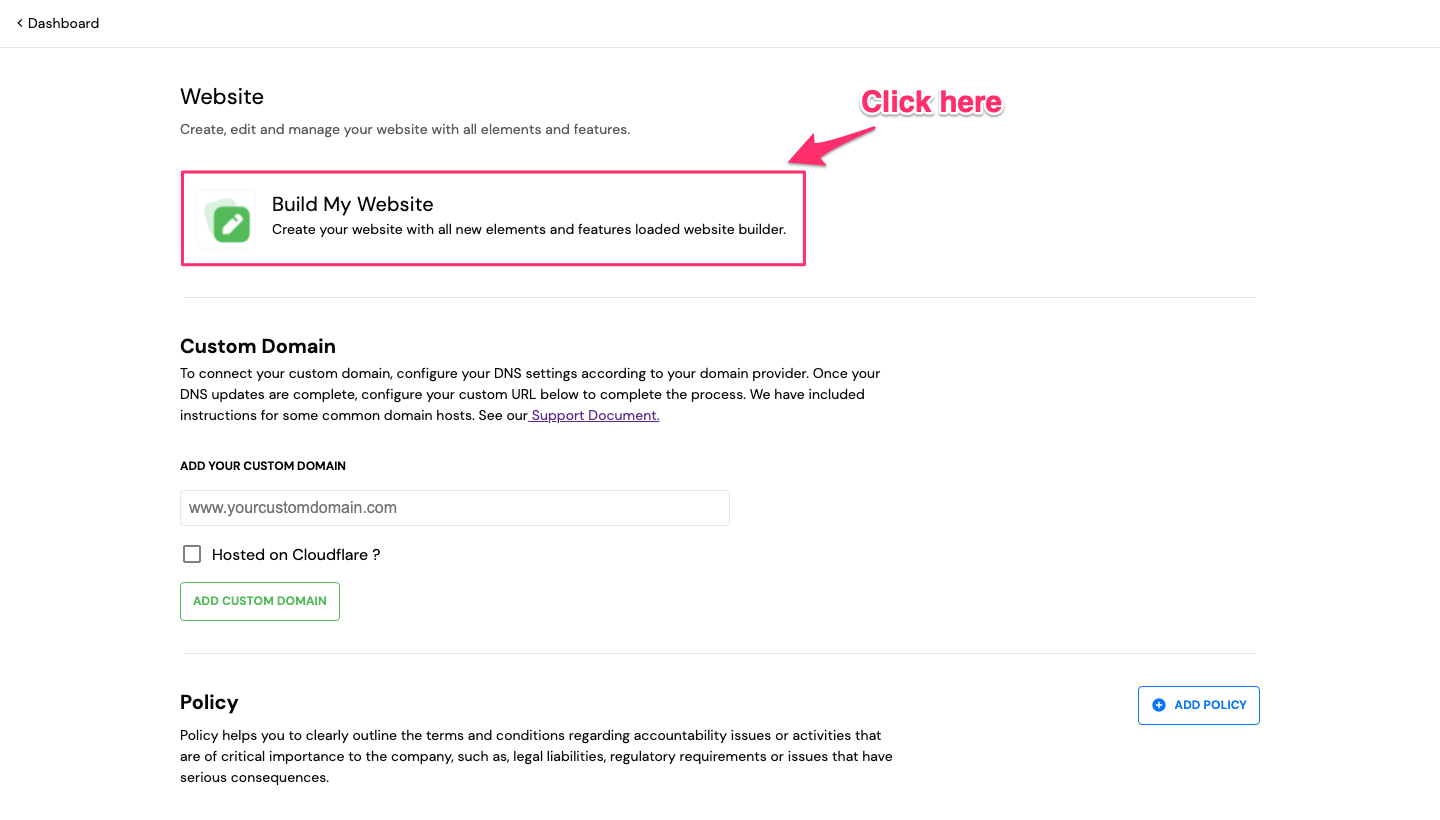
Click on the Build my website button

Here you will get a prompt to explore or migrate your existing website. Click on the explore button.
Tables can't be imported directly. Please insert an image of your table which can be found here.
Note: When you click on migrate, your old website builder will be replaced with the new one.
So, first click on the explore button, create your website and then select migrate
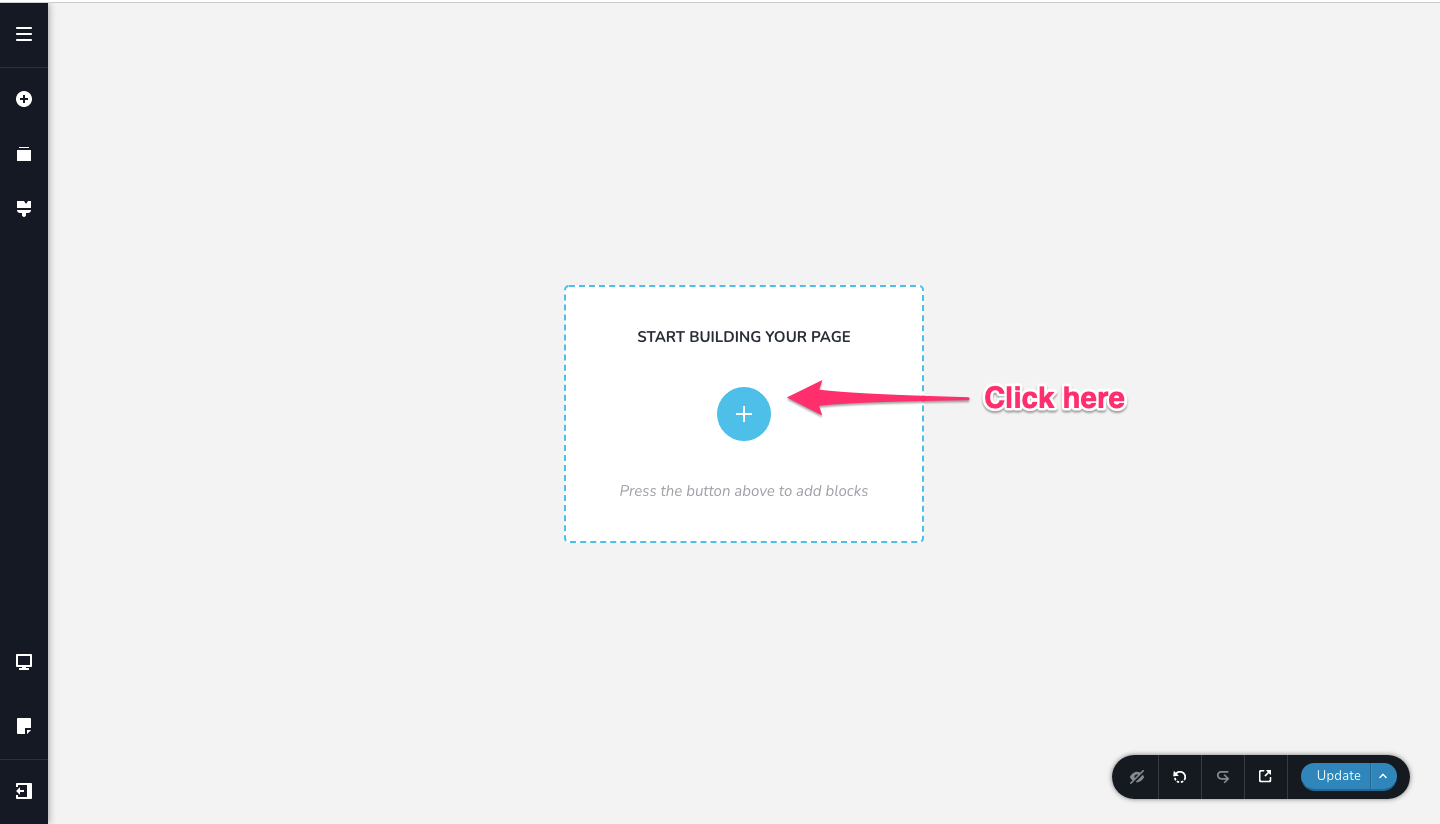
Now click on the start building your page button.

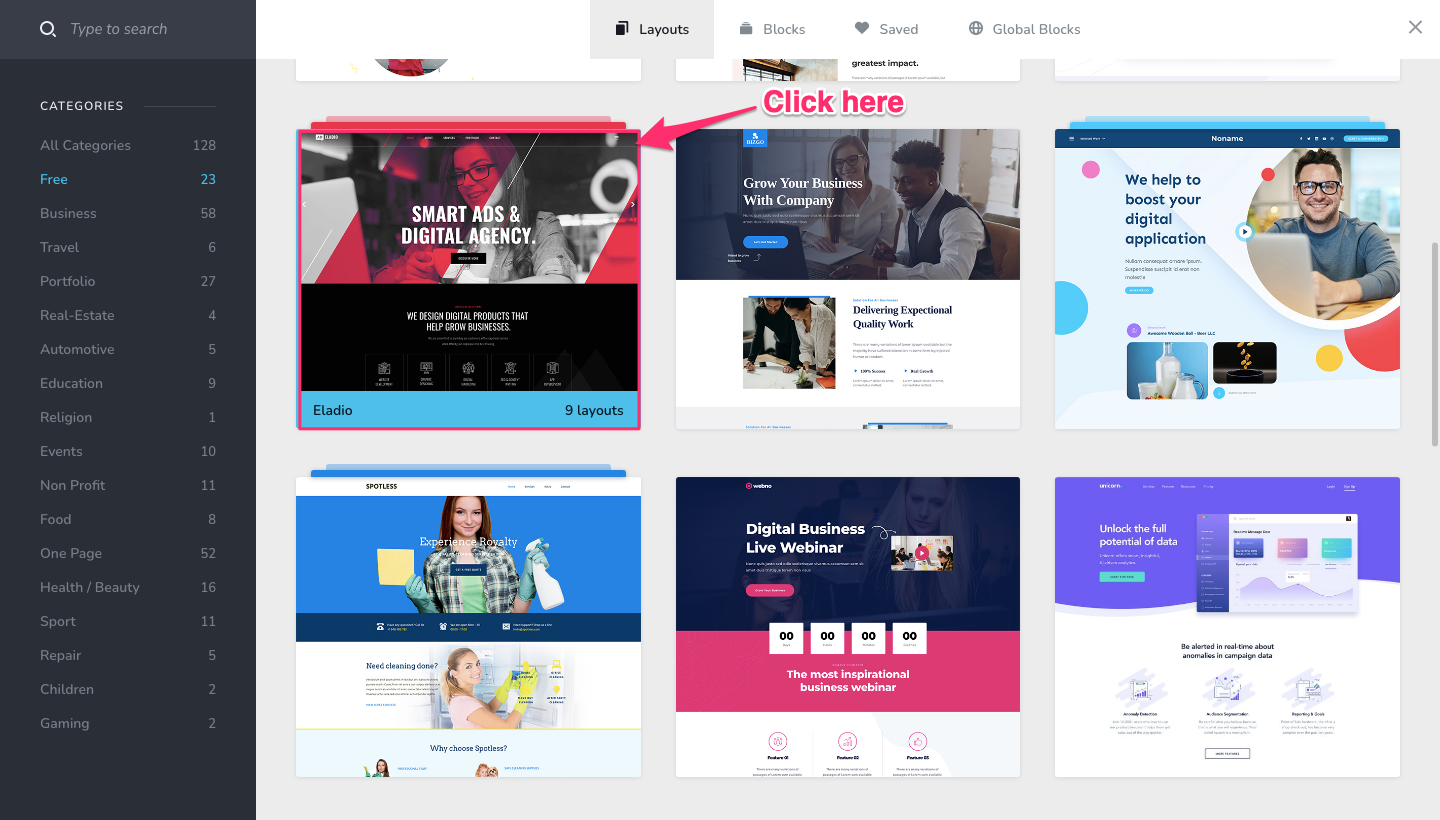
Here, are the 4 basic elements you will find in the website builder
Layout - Create an entire webpage with prebuild designs
Blocks - Create individual sections on the page
Saved - Save and reuse your favorite blocks or layouts
Global Blocks - Create blocks that appear on all your pages
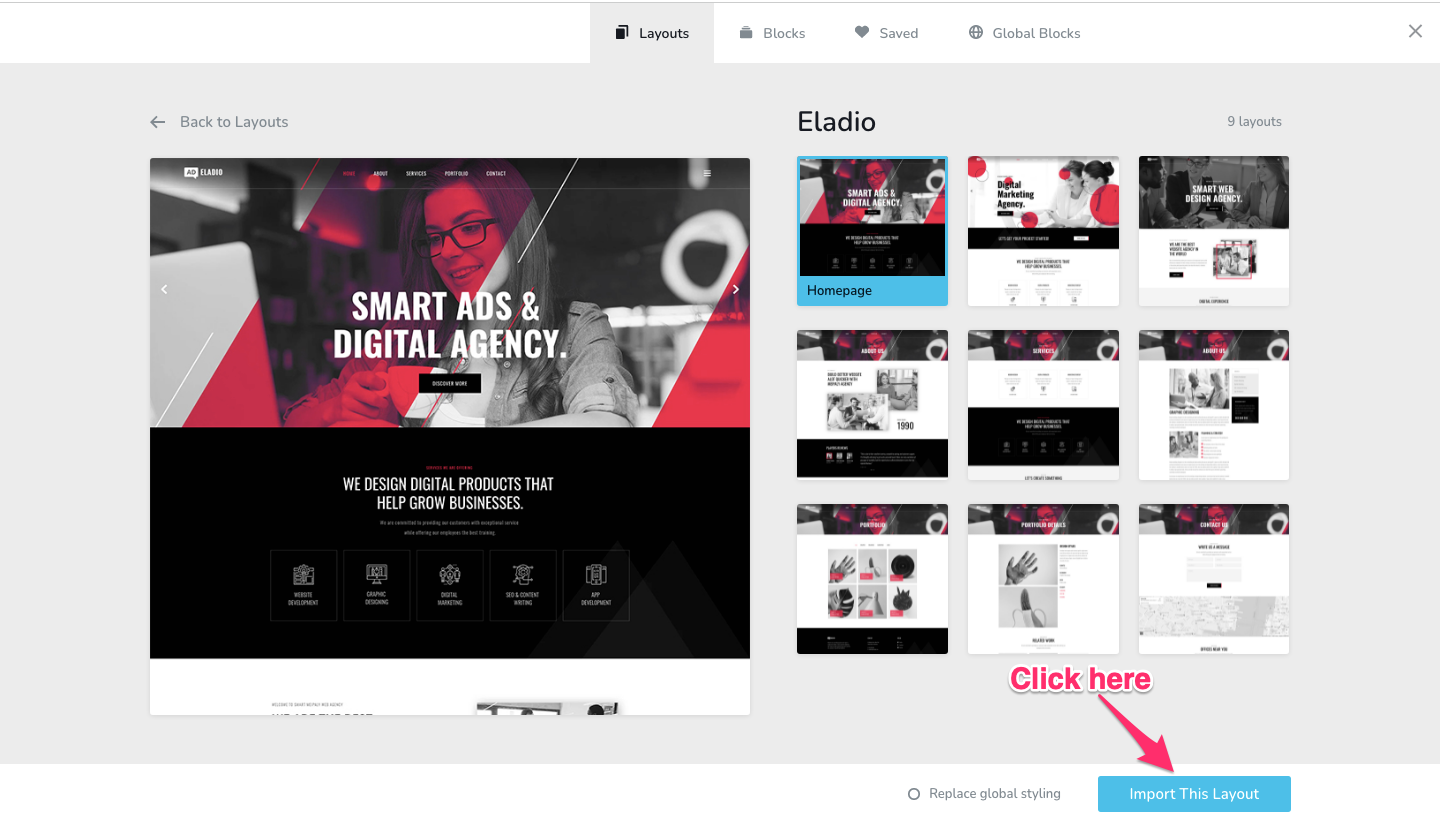
Let's click on a layout

Tables can't be imported directly. Please insert an image of your table which can be found here.
Note: You will find both pro and free templates. Pro templates will be available after you upgrade to a paid plan.
Click on the import template button, to create a website page using this theme.

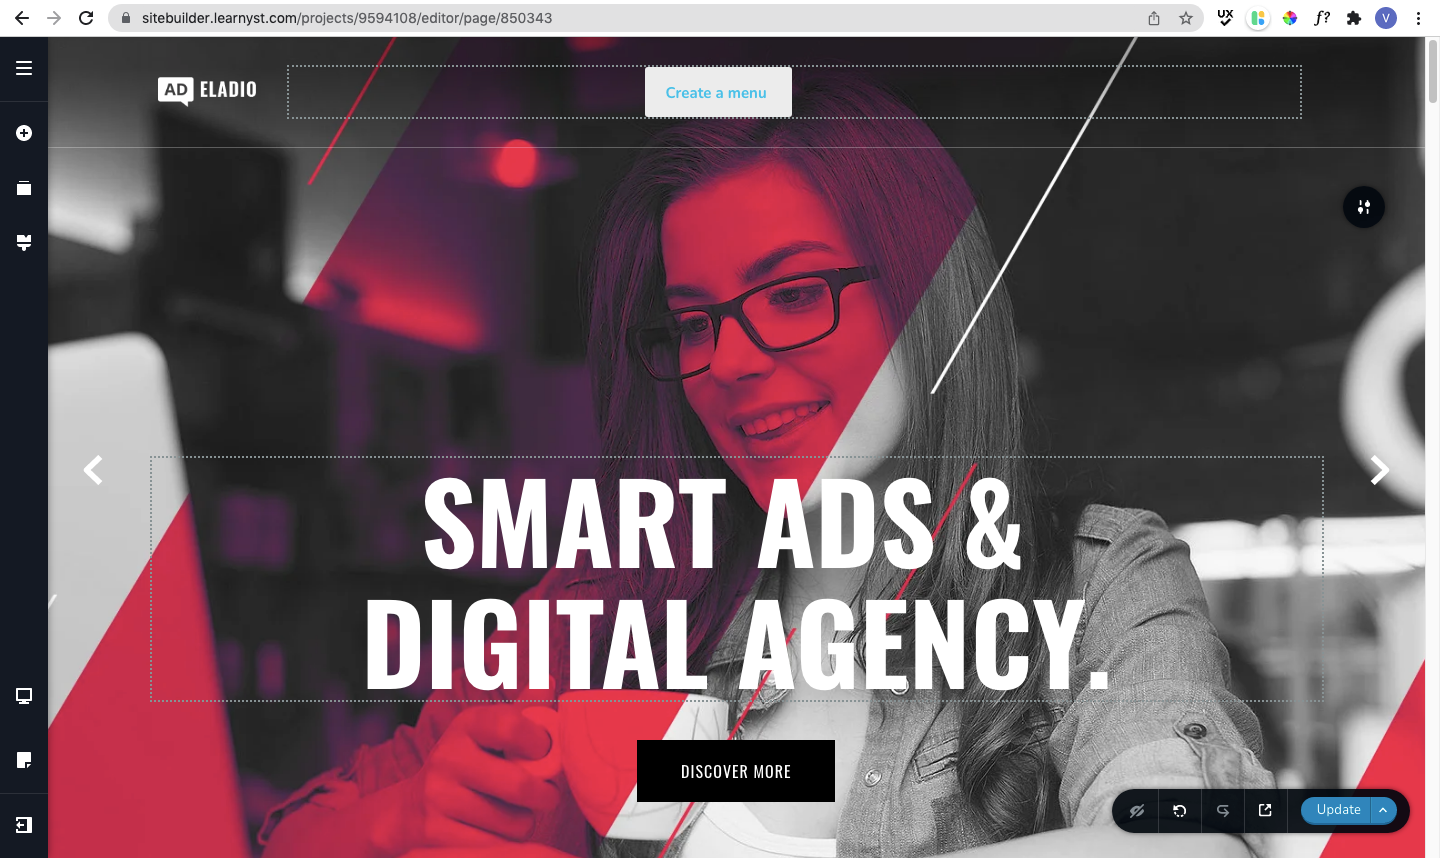
Here is what your new website will look like.

Next, you can customize your webpage according to your brand. Here are the basic customizations you can do.
Adding Logo:
First, click on the logo, select the image option to upload your brand logo.

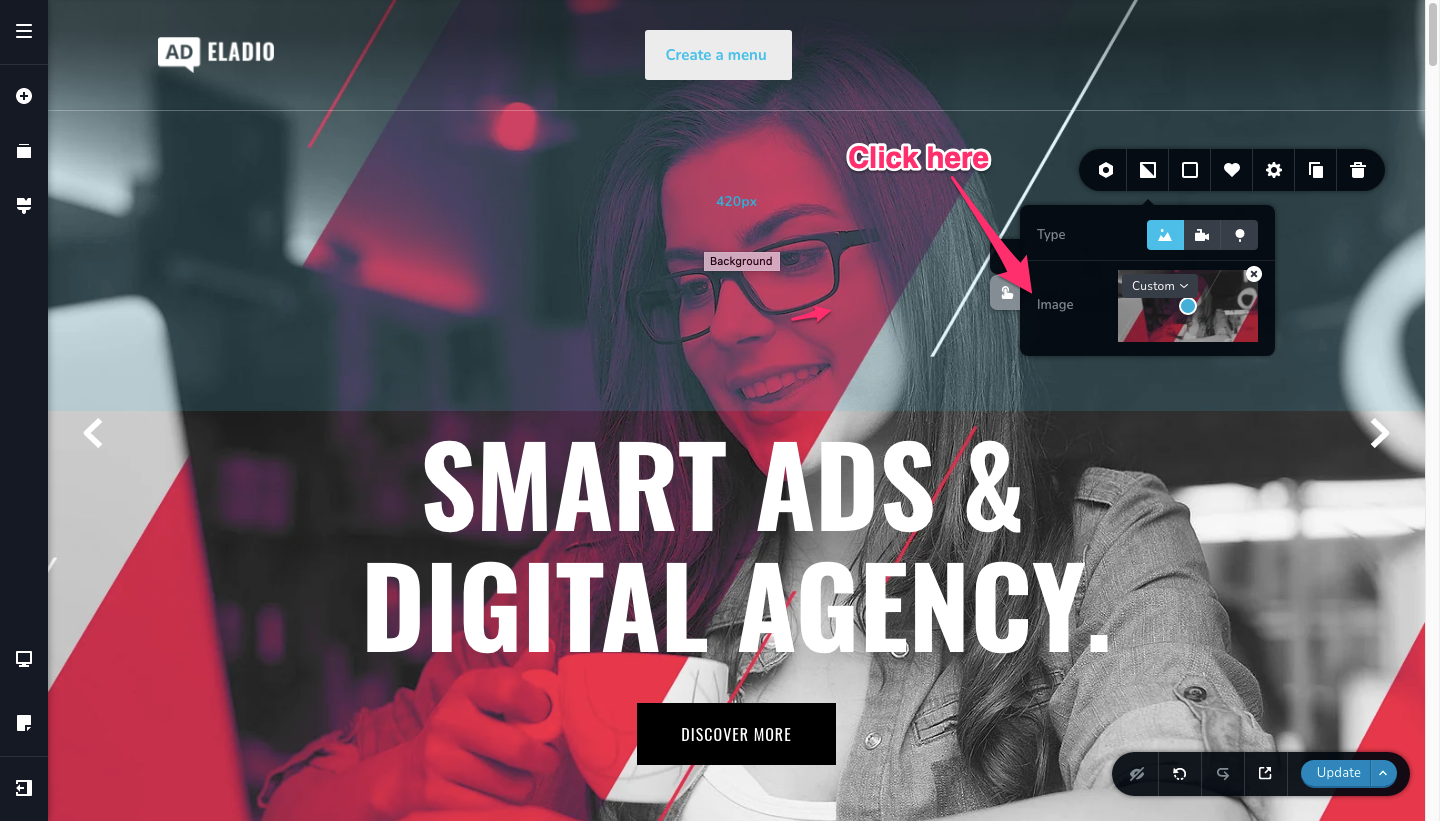
Replace Header Image:
You can replace the header image by clicking on this icon and uploading your own brand image or trailer video.

Change Font Type & Color:
Similarly, click on the text to change the font type, font-color

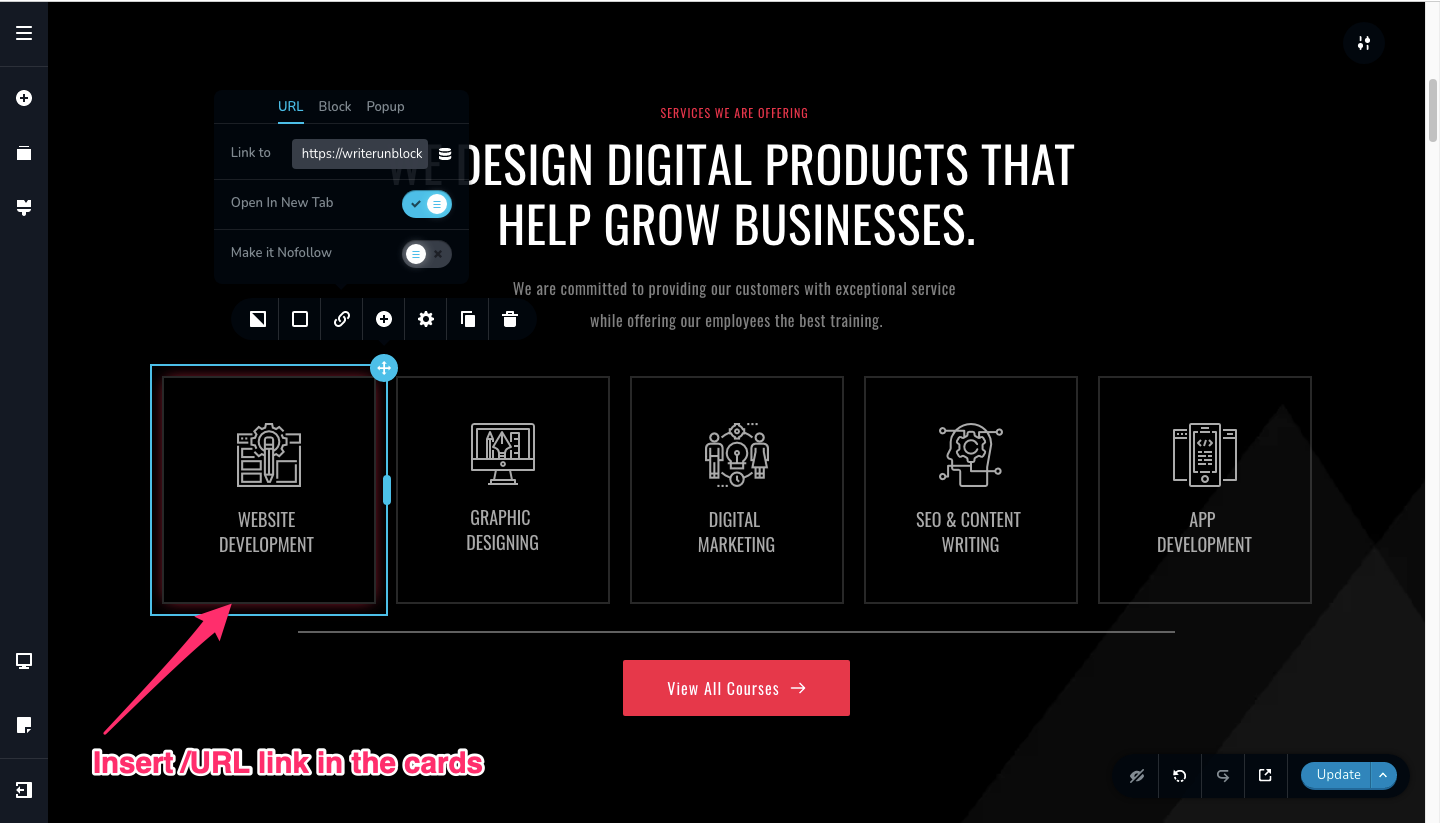
Add Course URL within your existing theme:
To link your courses or mock-tests to your website, select an existing card & insert the link of your course page.
For example: You can insert the link to your /learn URL page.

Insert buttons or elements:
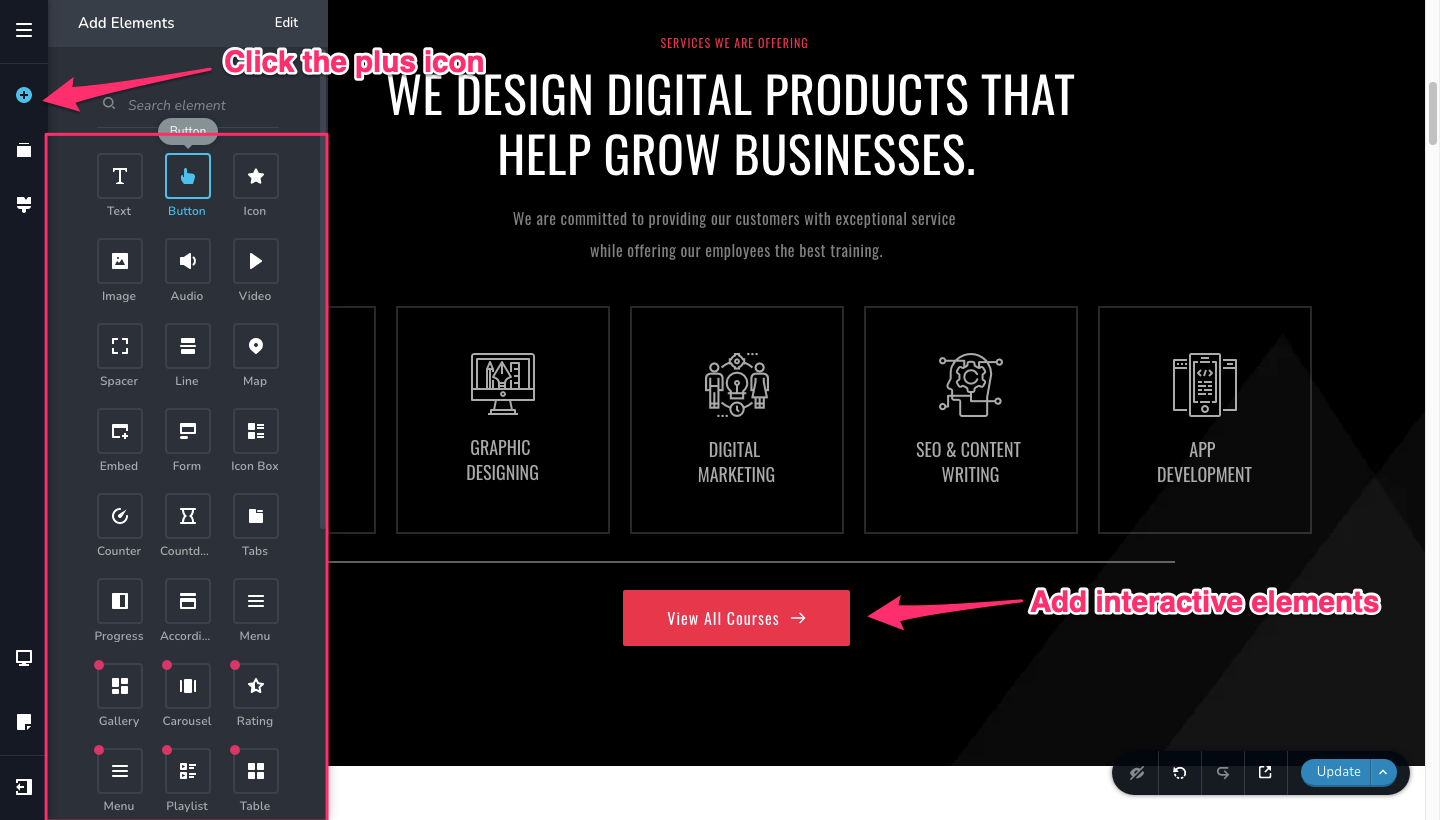
Click on the plus icon on the left panel and insert texts, buttons, or icons to make your page more interactive.

Embed Courses or Tests:
You can enter the embed element option and embed your courses or signup option within your website.

Refer to the how to embed courses in your academy to know more details.
Add New Blocks:
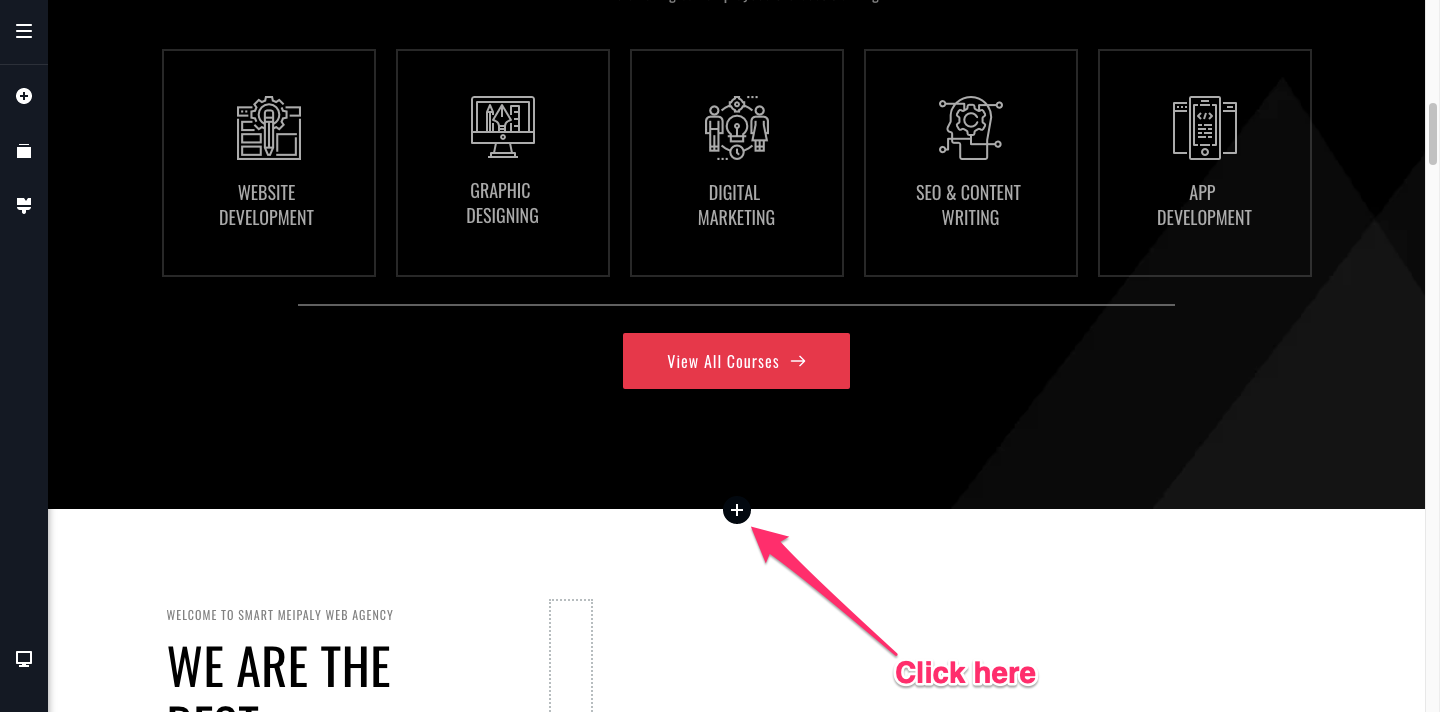
Press the plus button on a block to add new blocks.

You can choose from 500+ available blocks. Select any blocks you like.
Preview your website:
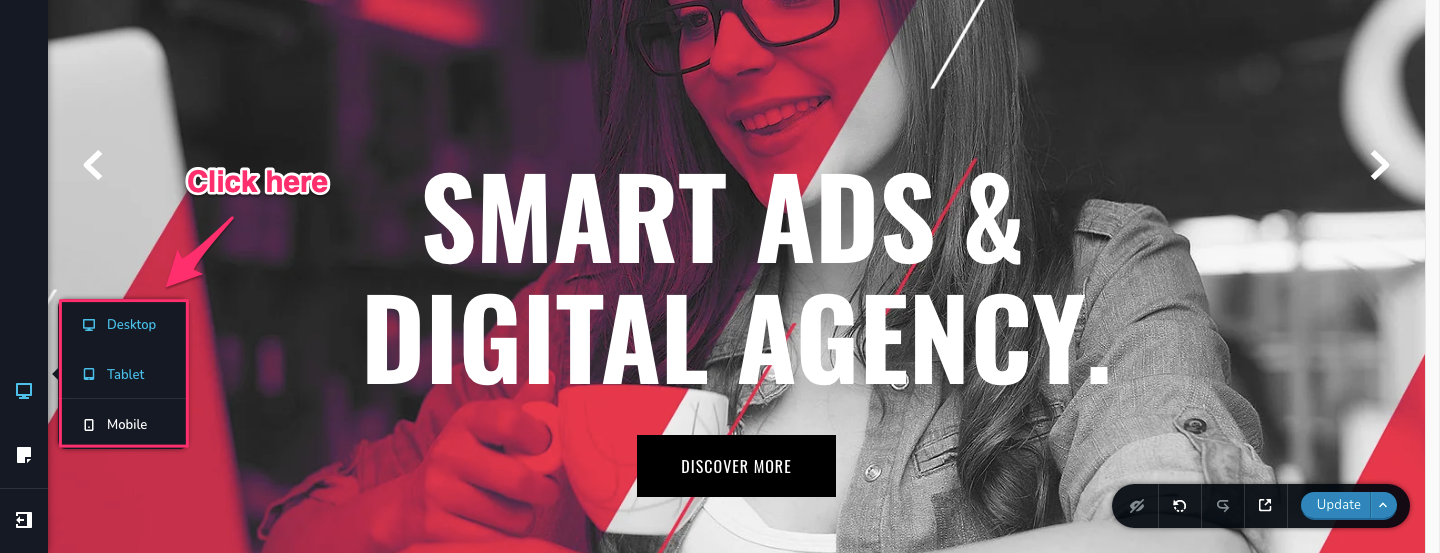
Before publishing, click on the device button to preview your website on the web, mobile or tablet devices.

Publish The Website:
After adding all your changes, click on the update button to publish your website.
Congrats! Your new website is live. Open your website in incognito or on a private tab to check it out.
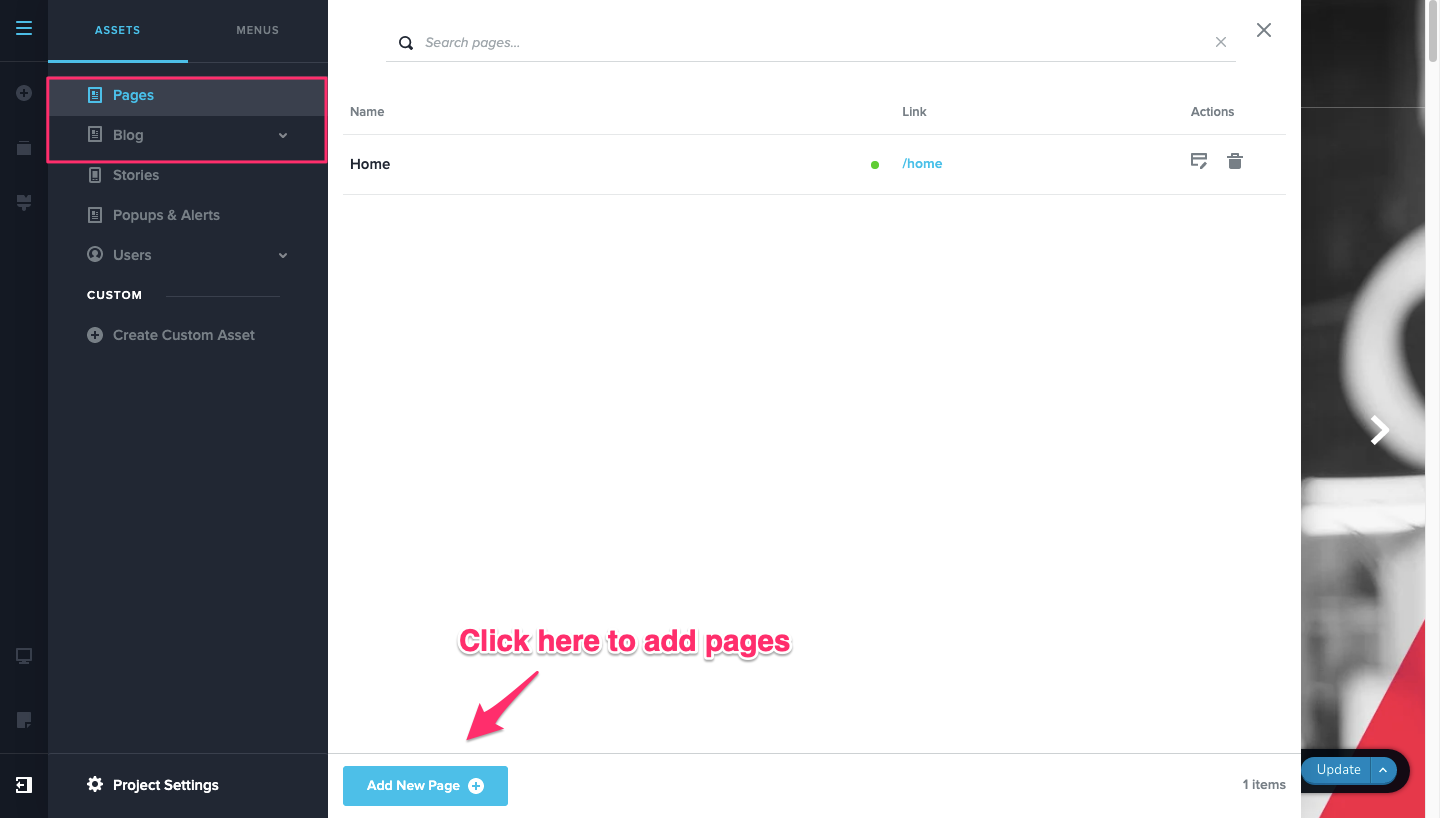
To create multiple pages on your website, click on the hamburger icon and click on pages to create a new webpage. Other than pages you can add blogs as well.

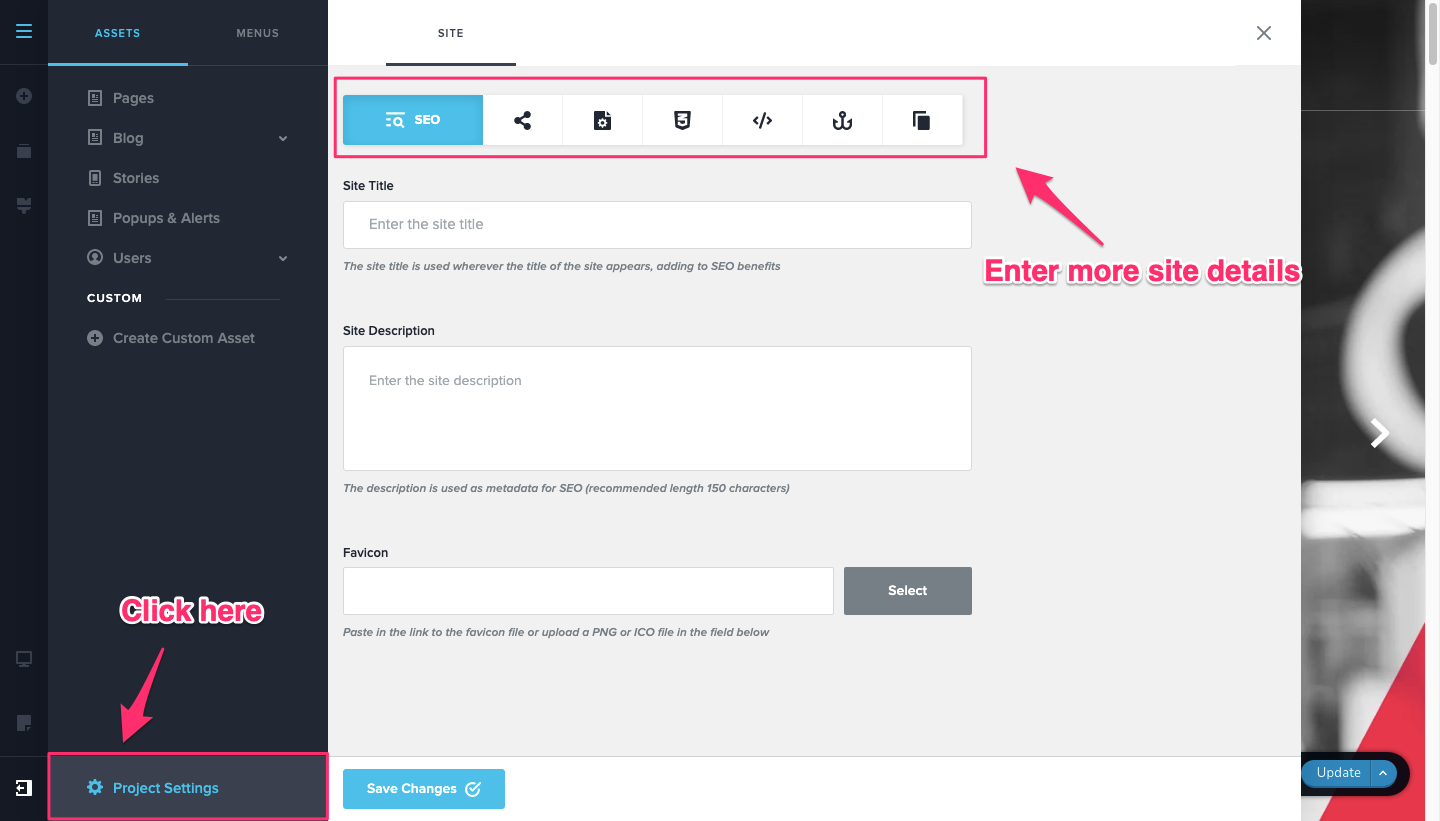
Lastly, you can click on the project settings to add your website SEO, favicons or create a sharable website link for your site.

Conclusion
So, these were the steps to create your website, using the new website builder.
Next, purchase your custom domain and map your learnyst account to your custom domain.
Refer to this document to map learnyst account to custom domain.



 Did this answer your question?
Thanks for the feedback There was a problem submitting your feedback. Please try again later.Yes
No
No results found
-Jun-10-2024-01-31-39-4468-PM.png?height=120&name=Learnyst%20logo%20(2)-Jun-10-2024-01-31-39-4468-PM.png)


