The community feature, let's you group students with similar interests and make engaging discussions happen within your academy.
It's a great way for students to form meaningful connections and nurture each other outside of your course content.
And, when they feel connected, they are more likely to trust you and recommend your brand to their friends.
In this article, let's see how to create a community and manage discussions.
Here is what we will cover
-
How to Create a Student Community
-
How to Add Posts and Discussions
-
How to Add Community Rules
-
How to Invite Students to Your Community
-
How to Manage Student Posts and Discussions
Let's see how to create a student community.
How to Create a Student Community
-
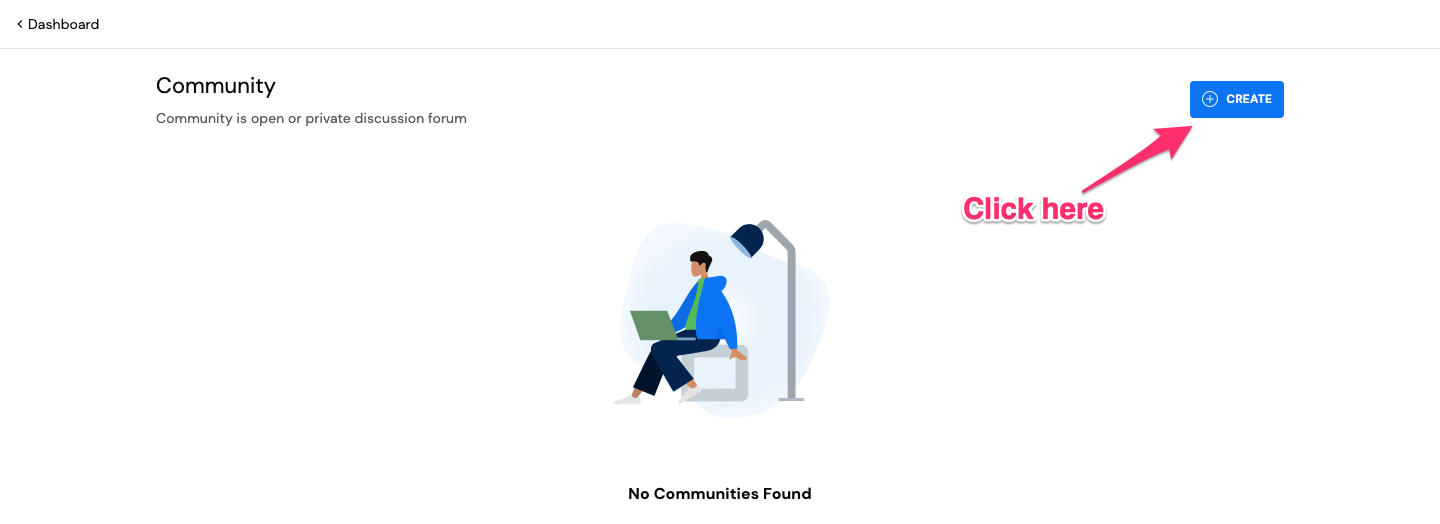
On your admin dashboard, go to manage and select community option.
-
Now, click the create button.

-
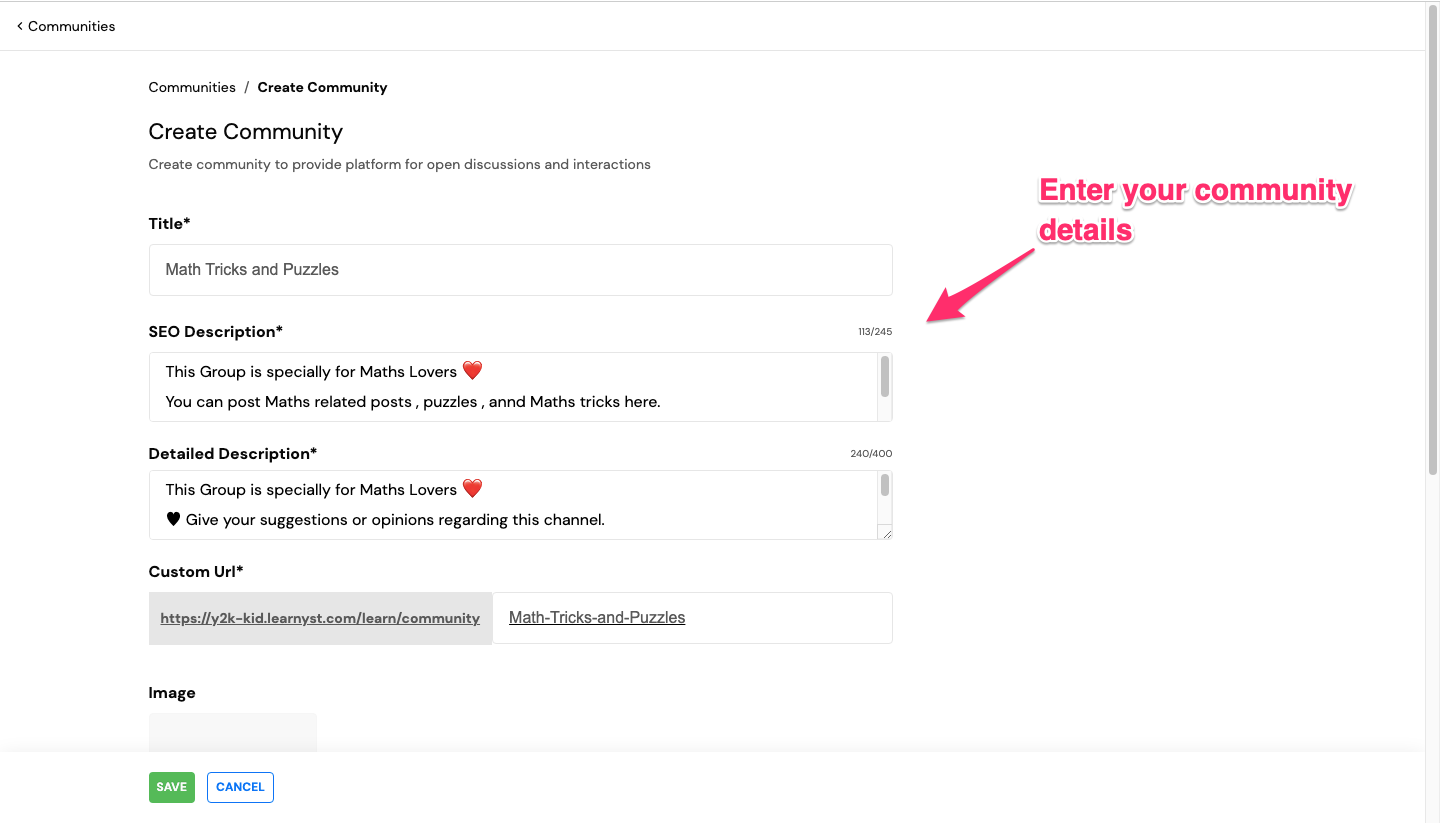
Here you need to, enter your community name, seo description & long description and custom URL as shown.

-
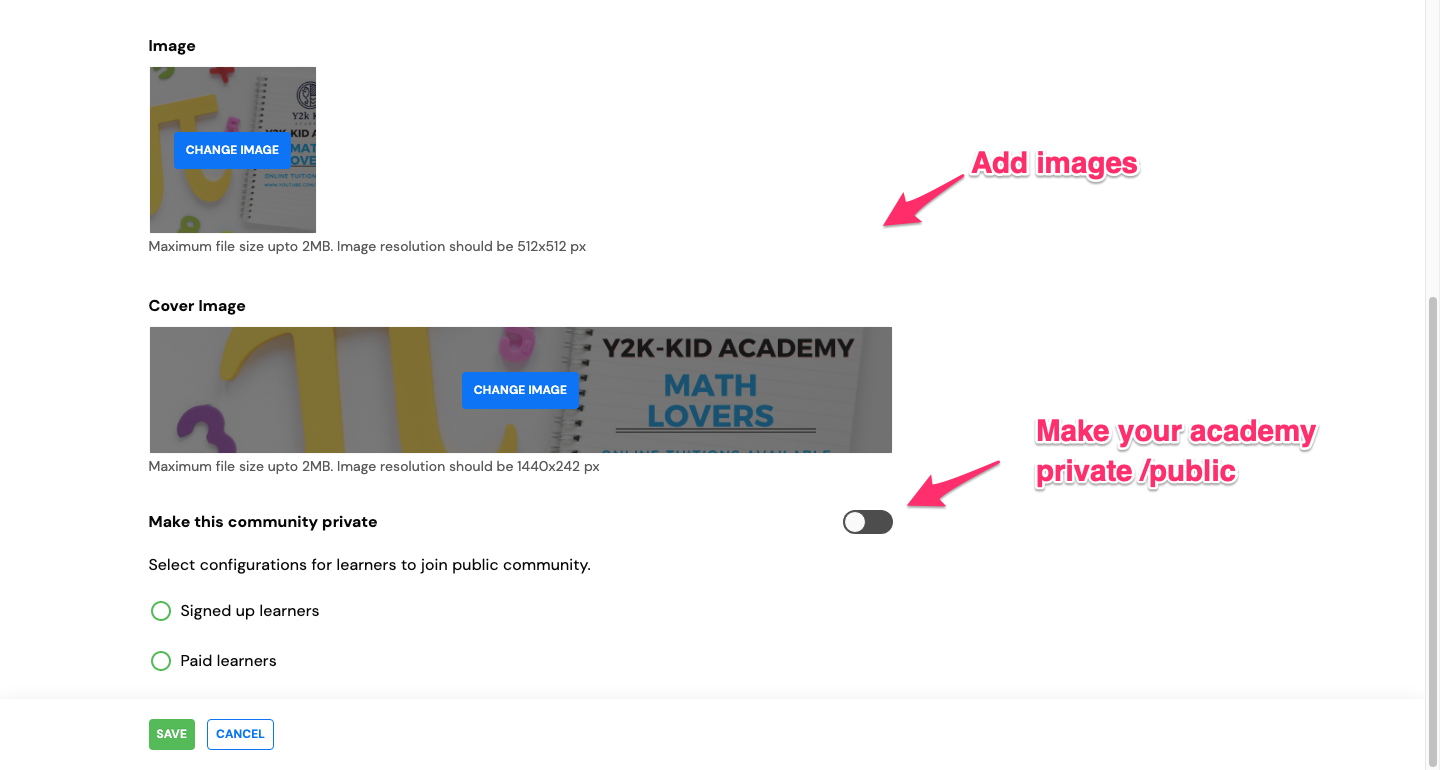
Add an image (512*512 px) and cover image (1440*242 px) to give a good welcoming feel to your community.
Also, set a private or public access to your community.
-
Next, you can control the community access type.
-
You can give a free access for all students to join your community by selecting the first option.

-
Or you can give paid access to students of a particular course to join your community.

-
-
Now, click Save to create your community.

-
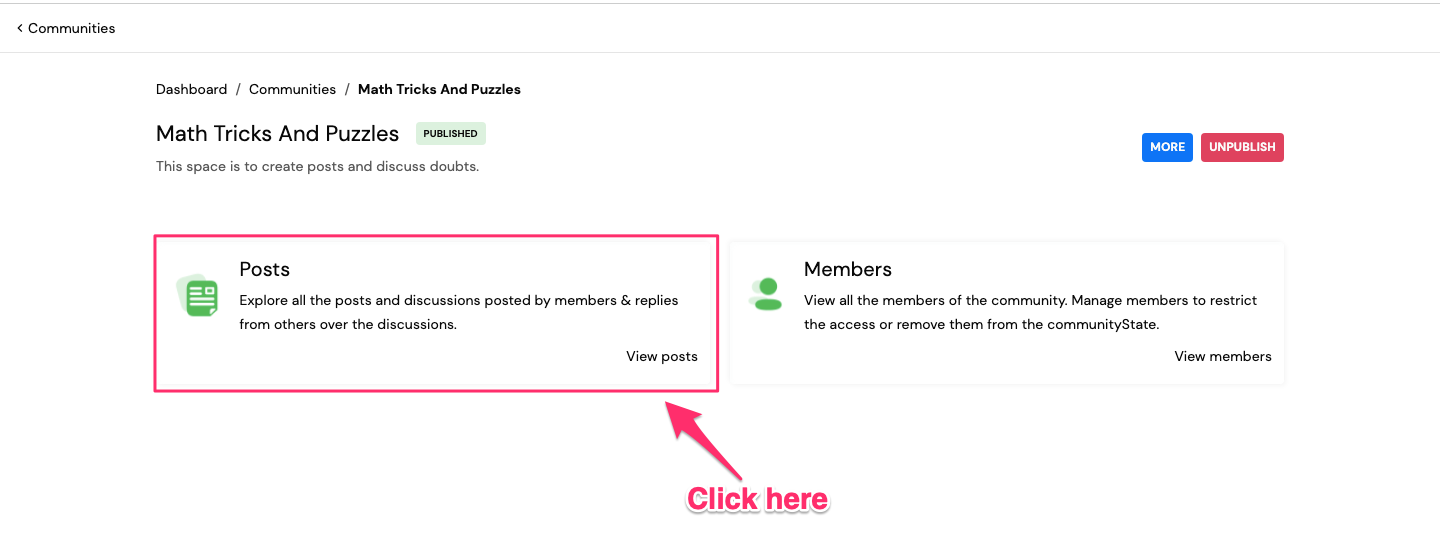
Next, click on the community and hit the publish button to make the community LIVE. Students can now join your community and discuss.


How to Add a Post and Enable Discussions
-
In your community both you and students can post text, image or video based posts. To do that, click on the posts.
-
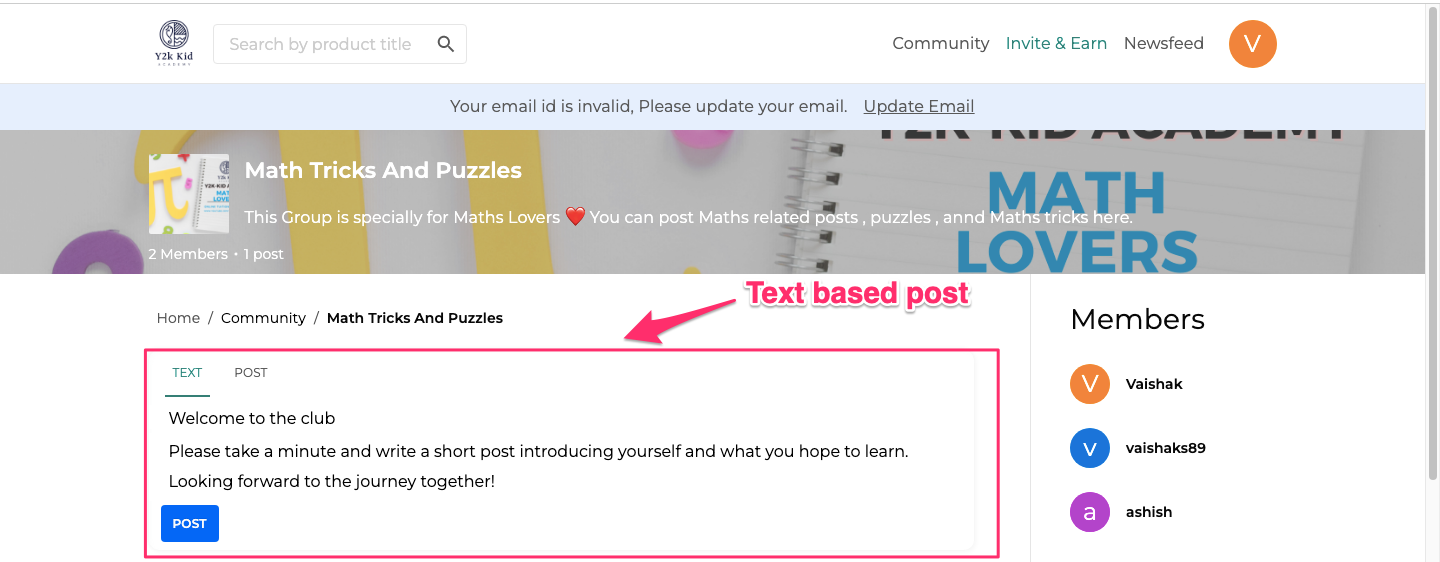
Here, you can create a text based post.
-
Or, you can create a post with added multi media elements.
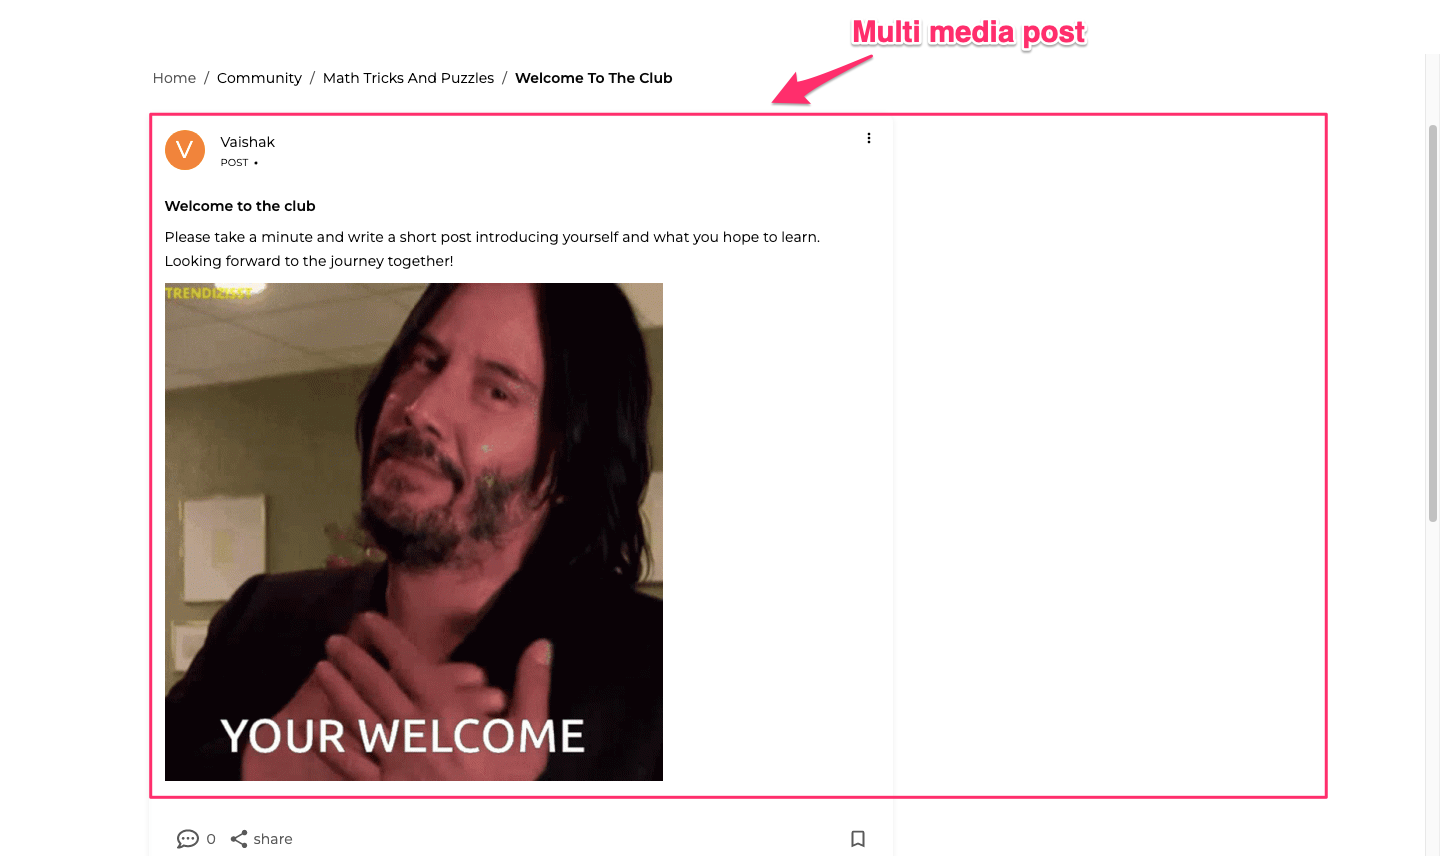
Note: You can embed videos, images, gif's, tables, links in your post.
-
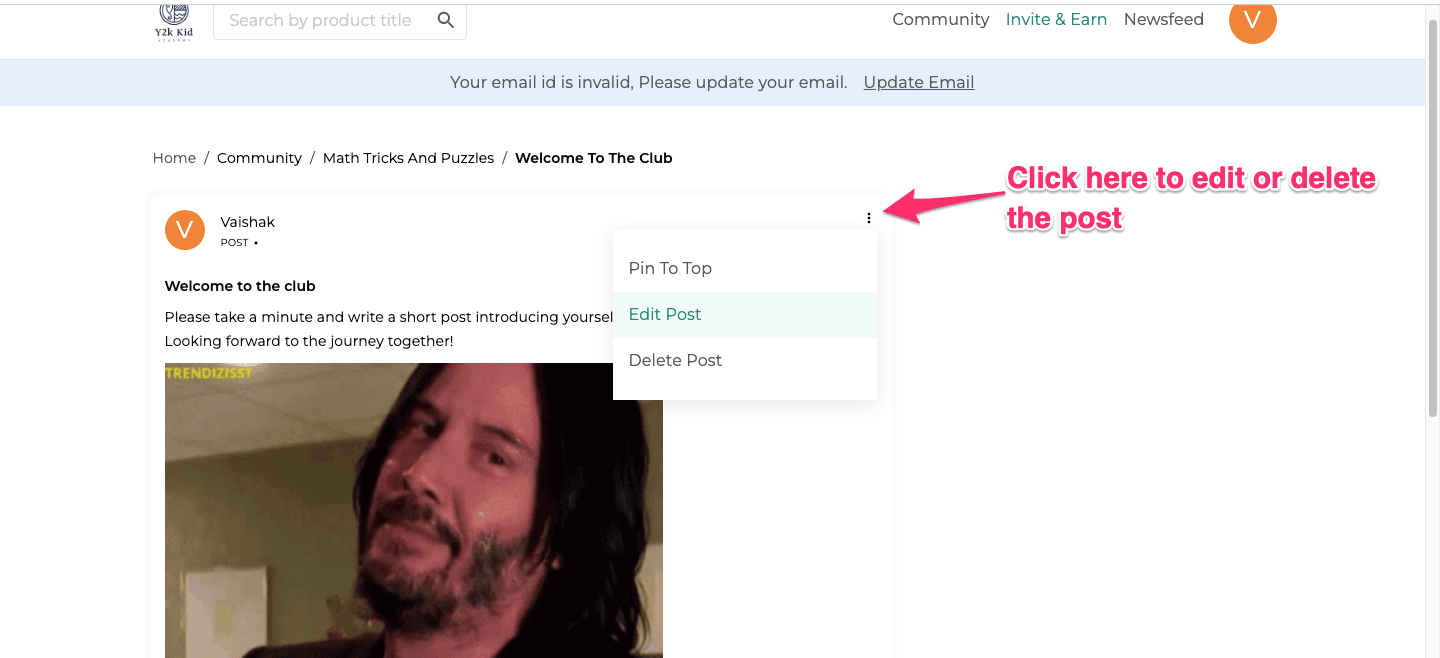
To edit or delete the post, click on the 3 dots and select the edit or delete the option.
-
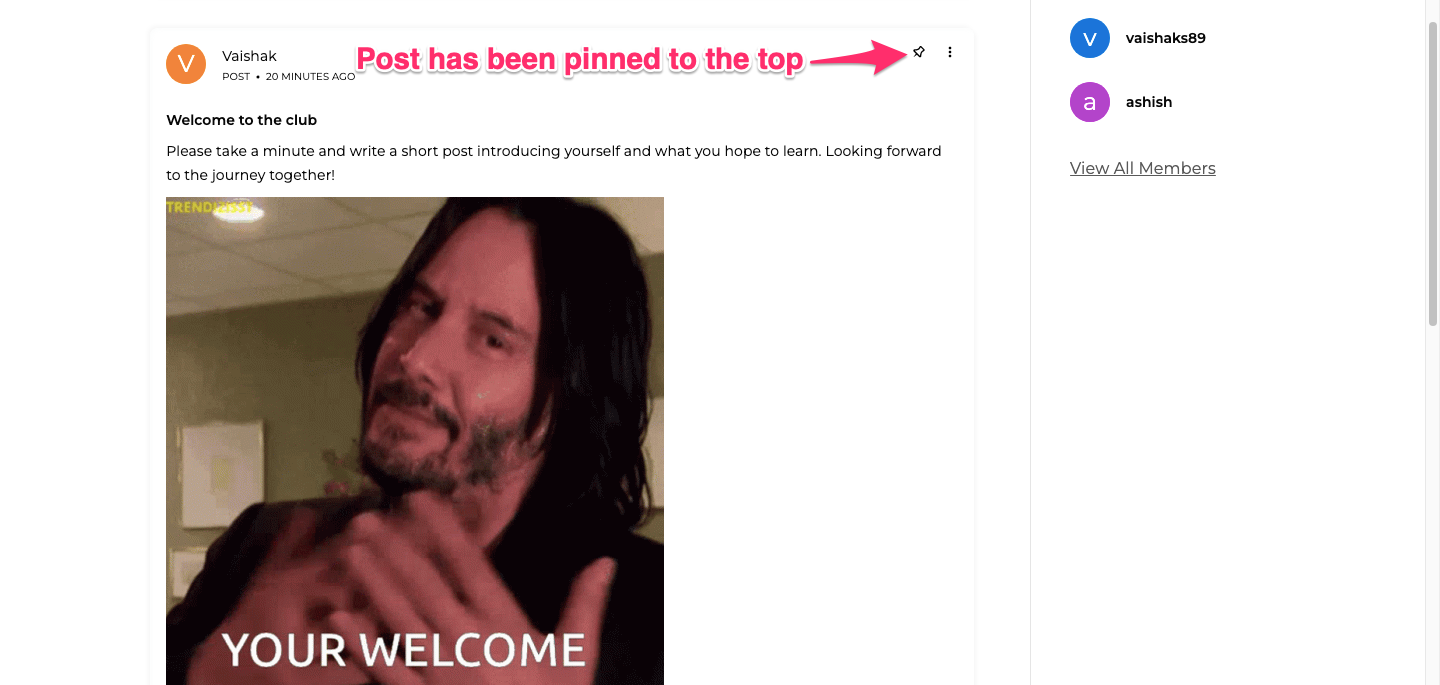
You can also pin the post to the top, so that it will always stay on top of the community.
-
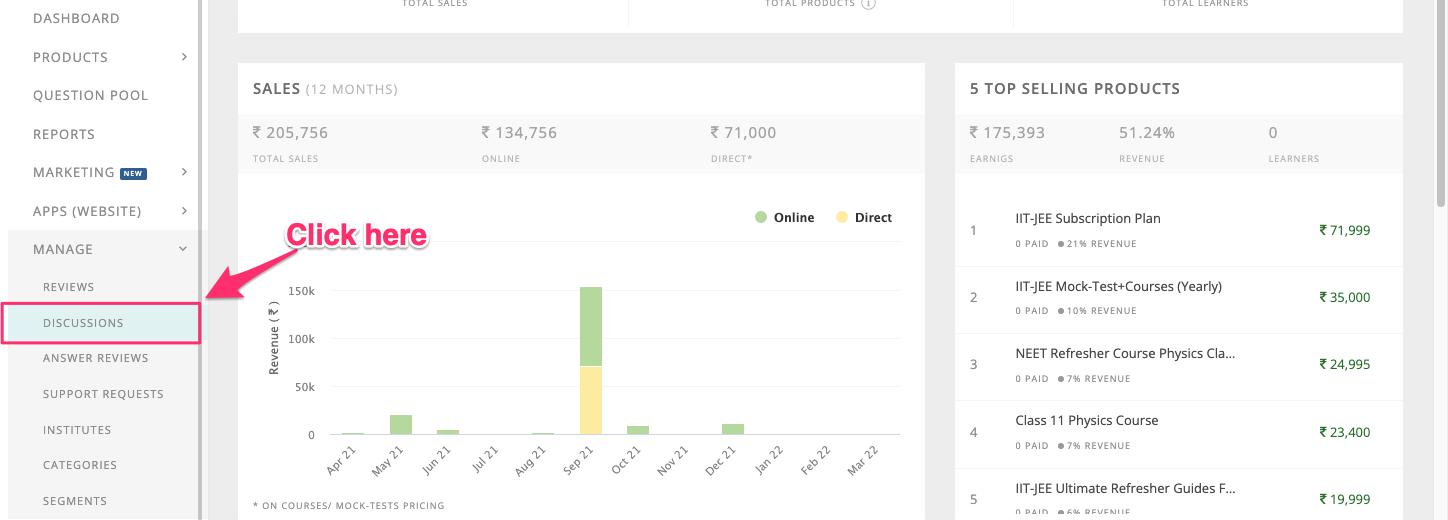
Next, to enable a discussion thread under a post, go to your admin dashboard, under manage, select discussions.
-
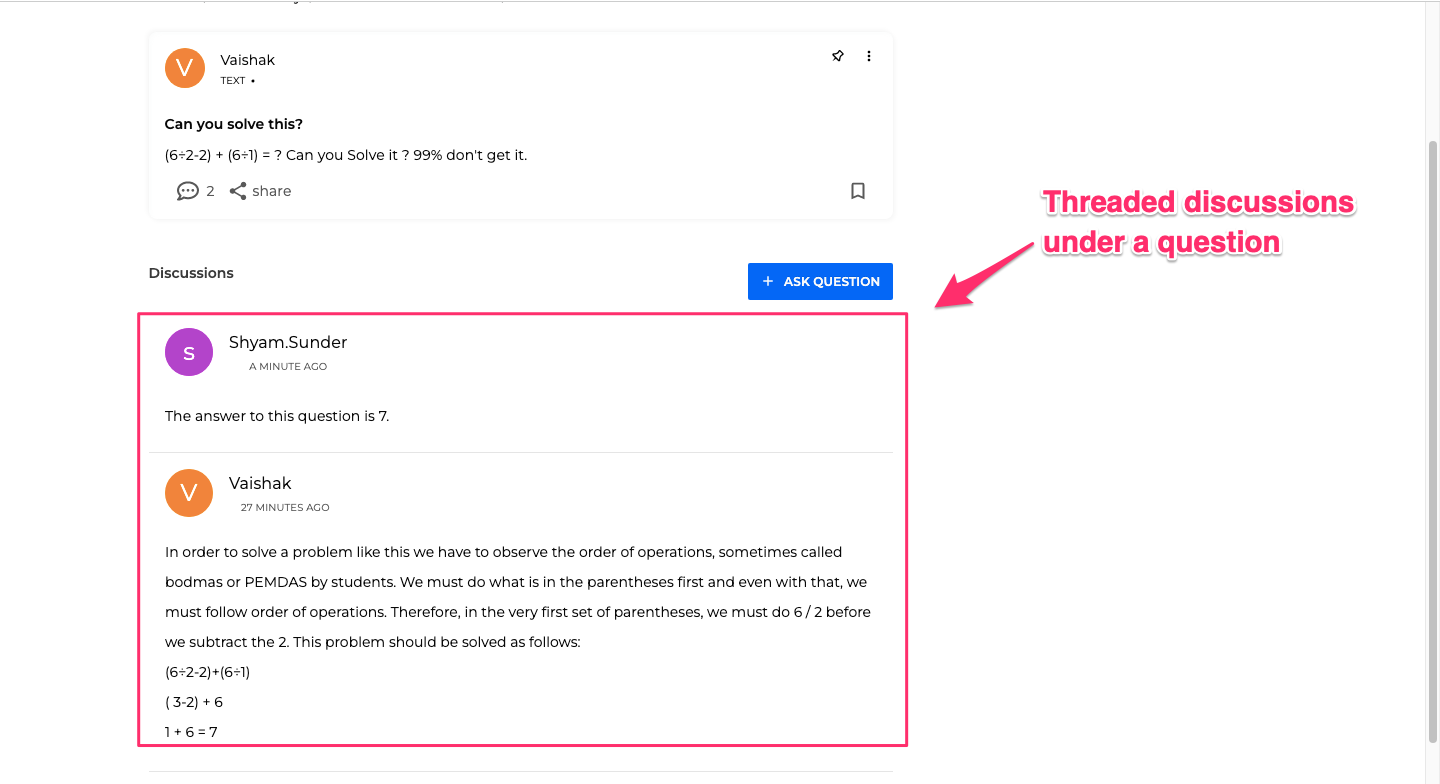
Now, click on enable newsfeed discussions to create threaded discussions.

-
After enabling this, you start a discussion under a post by clicking on the Ask question button.

-
Students can also start discussing under this post.
How to Add Community Rules or Guidelines
-
After publishing your community, you may want to set some basic community rules. To do that, click on the more button and select the community rules option.


-
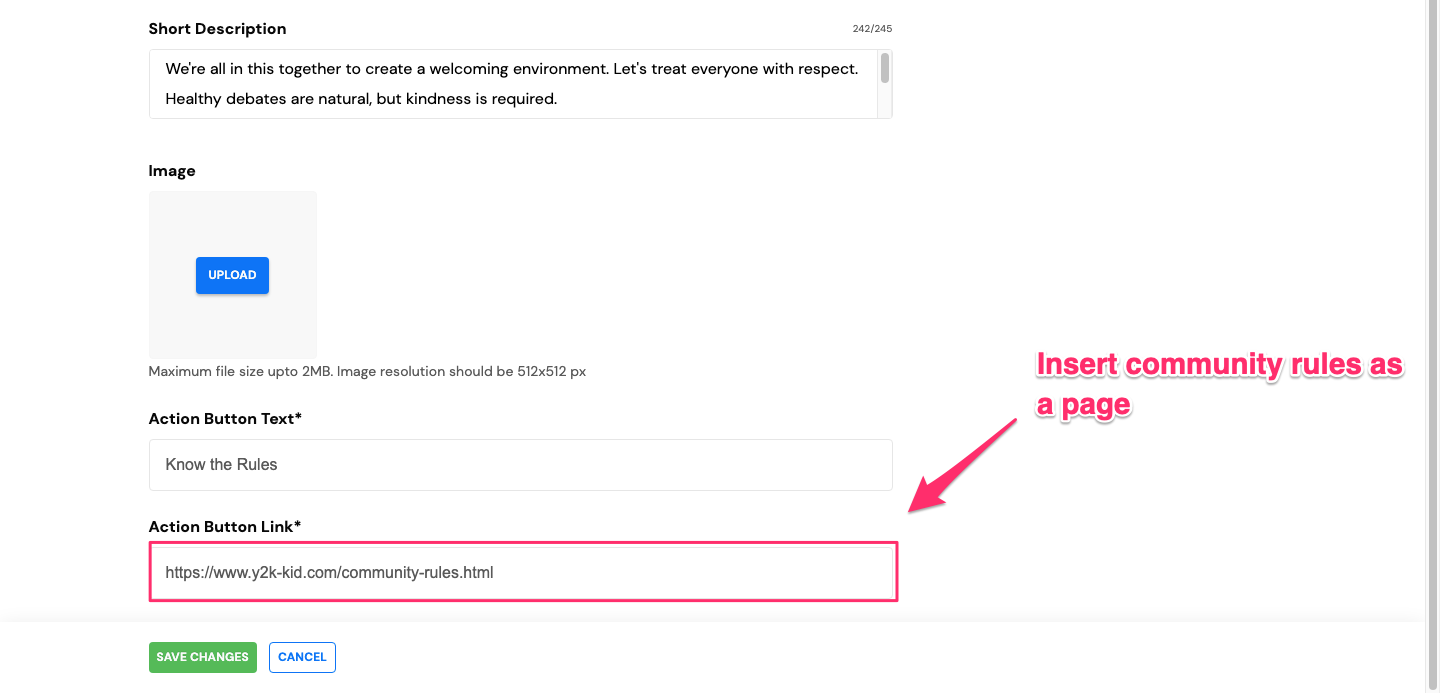
Next, add the community rules and click enable to make your community rules page LIVE.

Note: You can also the rules as a blog page link within the community rules page.


Note: Community rules will always be pinned on the top.
How to Invite Students To Your Community
-
If you have created a private community, you can add students one by one to your community by clicking the Invite learners button.

-
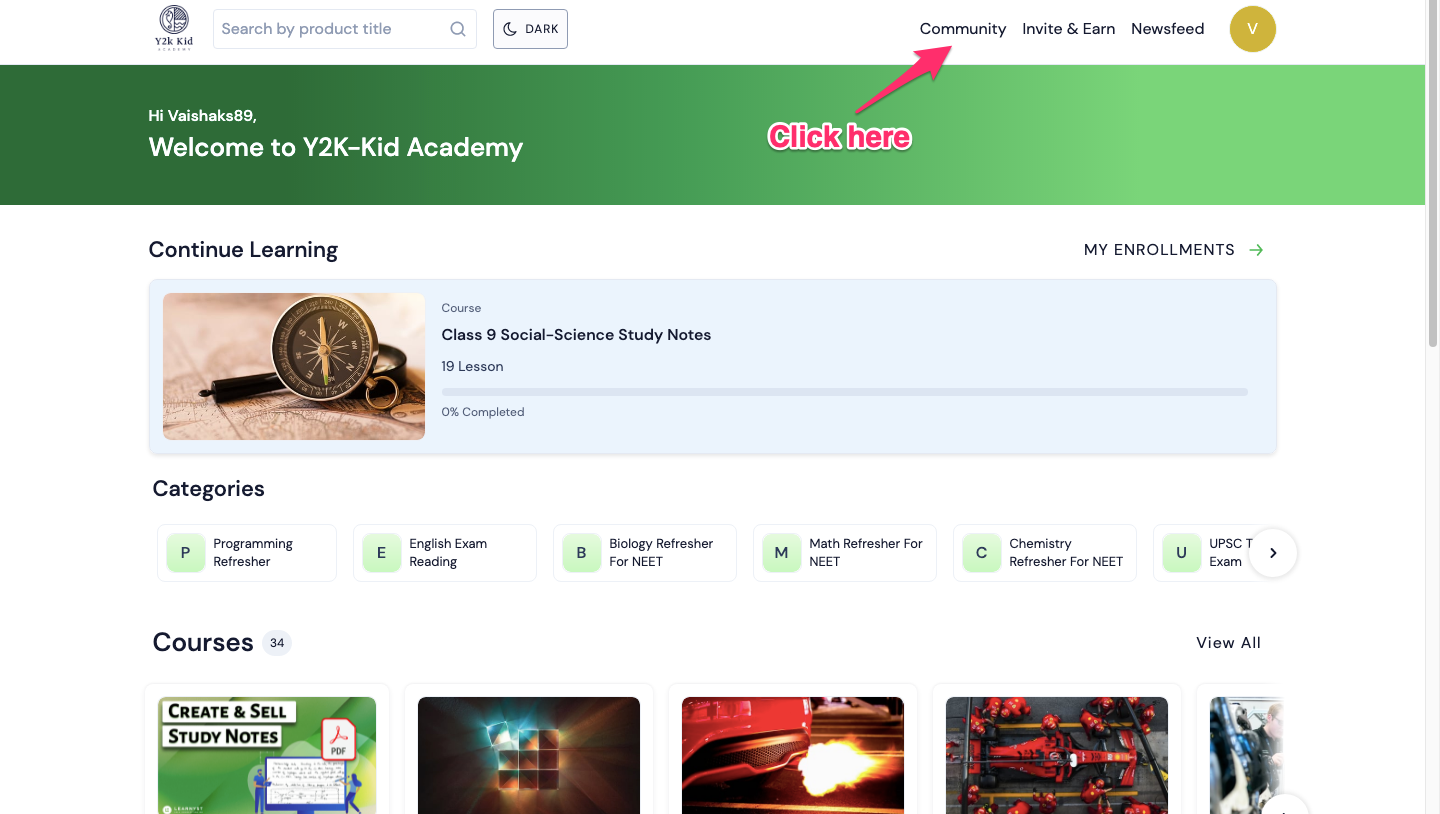
If you have created a public community, students can view the community link after they signup.

-
The student can click on the Join Community and start participating in discussions.

How to Manage Student Posts and Discussions
-
A student, can create a plain text type question or create a more interactive post type question.

-
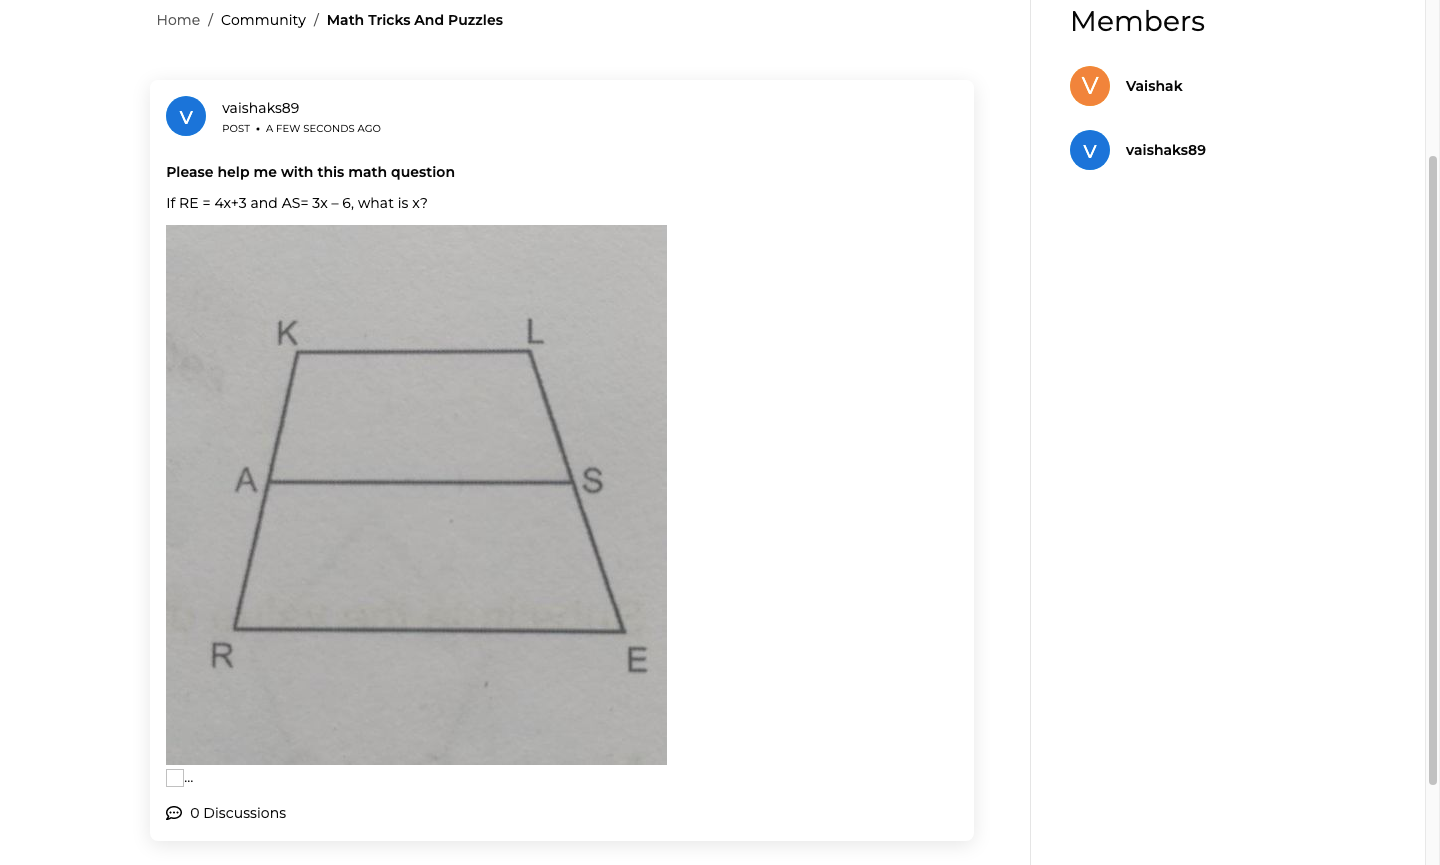
As an admin, you can click on the view post button to view all the student questions.

-
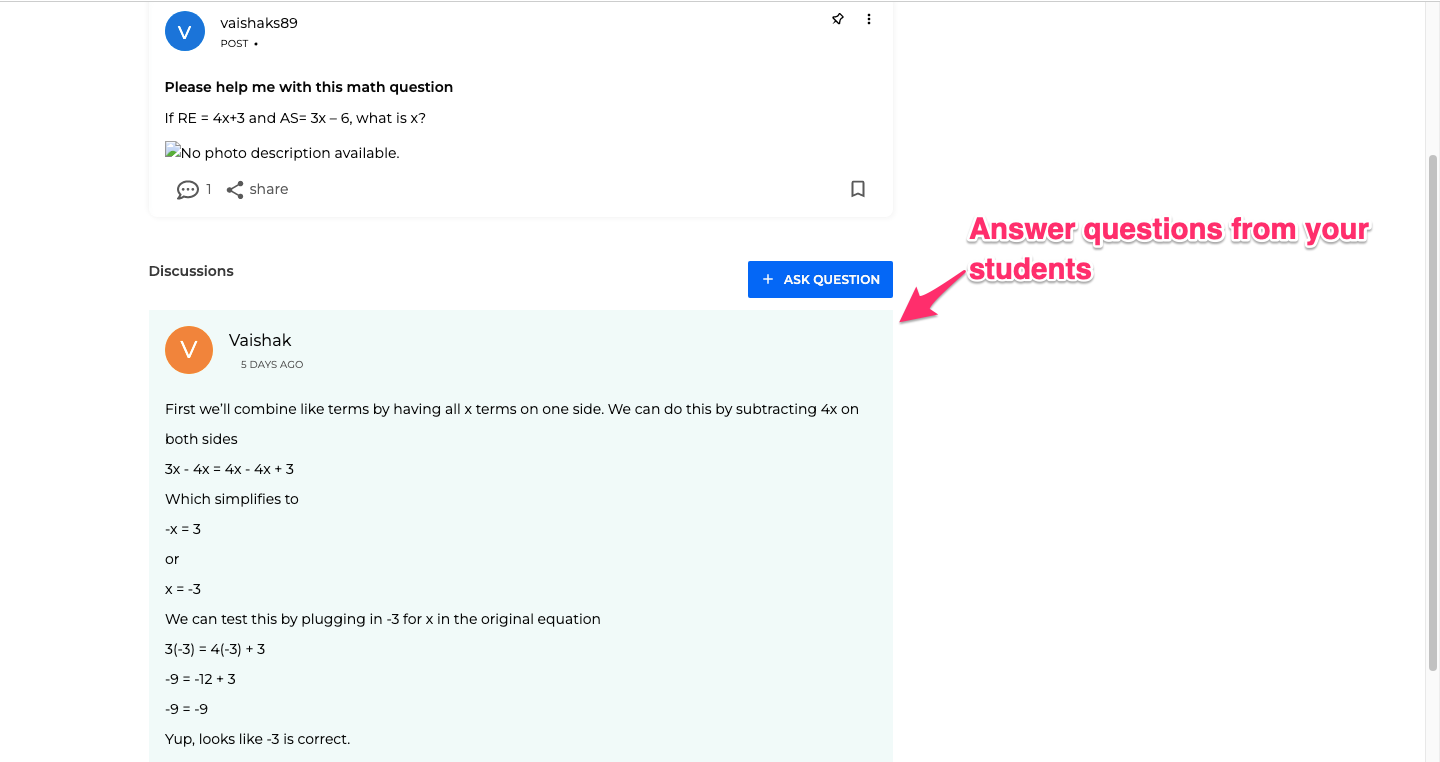
Or, you can go to your admin dashboard, click on Manage and select discussions. Here, you get the latest questions posted by students.


-
You can click on the question and answer it.
-
And at times, if you feel the post is inappropriate, you can delete it.

-
You can also ban the student, in which case the student can only view the discussions but won't be able to participate in it.

-
Alternatively, you can also remove the student from the community, in which case students can't view any discussions.


Conclusion
This sums up the community feature. Use this feature to group students with similar interests and build your own student following.
Did this answer your question? Thanks for the feedback There was a problem submitting your feedback. Please try again later.Yes No No results found


