-Jun-10-2024-01-31-39-4468-PM.png?height=120&name=Learnyst%20logo%20(2)-Jun-10-2024-01-31-39-4468-PM.png)
How To Evaluate Your Exams Online As An Evaluator
In the previous section, we saw how to add your evaluator to a mock-test. Now, let us see how to evaluate the exams as an evaluator.
Onscreen Evaluation System - Evaluate Exams Online (Full Guide)
To watch the evaluation part watch the video from 03:39s to 07:55s. Alternatively, read through the full steps below.
Steps To Evaluate Exams Online As An Evaluator
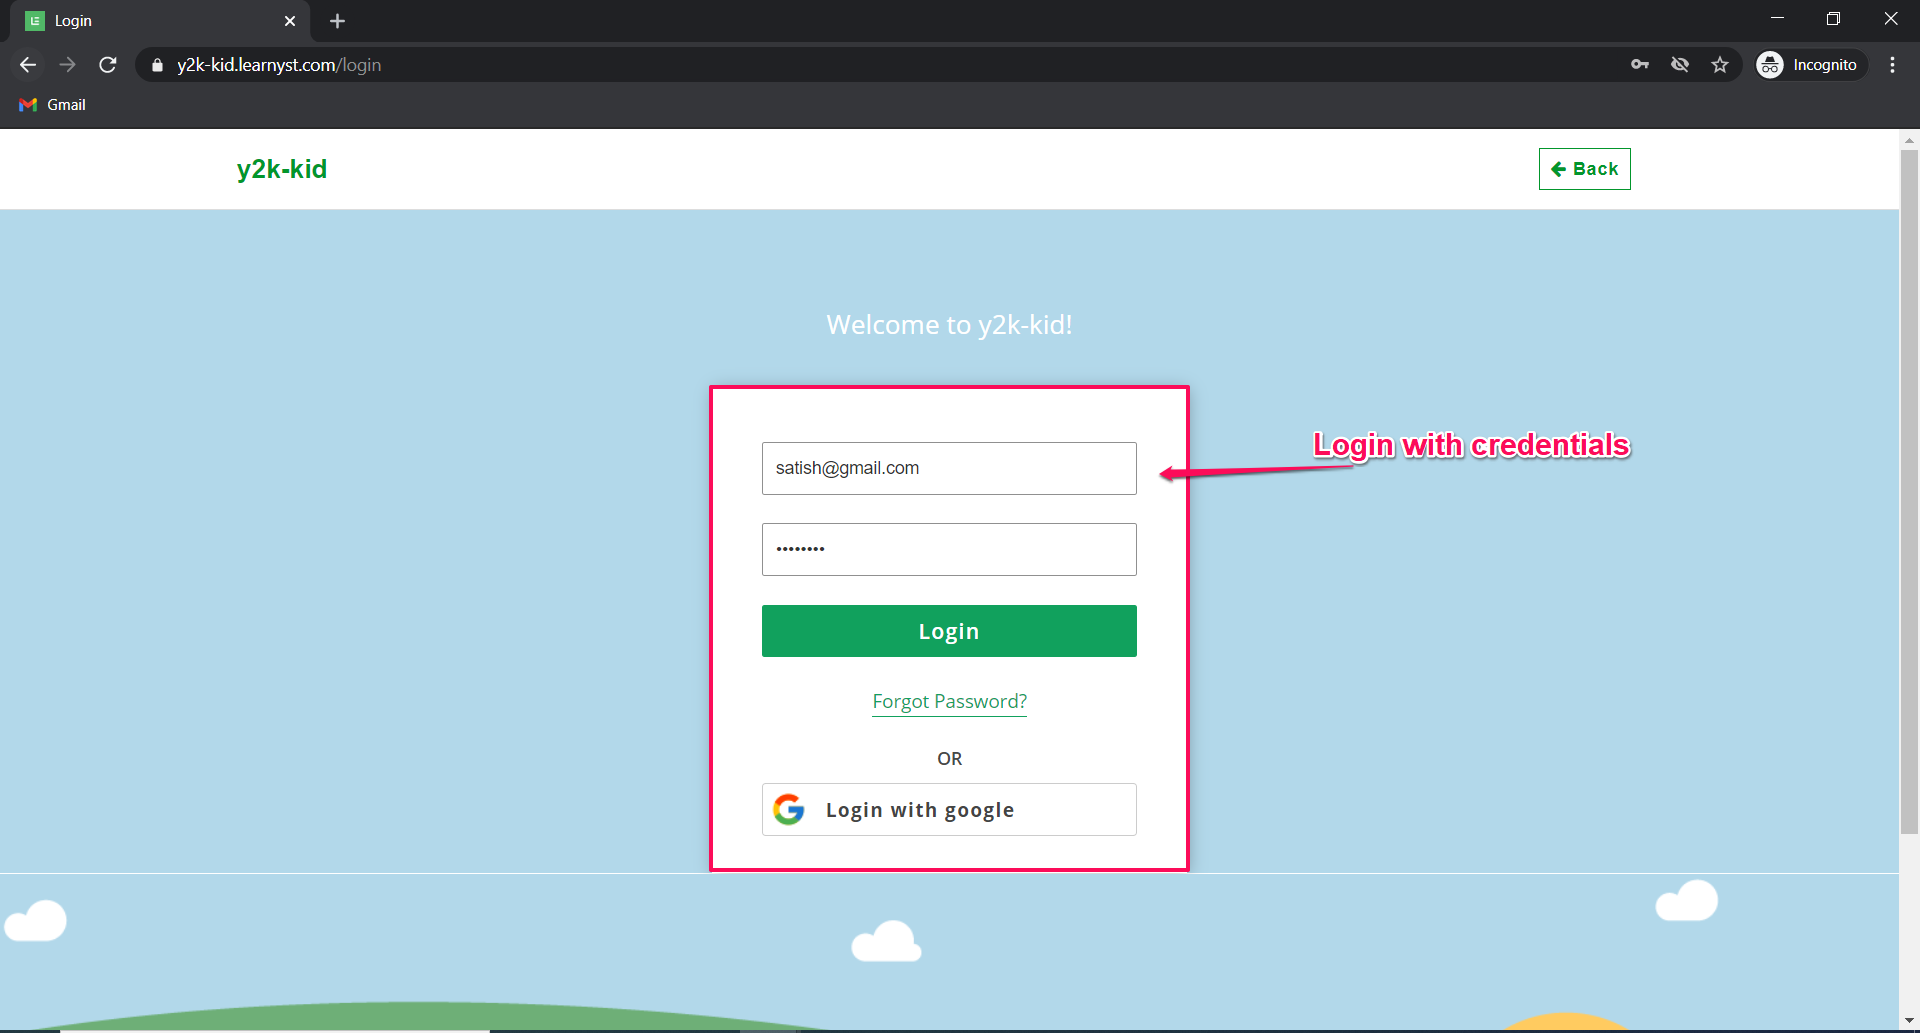
First, your evaluator needs to login into your system with the username and password
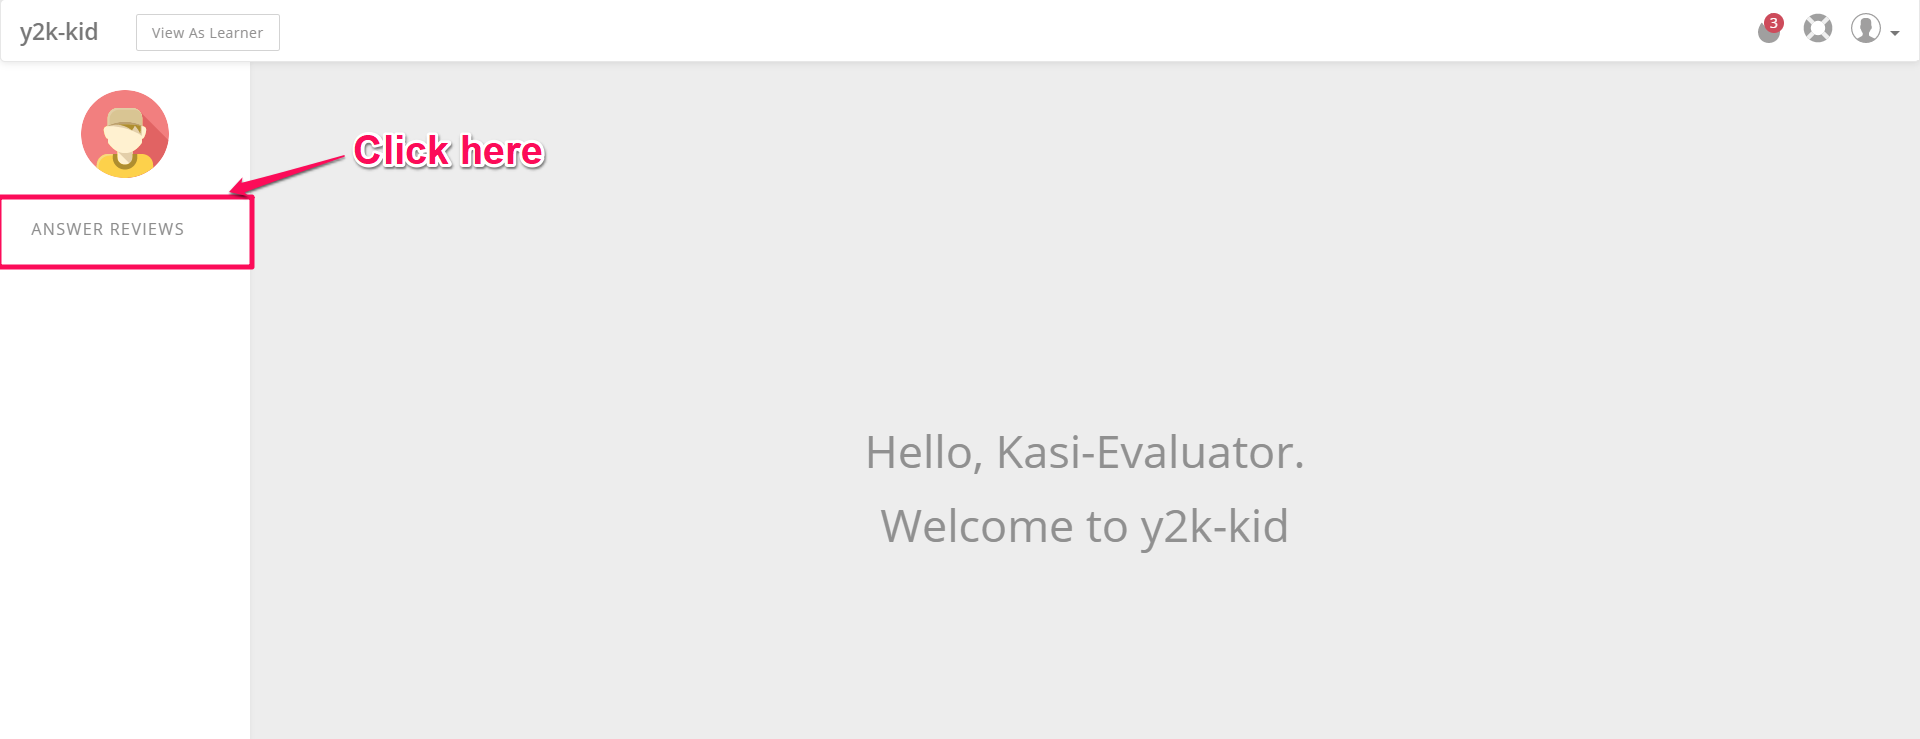
Next, they need to click on the Answer Reviews option
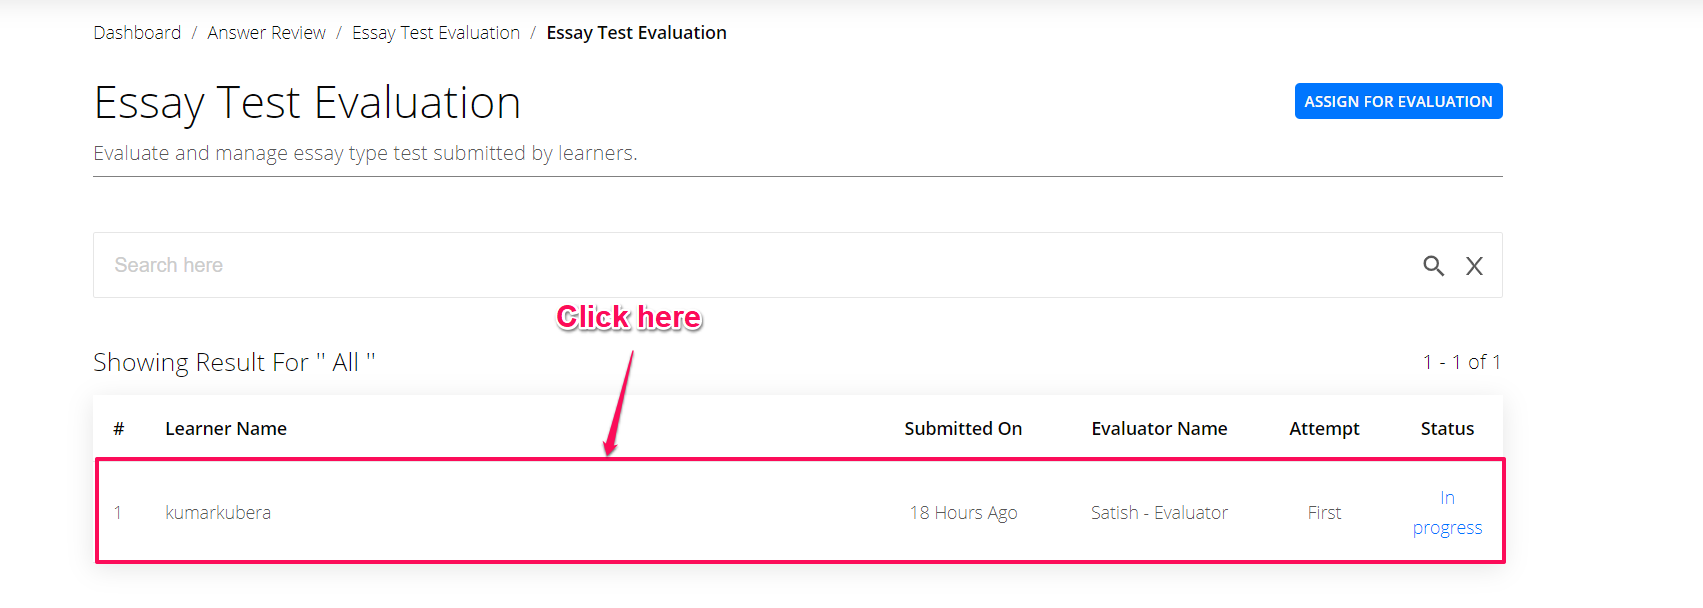
This will take them to the next screen of the mock-test. Here, they will be able to find the mock-test
Click on the Quiz

Click on the learner name
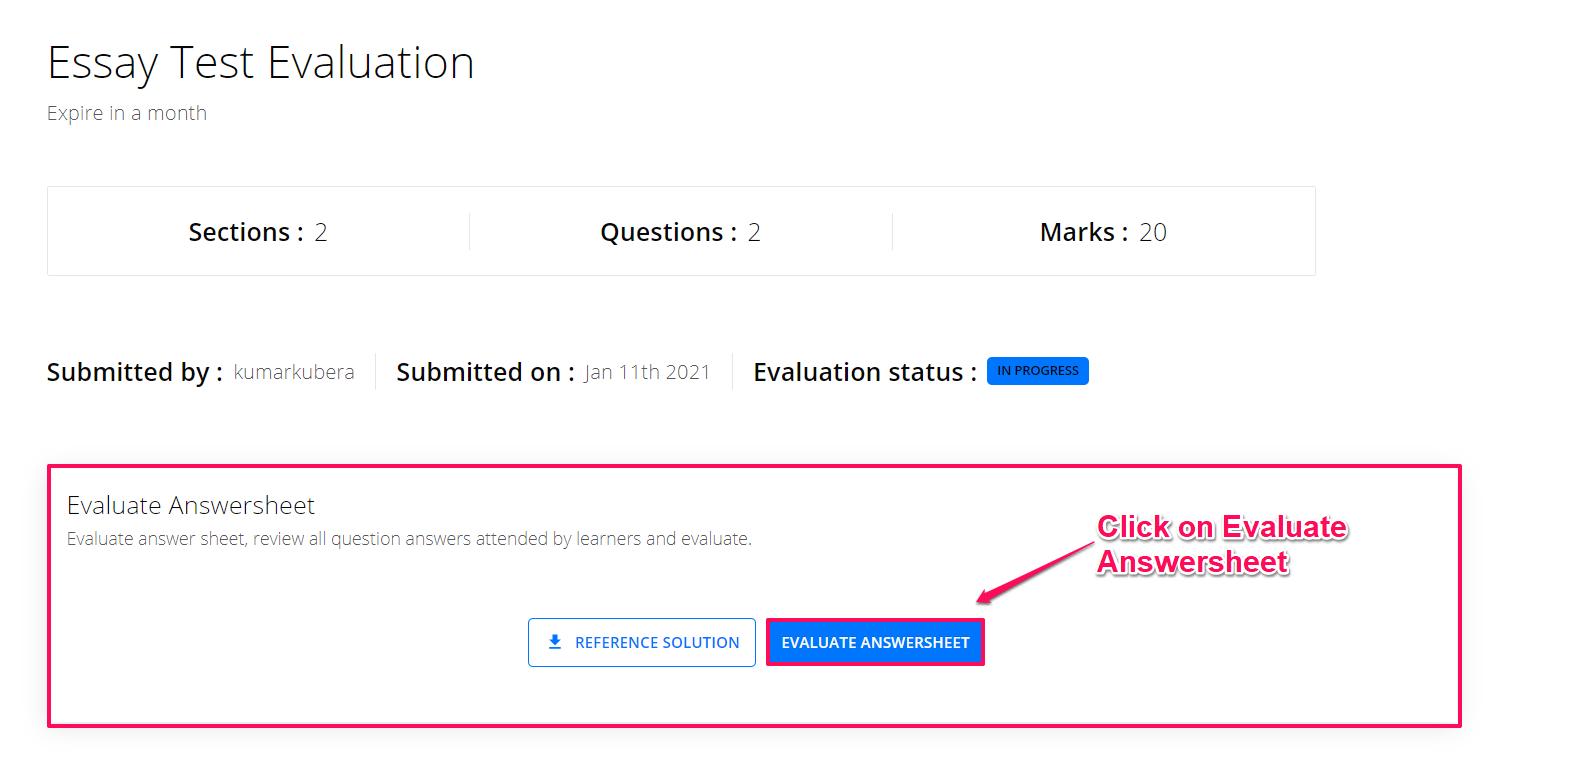
On the next screen, click on Evaluate Answer Sheet to start the evaluation process.
You will now be taken to the screen where the student answer sheet will be visible on the left-hand side and the questions will be visible on the right-hand side.
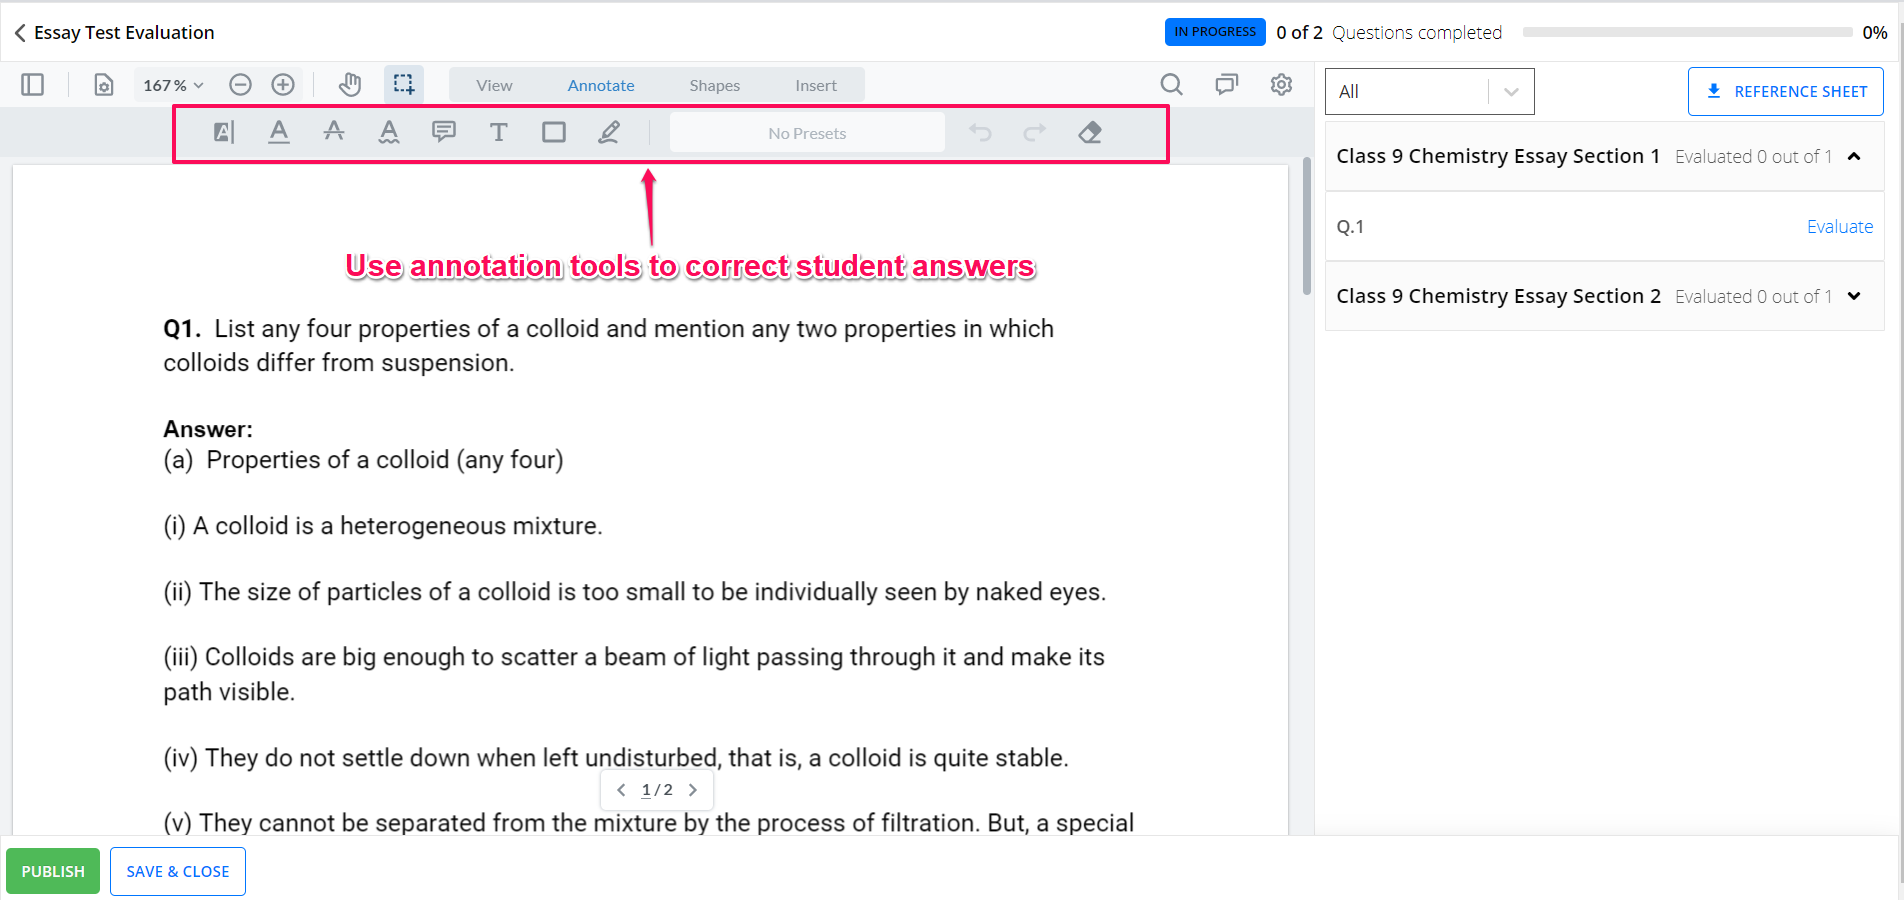
Now let us get to know the various tools to help you evaluate the answer sheet online.
Correcting Your Answer Sheets Online
In the below steps, let us try the various functions of the onscreen evaluation tool to correct your answer sheets online.
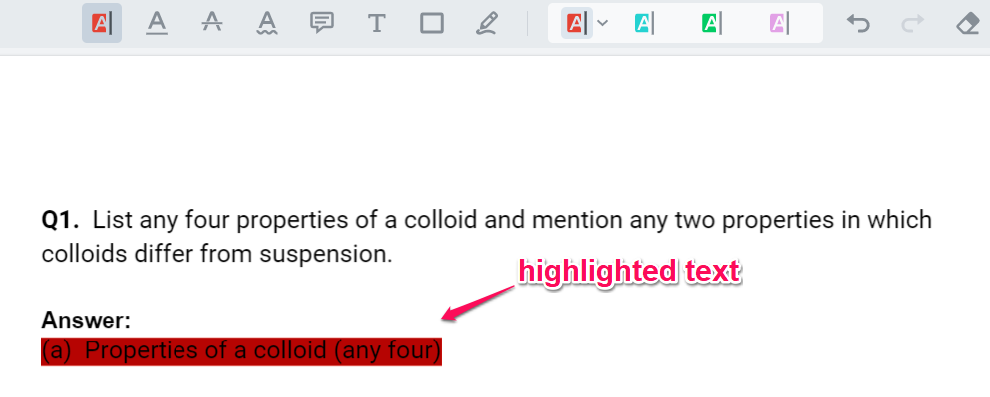
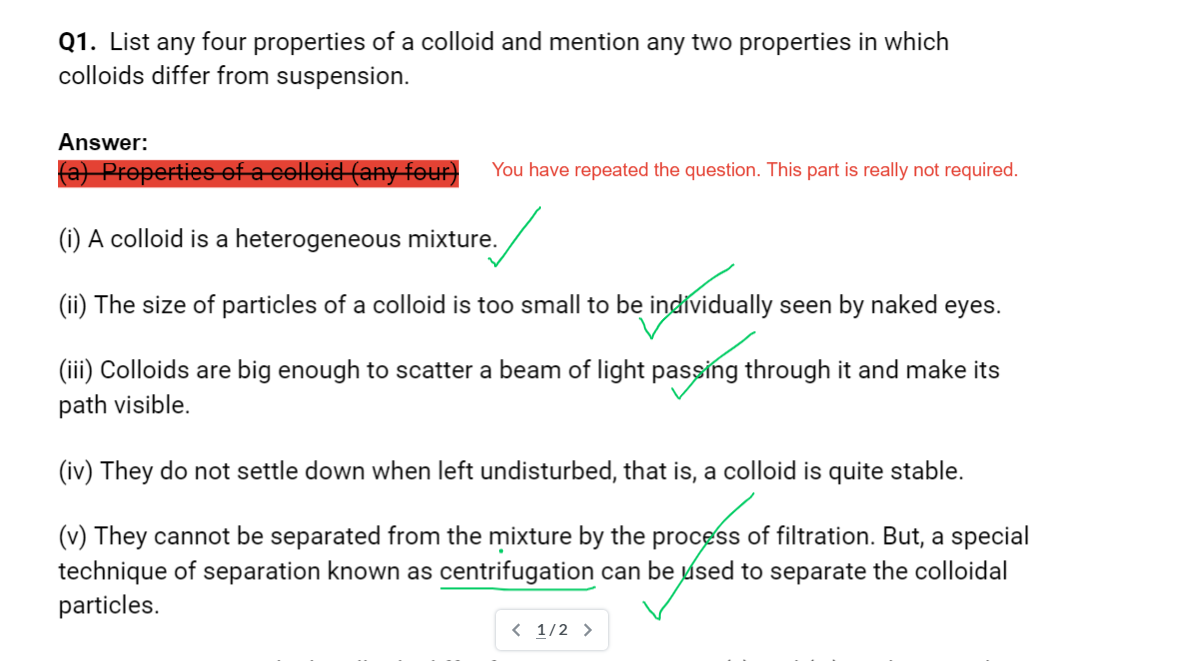
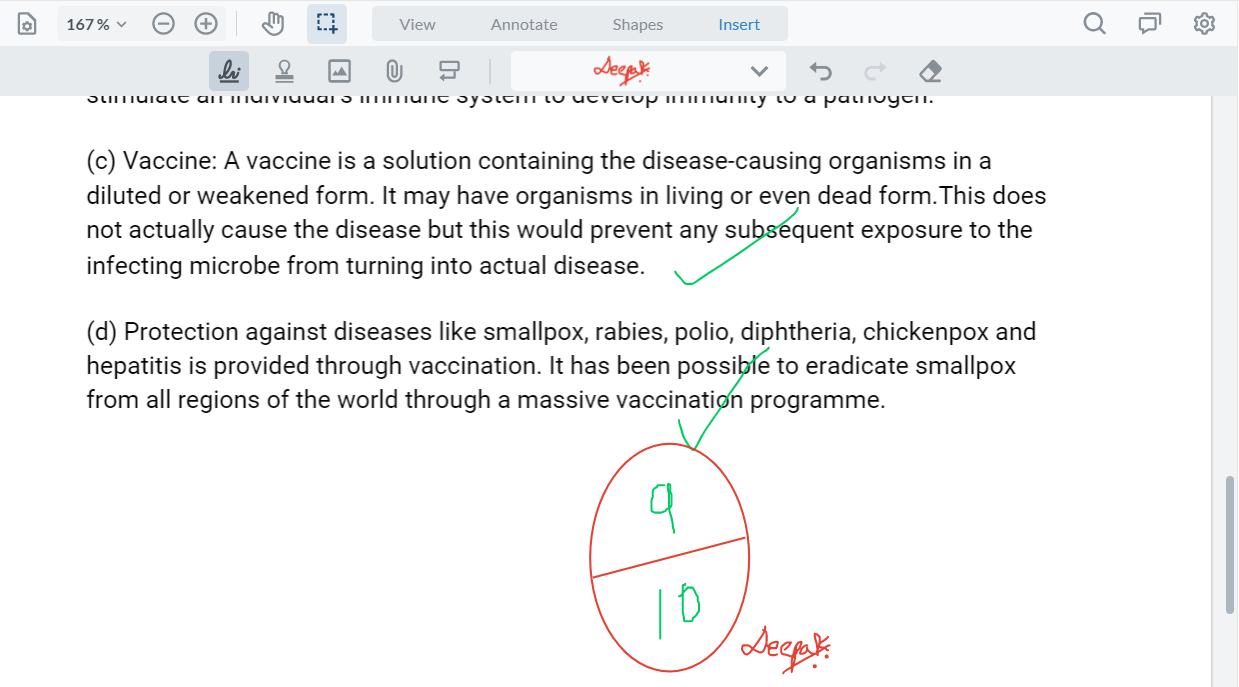
1. Highlighting The Right And Wrong Answers
As a teacher, you may want to highlight the right answers with green & wrong answers with a red color. Let us try to do that.
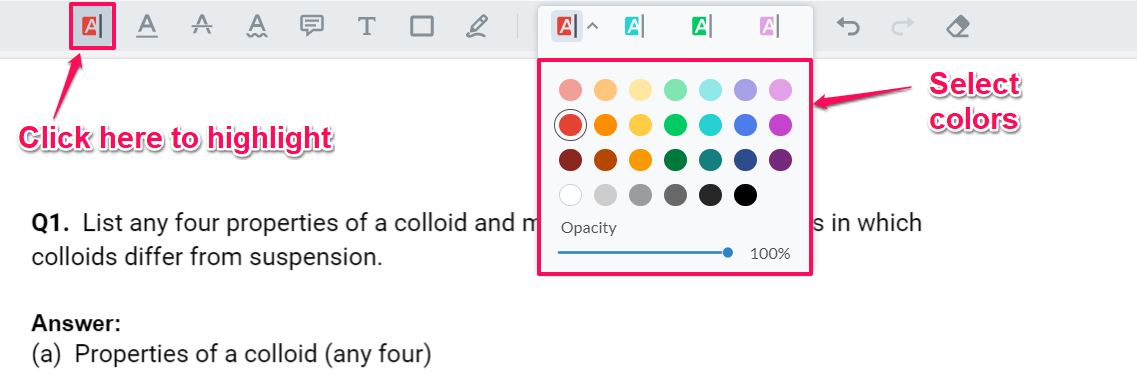
Left-click and drag your mouse on the text you want to highlight. For e.g. I will show you how to highlight a wrong answer.
2. Striking Down A Wrong Answer
Next, you can strike down this answer. To do that, select the strikethrough option on the top section.
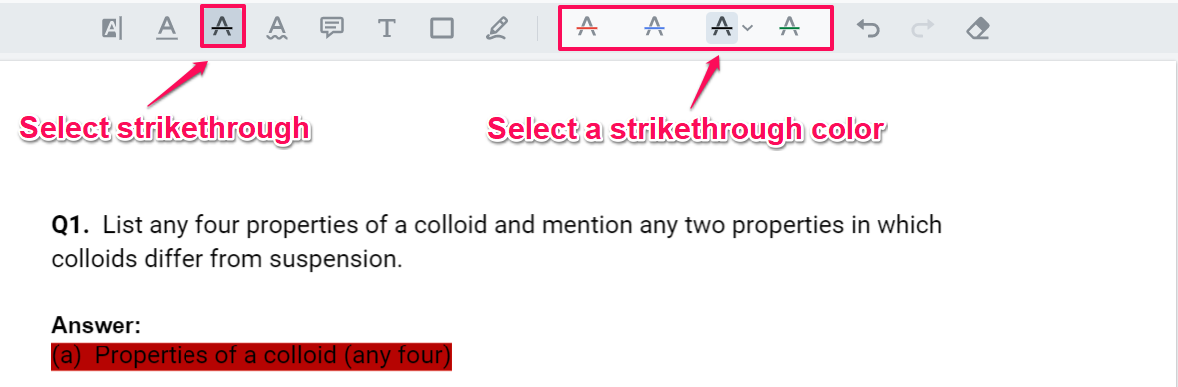
Now drag the mouse through the text and strike it down.

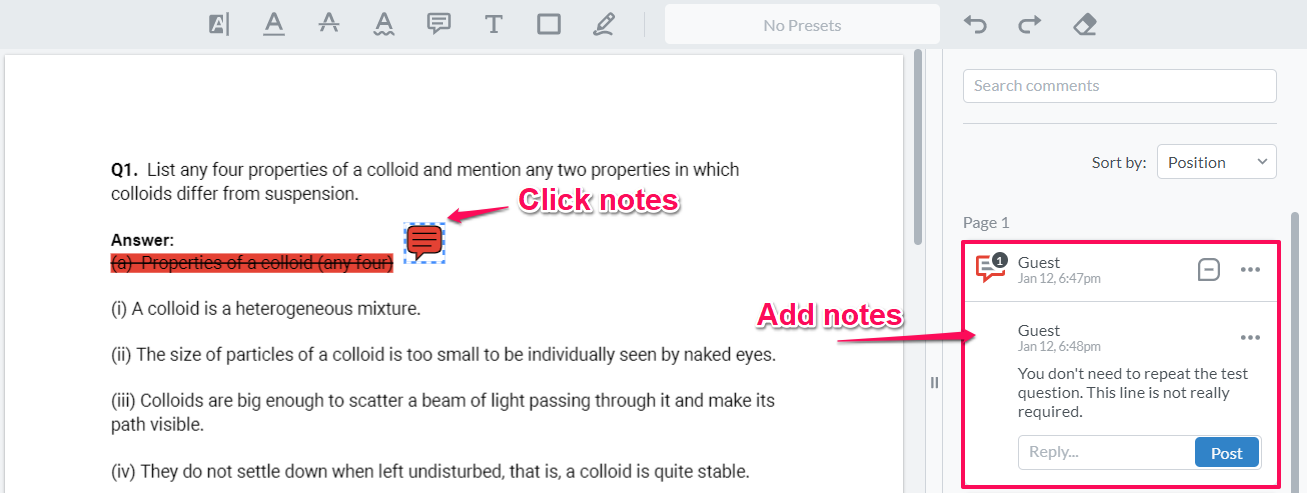
3. Add Your Comments As A Note
Next, you can mention, why you had struck down the answer. For this, you can use the comments option
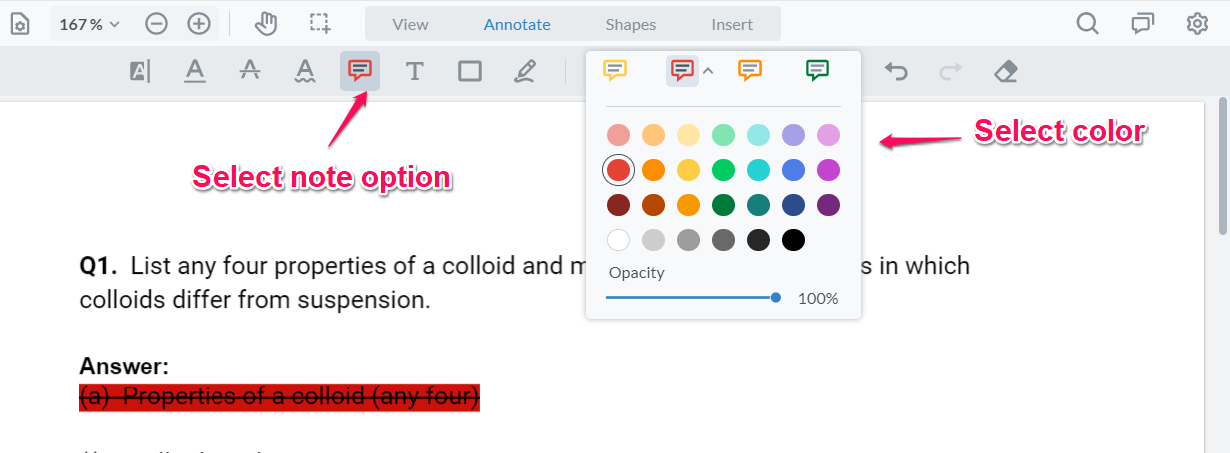
Then, add the note next to the text and add your comments.
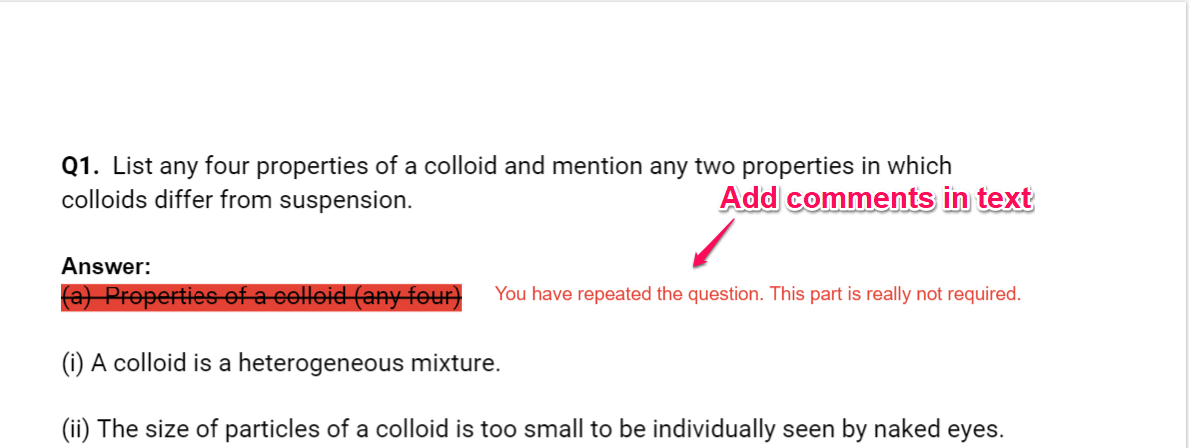
4. Add Your Comments As A Text
Other than notes, you can add comments as a text as well. For this, click on the Free Text option and select an appropriate color.
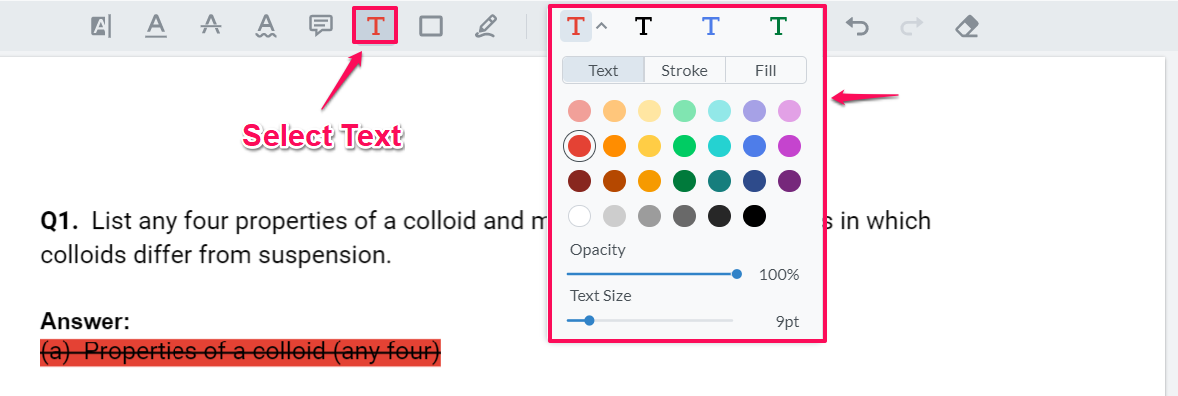
You can now click near the highlighted text and type your comments.
5. Add Tick Mark To The Right Answers
Using the FreeHand tool, you can put a tick mark next to the answers or circle incorrect answers with a question mark.
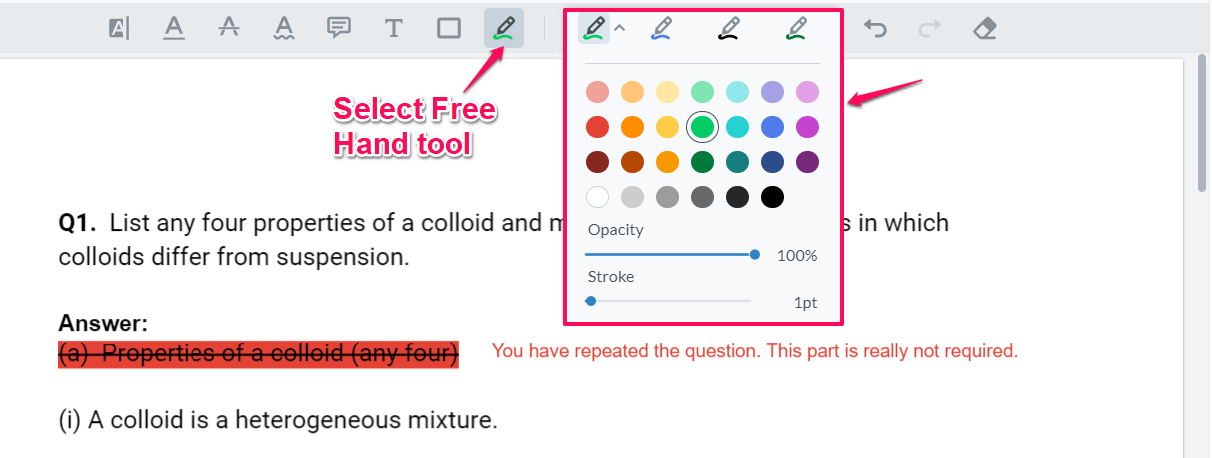
Next, put a tick mark on the right answers.
6. Erase Any Comments
To Undo any previous comments or annotations, you can press cntl+z. Alternatively, You can use the eraser function on top to erase out any correction mistakes.

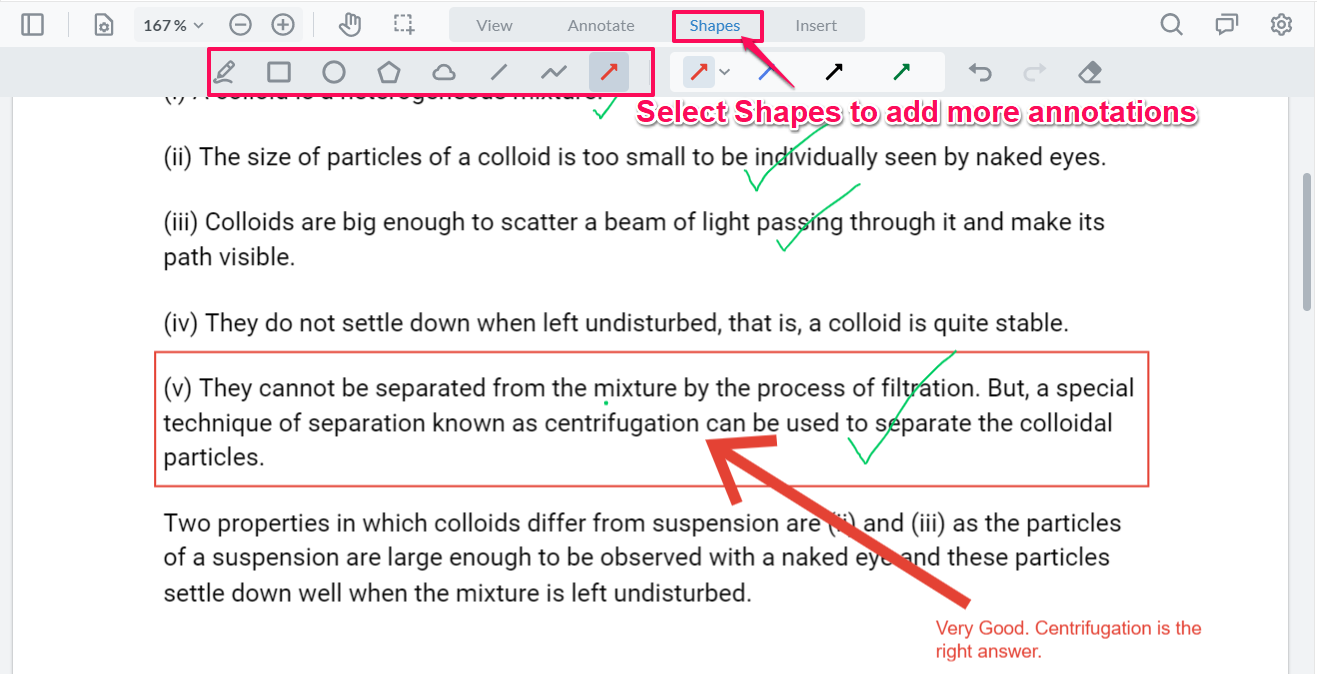
7. Insert Advanced Annotations With Shapes
You can use the function of the shape to insert arrows or more creative annotations.
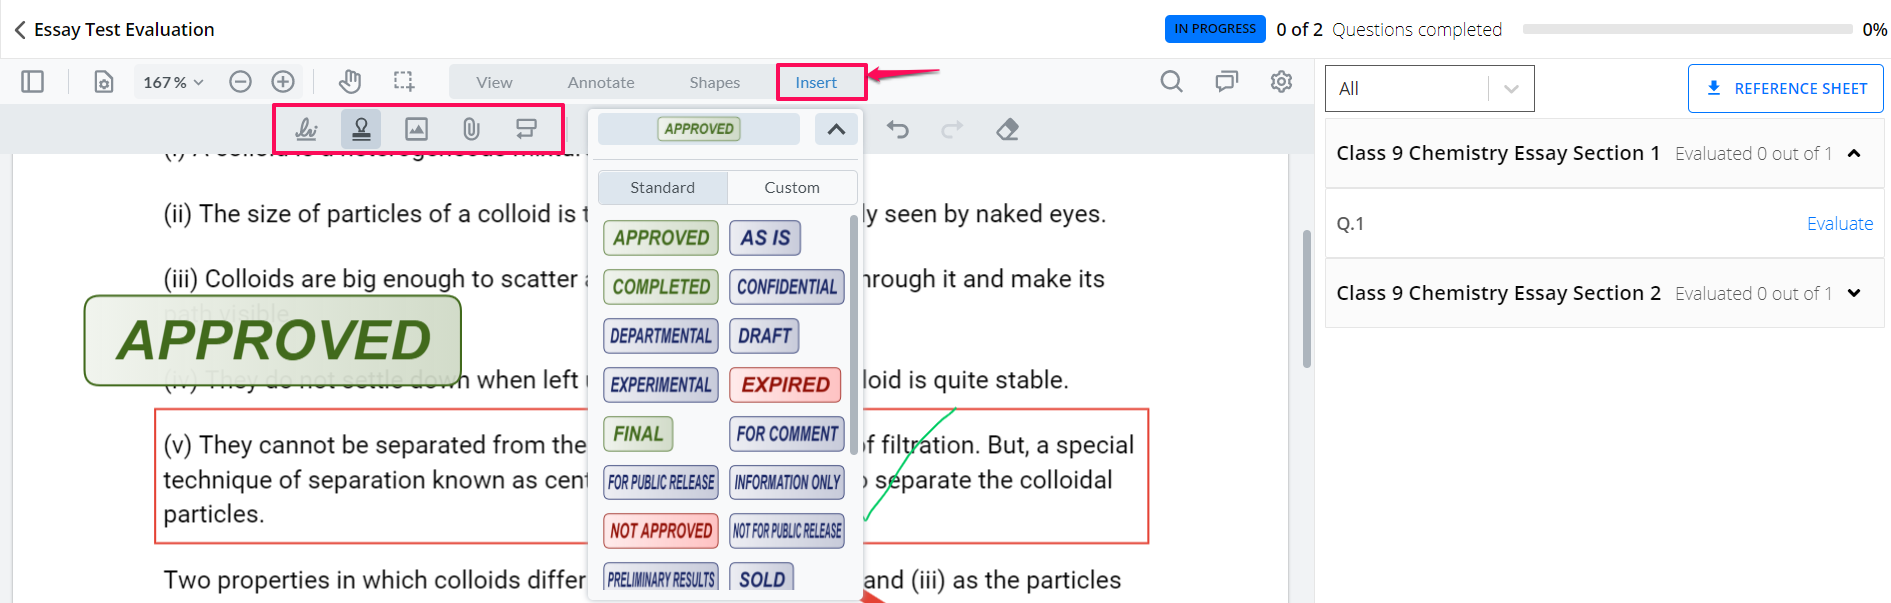
8. Insert Rubber Stamps
You can go to the insert option and insert signatures or rubber stamps (labels)
9. Insert Marks & Signature
After correcting the paper, you can even insert marks and your signature at the end.
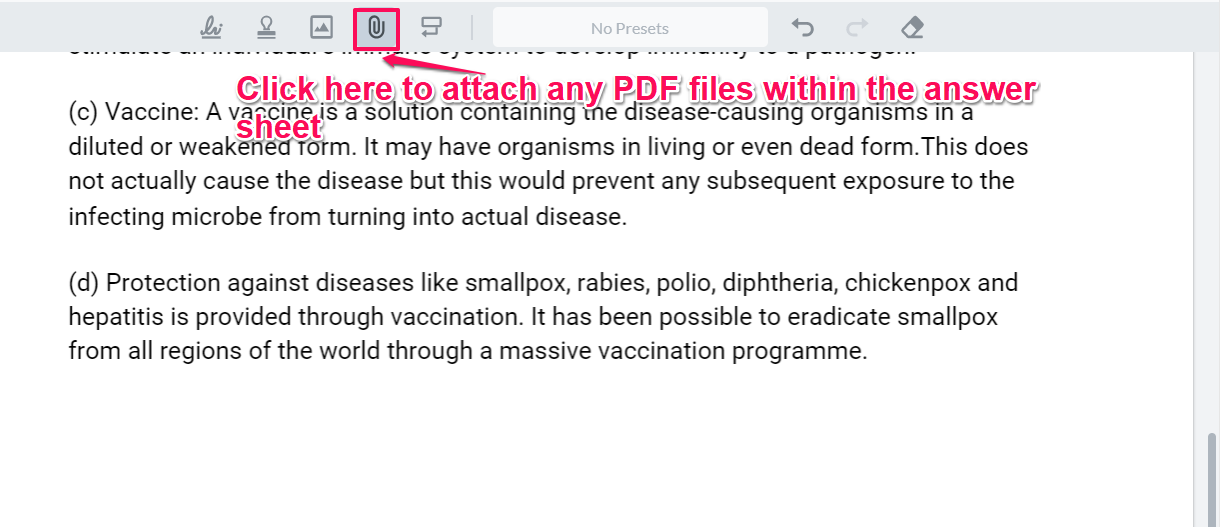
10. Attach PDF Files
If you don't like annotations, you can even add all your comments in a simple word file, export it as a PDF and attach it using the insert option.
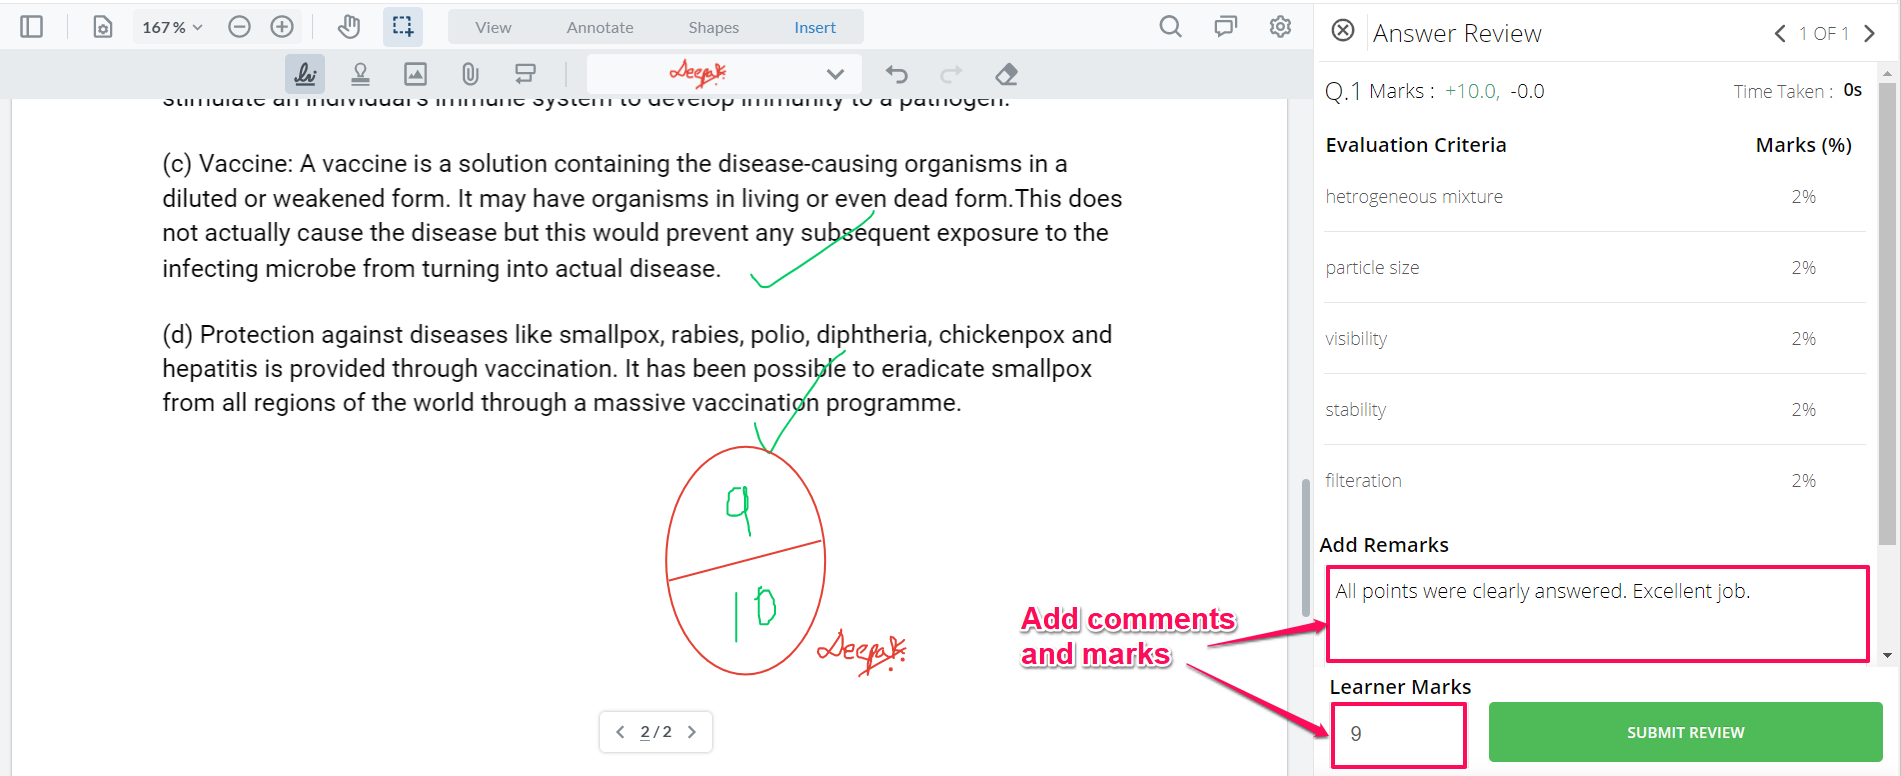
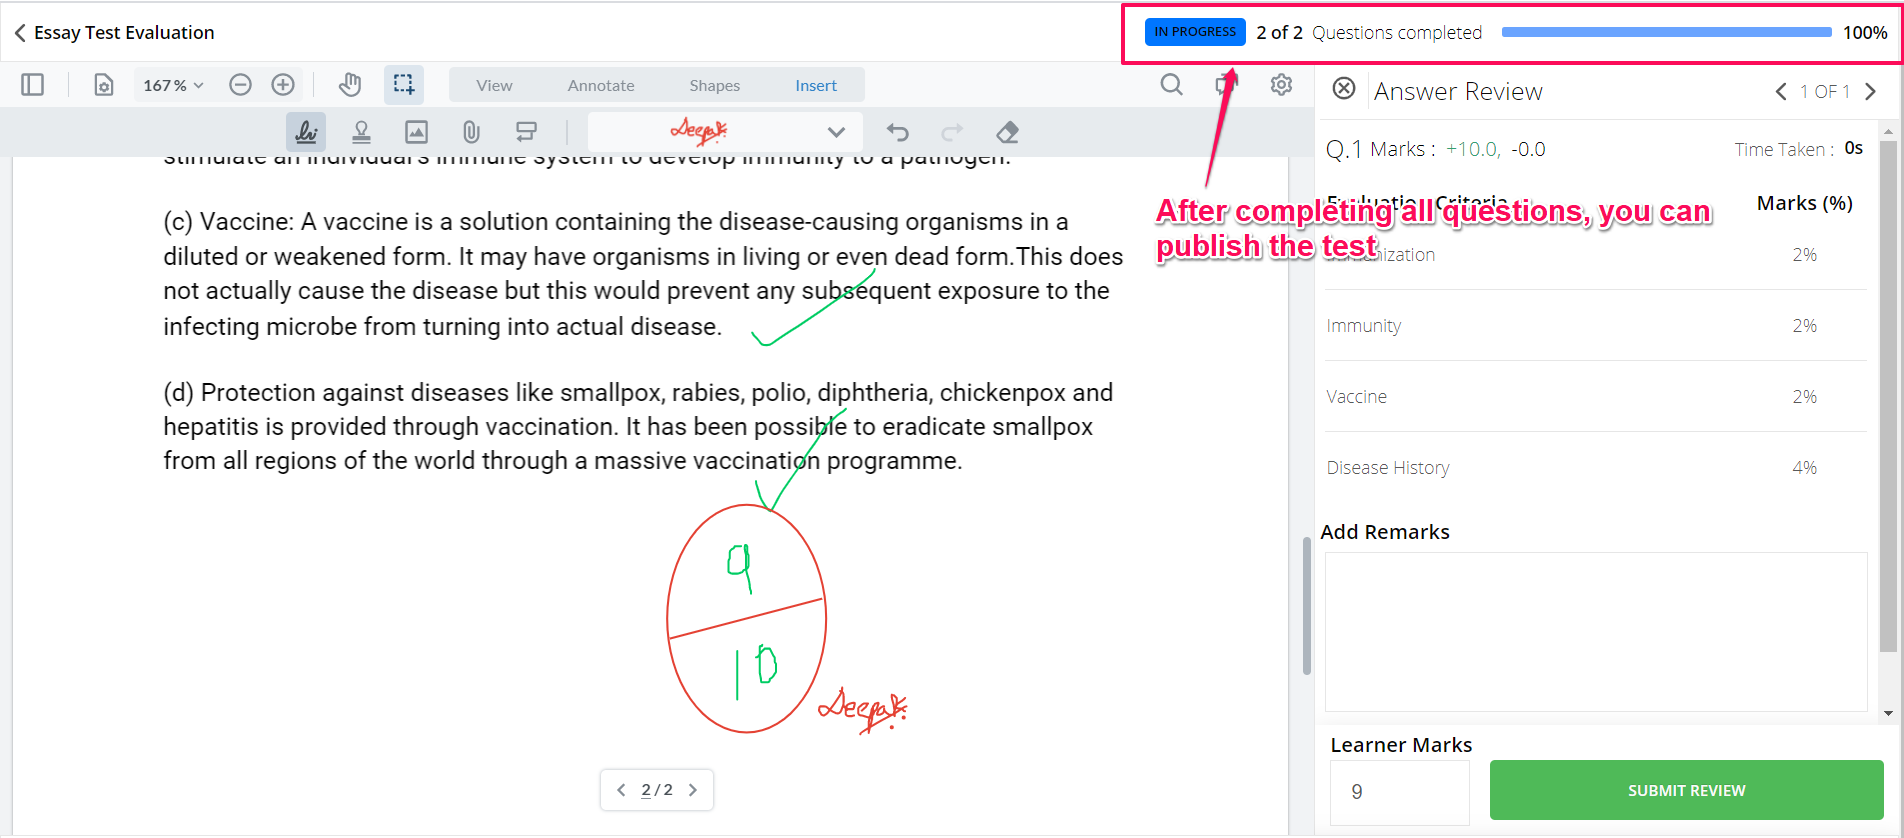
How To Add Marks For Your Students Exam
After you have done correcting the answers, you can now insert the marks on the right-hand side. The system will compute add them automatically.

Next, enter the marks or any comments.
Click on Submit Review.
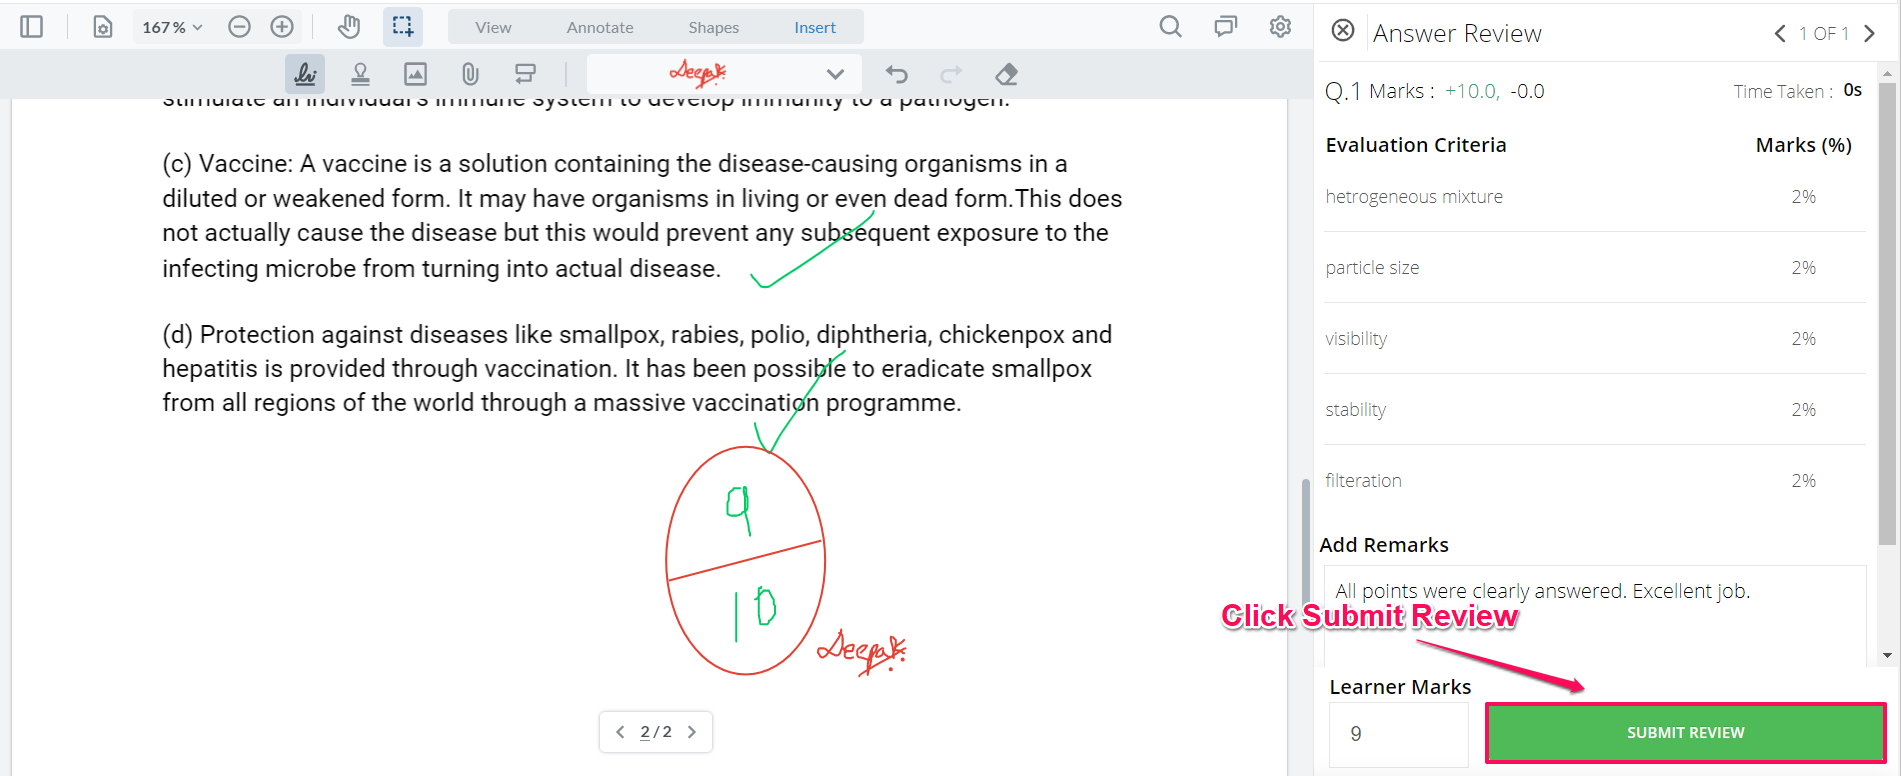
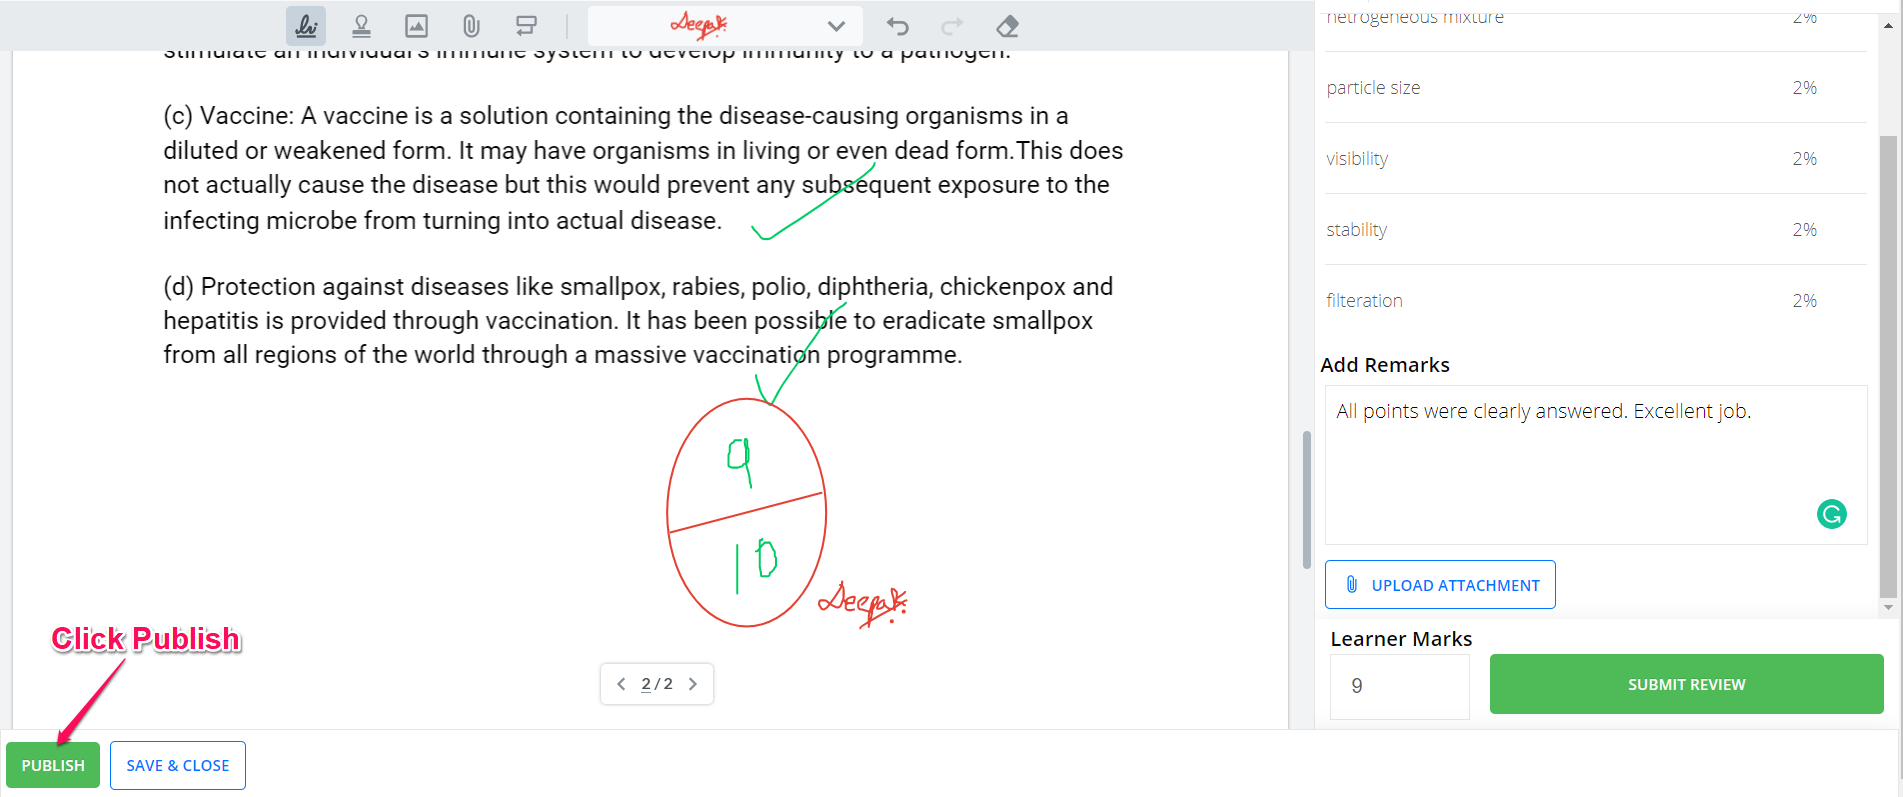
Likewise, go to each and every question & submit review for them.
After completing the review for all questions, go ahead, and publish your test.
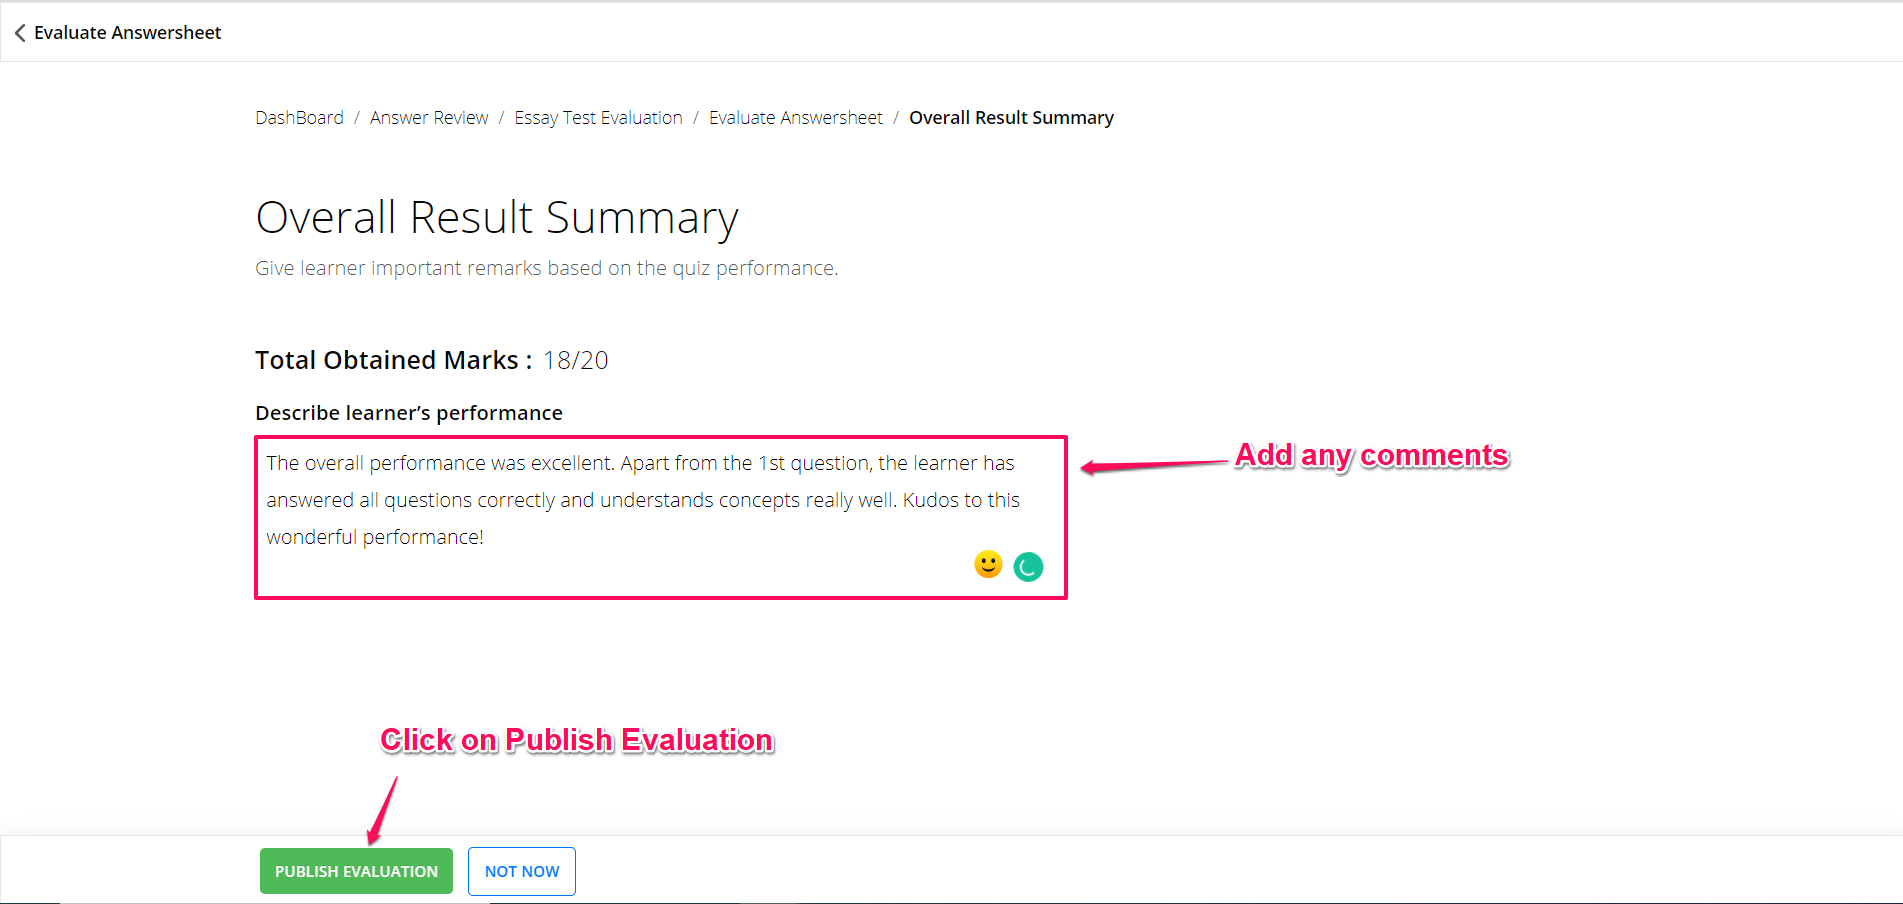
Add any final comments and click on the publish evaluation button to publish the review.
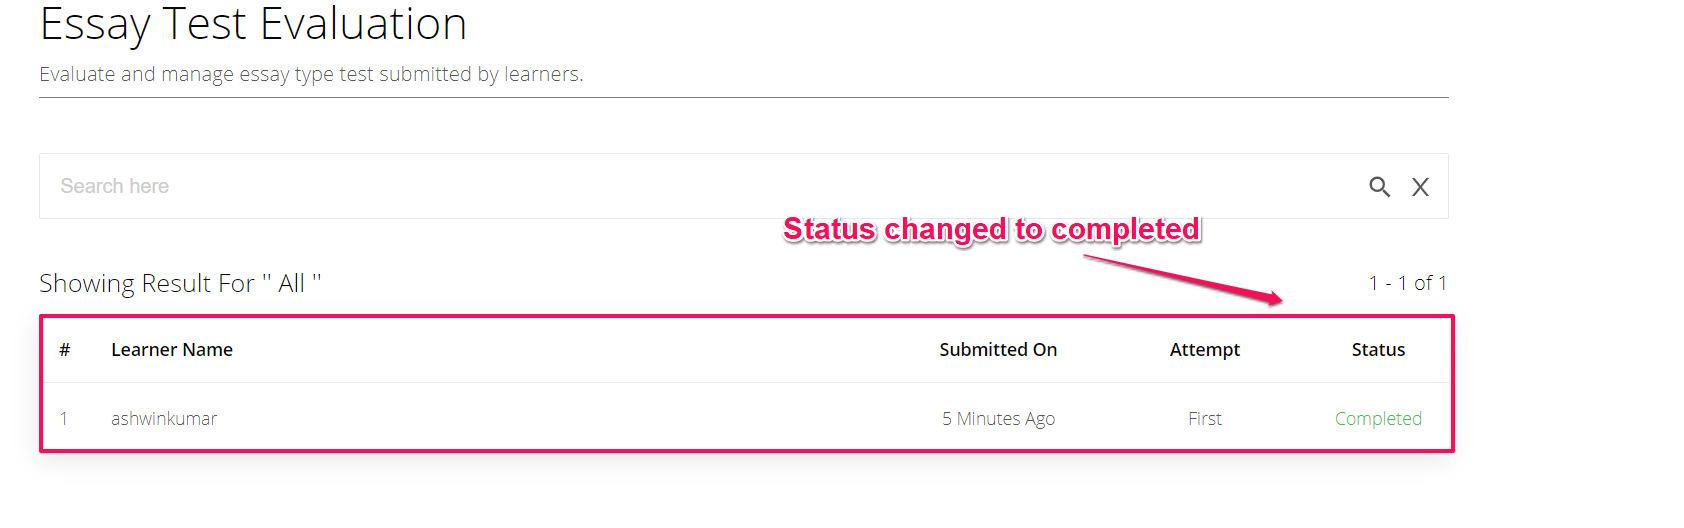
In the final screen, your mock-test paper review status will change from Inprogress to Complete
Make your paper correction easier with digital evaluation. To know how to correctly answer papers in double quick time, read the digital evaluation master guide
Did this answer your question? Thanks for the feedback There was a problem submitting your feedback. Please try again later.Yes No No results found