
- Support Center
- Legacy Website Builder
- Sub Domain
-
Get Started
-
Website
-
Embeddables
-
Courses
-
Bundles
-
Batch
-
Code
-
Product Settings
-
Product Pricing
-
Mock test
-
Test Series
-
Ebooks
-
Podcasts
-
Webinars
-
Digital Products
-
Free Resource
-
Telegram
-
Learner Management
-
Quiz & Assessment
-
Content
-
Question Pool
-
Test Evaluation
-
Reports
-
Marketing
-
Forms
-
Workflows
-
CTA
-
Campaign
-
Integrations
-
Roles and Permissions
-
School Settings
-
Sub School
-
Ratings and Reviews
-
Learner Discussion
-
Mobile Apps
-
Reports (Old)
-
Intergrations
-
Zoom integration
-
Newsfeed
-
Payments
-
FAQs
-
Troubleshooting
-
Support
-
Content Security
-
Legacy Website Builder
-
Gamification
How to Set up Your Custom Domain in CloudFlare
If you have purchased a domain in cloudflare and want to map it to your learnyst account, here is the support article for you.
This is what we will cover in this article:
-
Setup a Cname - Point your custom domain to Learnyst account
-
Add Redirection - Point Learnyst account to your custom domain
Setup a Cname
-
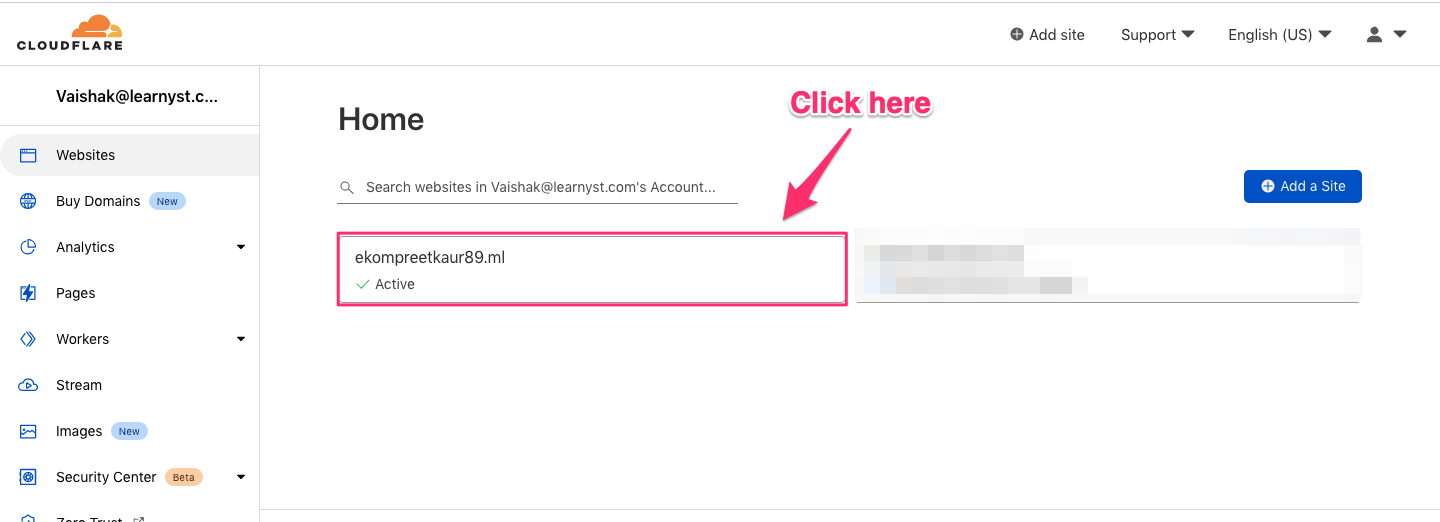
First, log in to your CloudFlare account.
-
Now, select the domain that you would like to use for your Learnyst site
-
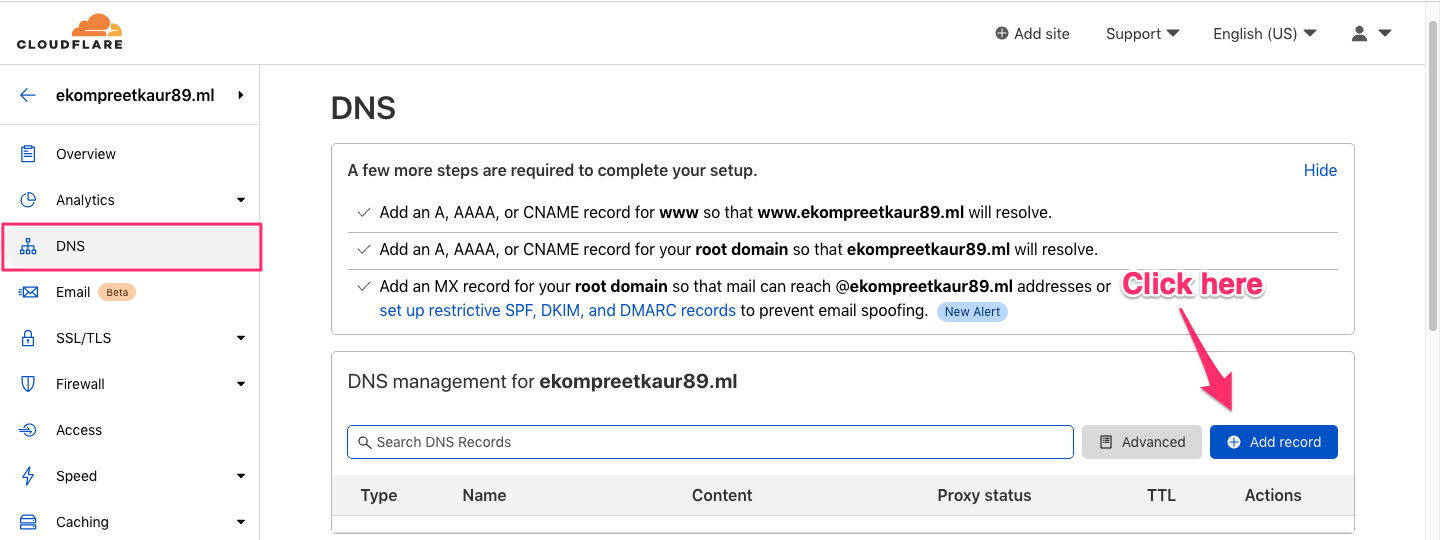
Select the DNS account. and click on Add record button.
-
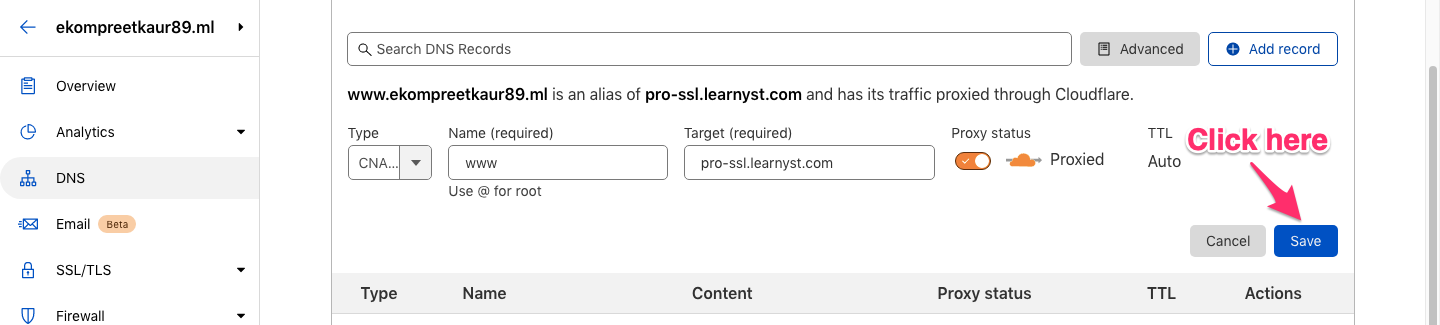
Here, select Cname option and within the name enter www and within target enter pro-ssl.learnyst.com.
-
This will point your custom domain www.ekompreetkaur.89ml to your learnyst account.
Note: Instead of custom domain, you can redirect your sub-domain like learn.ekompreetkaur89.ml to learnyst.
-
Just enter the subdomain like learn or prep within the Name textbox

Add Redirection
-
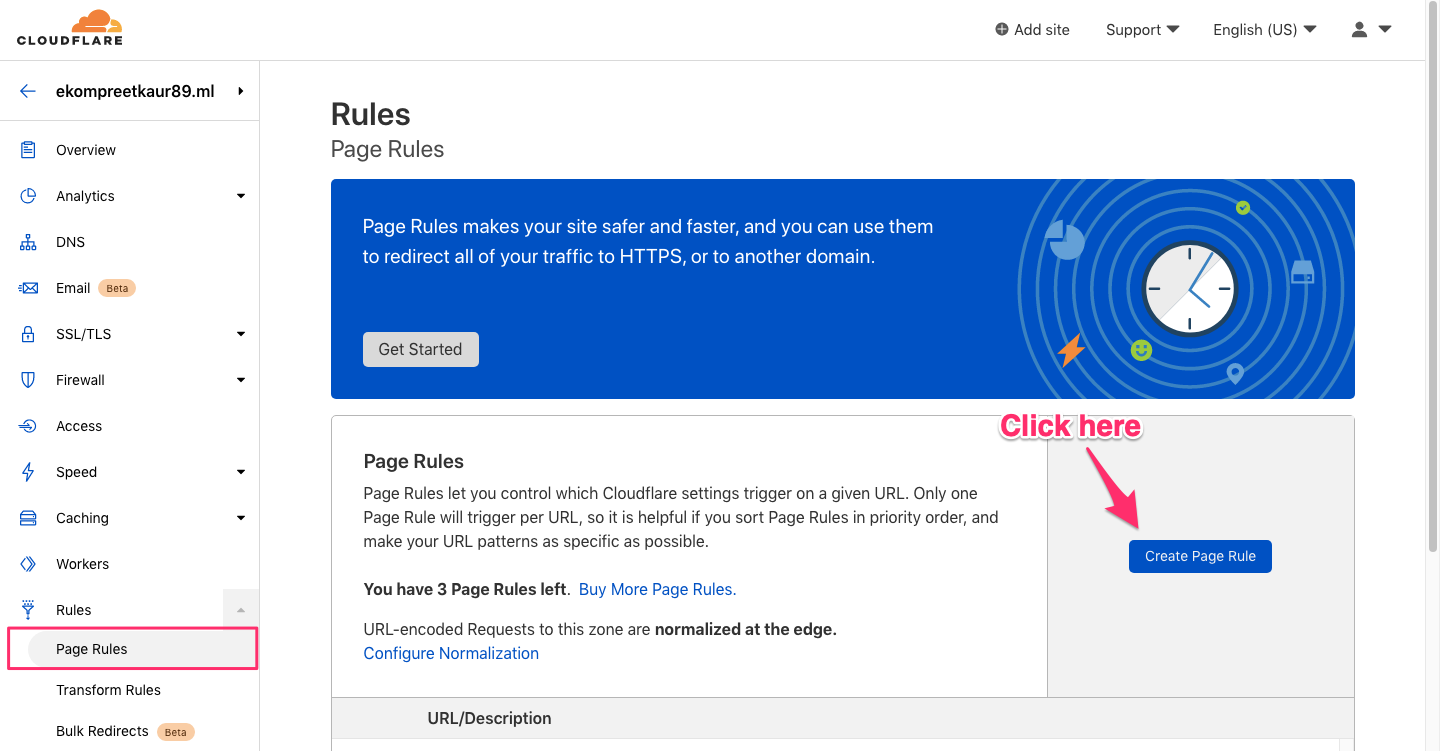
After pointing your main domain (www.ekompreetkaur89.ml) to your Learnyst account, you need to redirect learnyst page to your custom domain. Here's how:
-
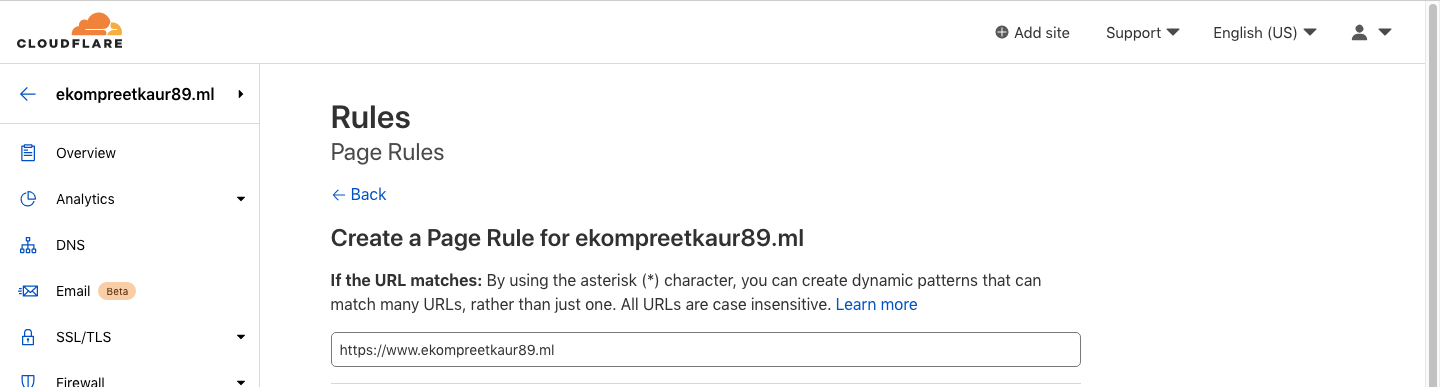
Click on Page Rules and select the Create Page Rule option.
-
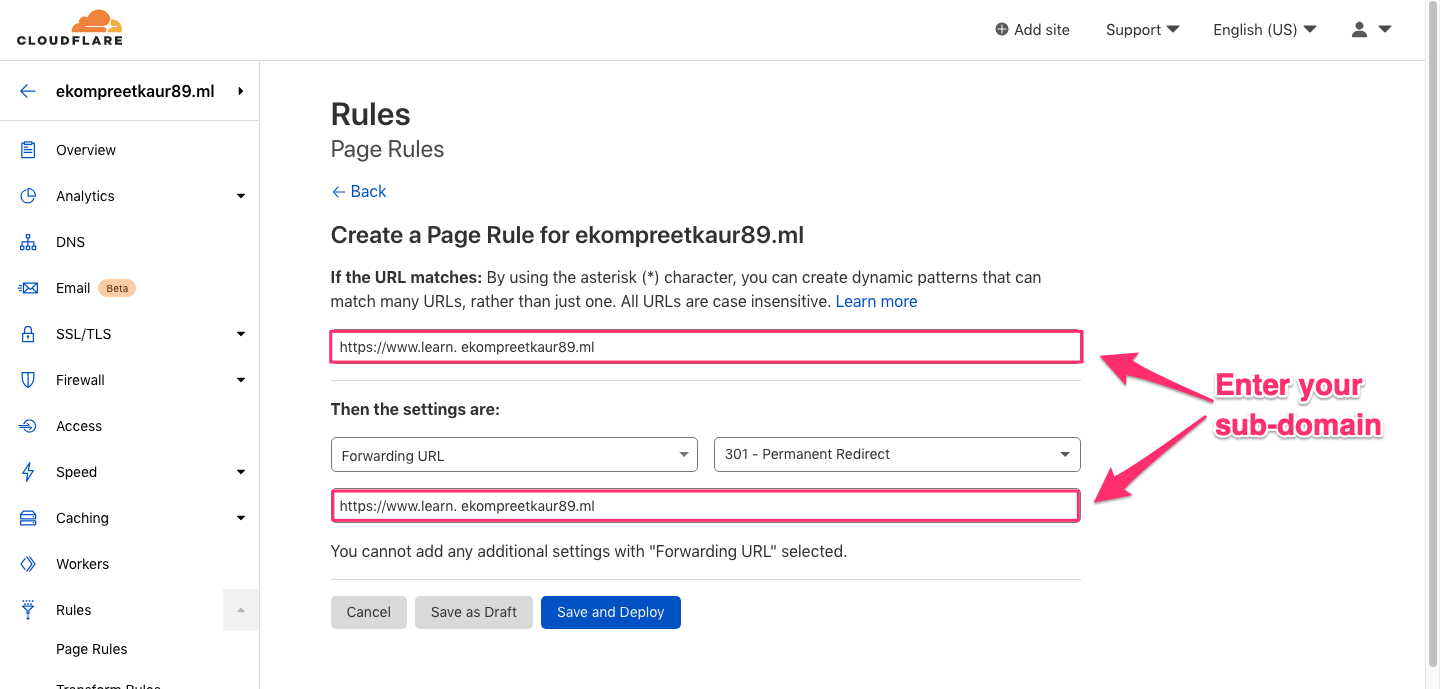
Here, within if the URL Matches, enter your custom domain: (https://www.ekompreetkaur89.ml)

-
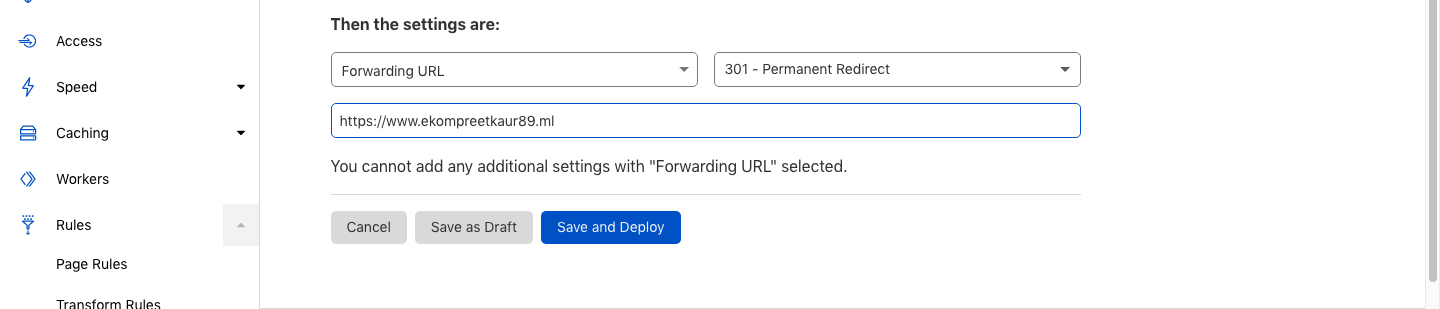
Then, the settings are Select Forwarding URL, select 301 Permanent redirect and within the URL textbox enter your custom domain. Now, click Save and Deploy.


-
This will redirect your learnyst account to your custom domain www.ekompreetkaur89.ml

-
To redirect your learnyst account to your sub domain ( learn.ekompreetkaur89.ml), within the URL textbox enter your sub-domain. And then Save & deploy.

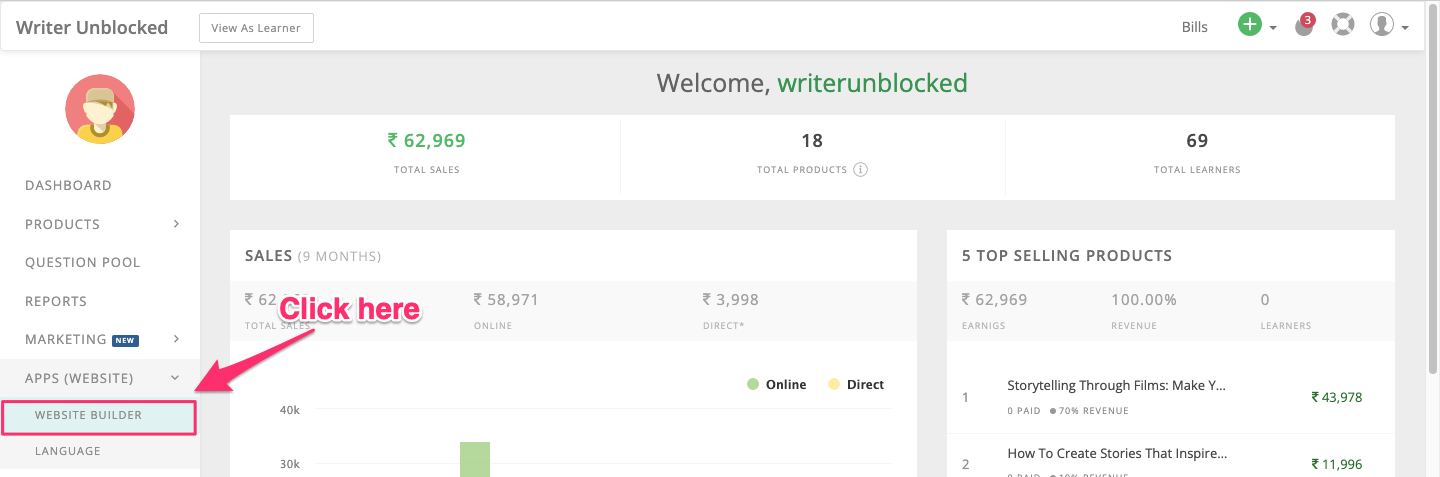
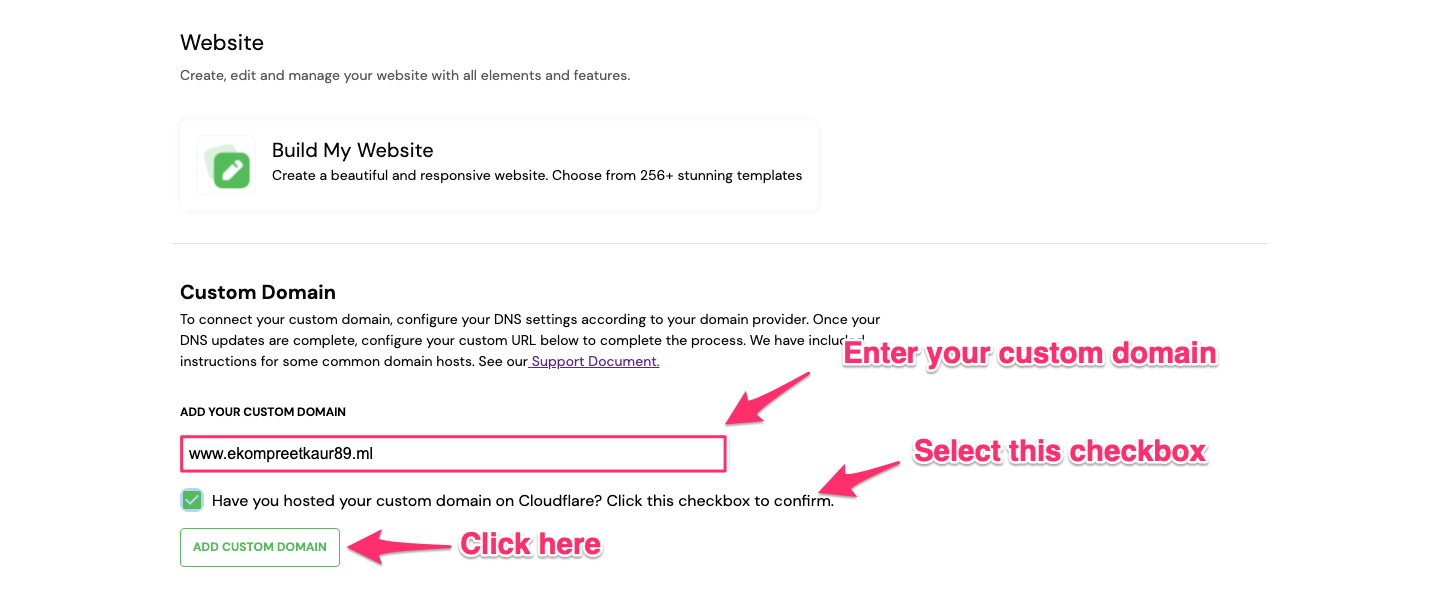
Lastly, after doing both the above steps, go to your admin dashboard, and select the apps ( website) and click on the website builder

-
Next, enter your custom domain and click on add custom domain


Conclusion
Congratulations! You have now linked your custom domain in cloudflare with your learnyst account.
Now, what's next? Start building your website and create a beautiful course website using the learnyst website builder.