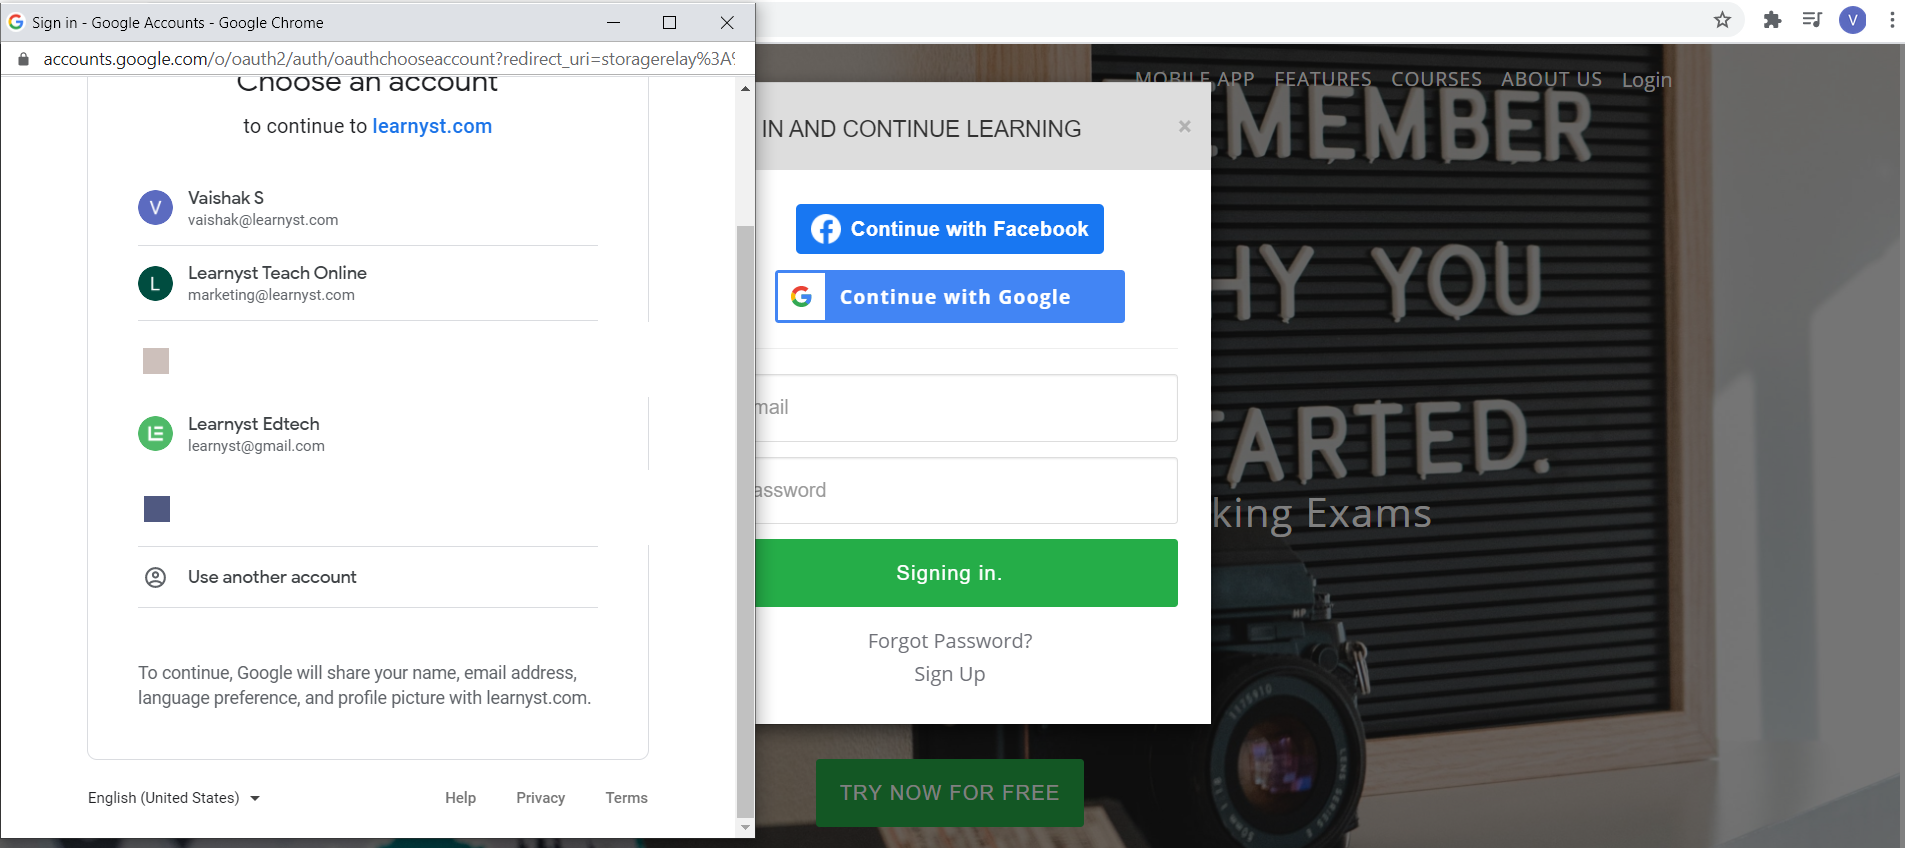
With Learnyst, students can simply use their Google accounts to sign in and instantly join your online school - making enrollment quick, easy, and hassle-free.
-
Remembering passwords is a big pain for anyone. That is why Google has introduced the sign-in option to allow learners to log in to websites easily.
-
In this article, let us learn how to use this Google feature on your academy website.
Note: This article is only for website users. To configure google sign-in for mobile.
#1. Create a Project in Google Developer Console
-
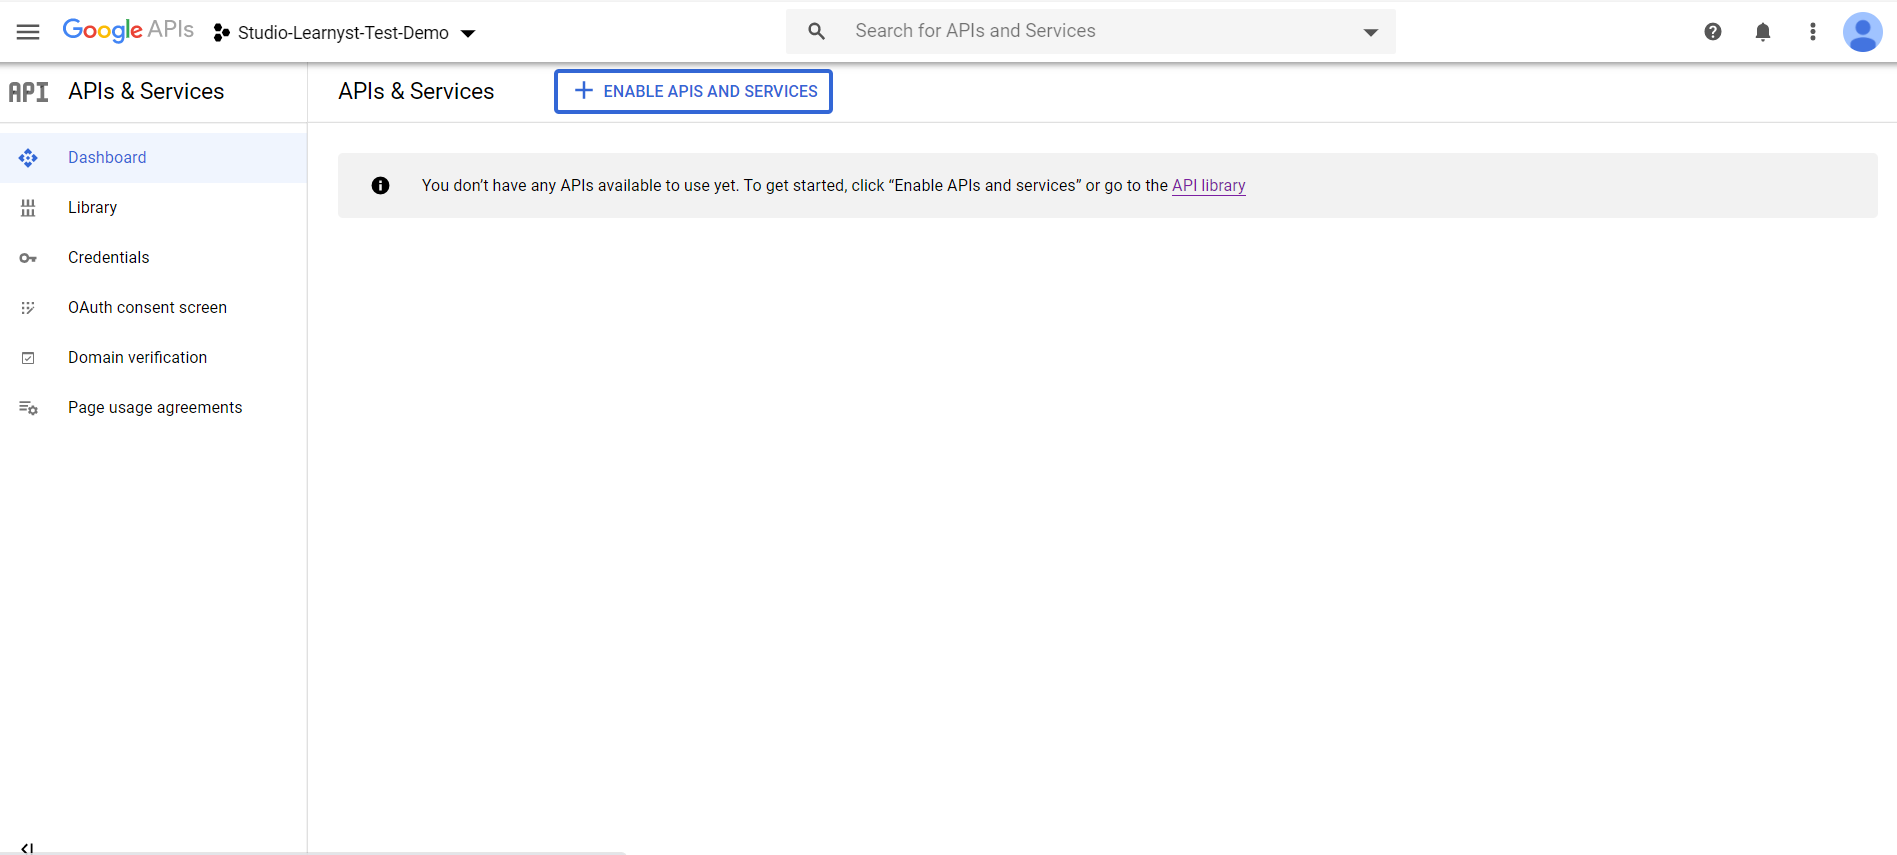
Login to https://console.developers.google.com with your Gmail credentials.
-
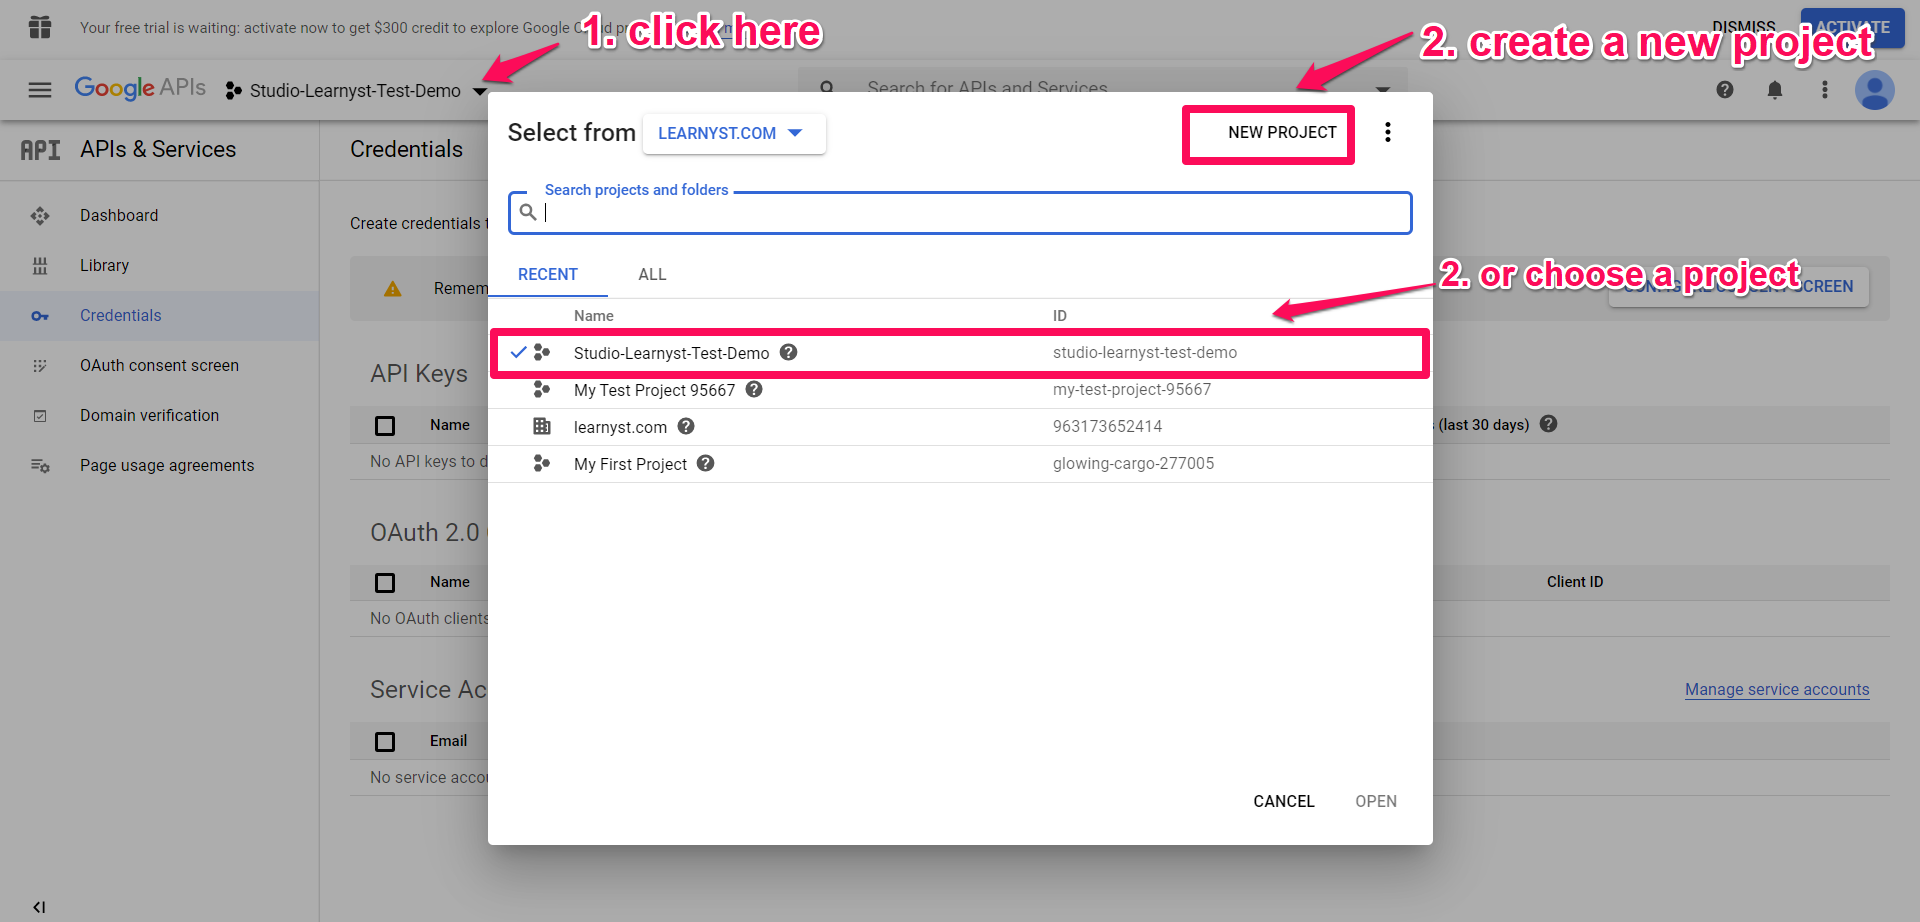
You can either create a new project or choose an existing project as shown below.
-
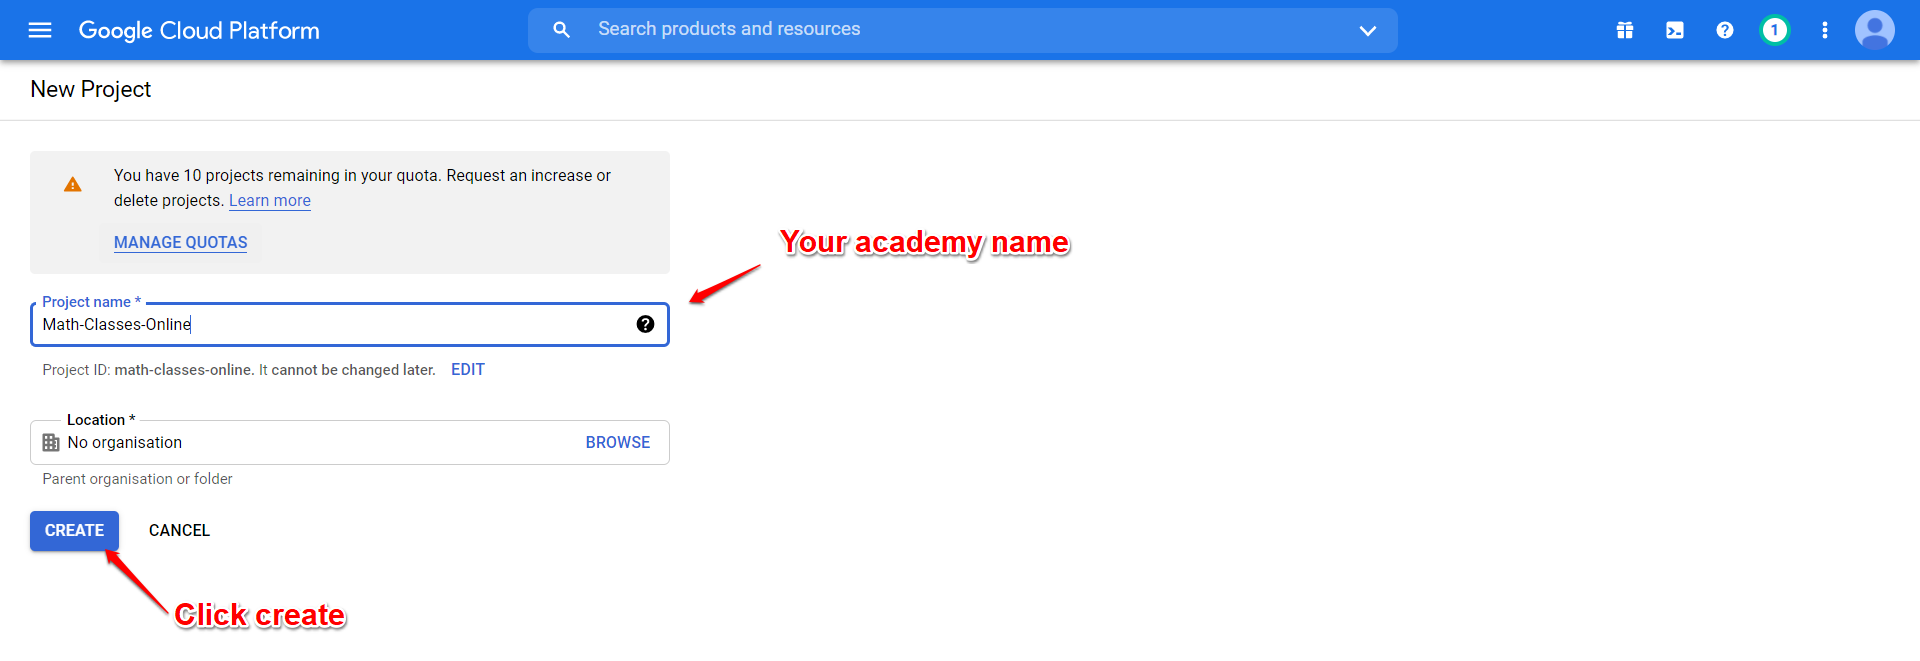
Now, after creating a project you can enter the project name in the boxes provided as shown below.
-
This will take you to the Credentials screens. Here, we will have to create the API keys.

#2. Create The API Key Credentials
-
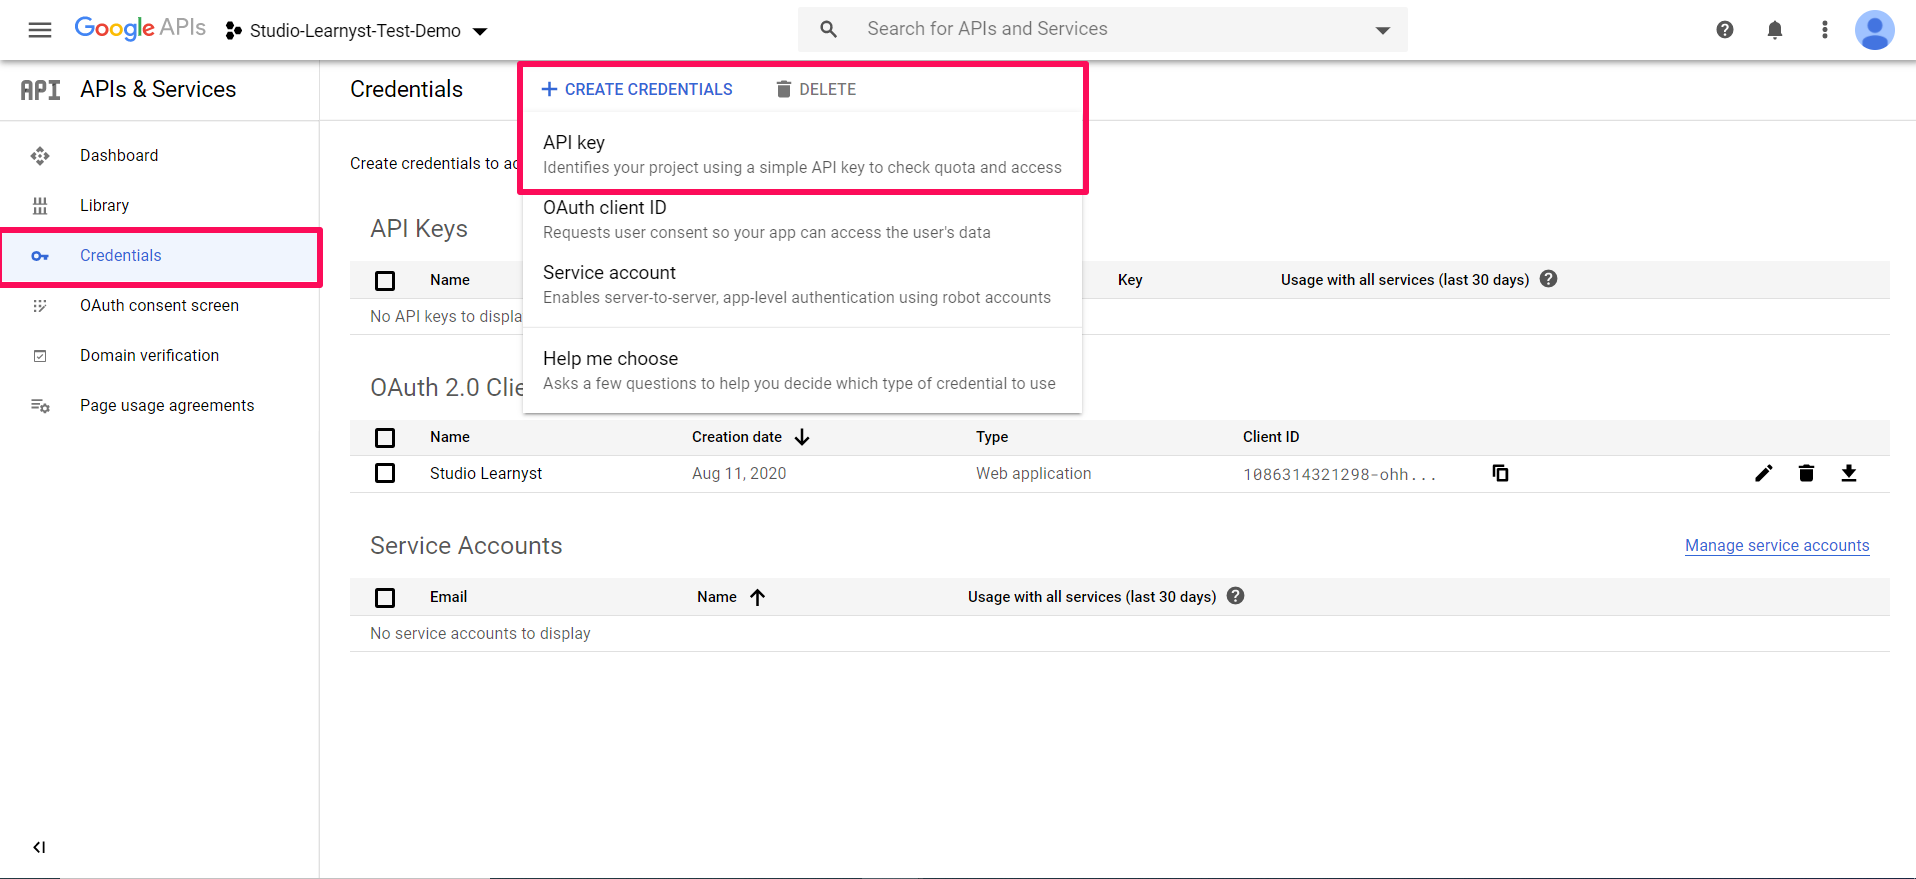
Now, to create an API key go to “Credentials” and click on “Create credentials” and then on “API key” as shown below.
-
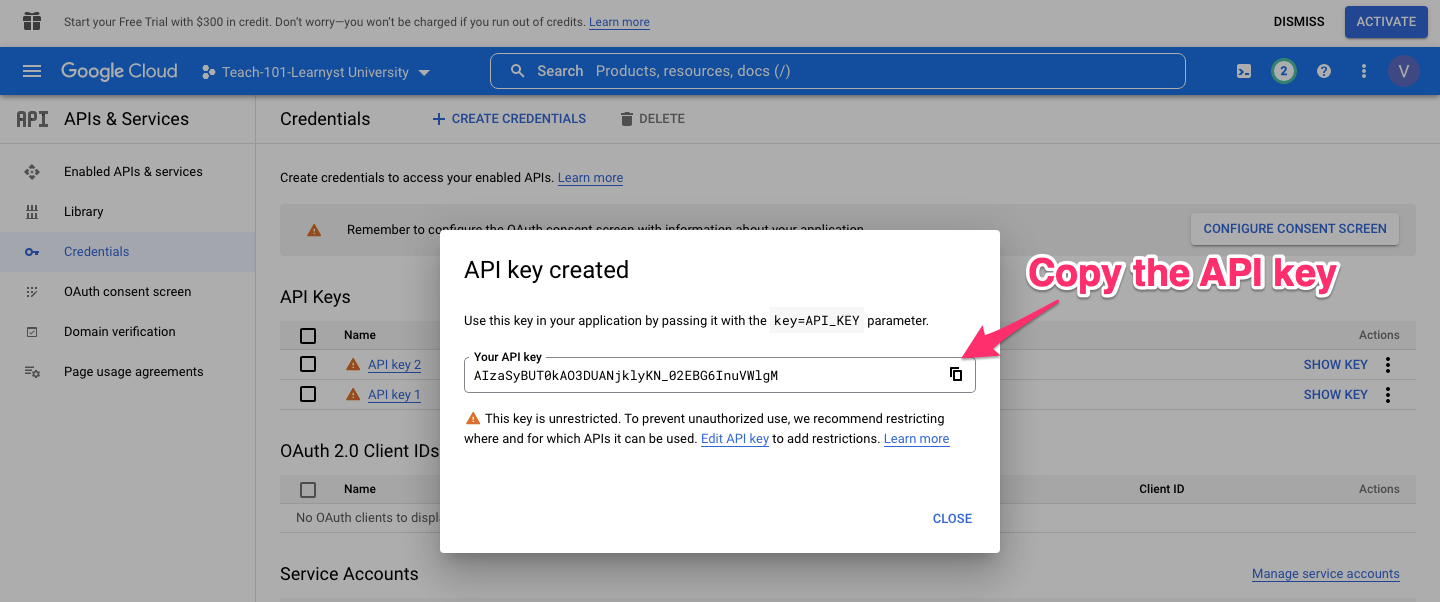
Now, the API key is created. Finally copy the API key on a notepad.
-
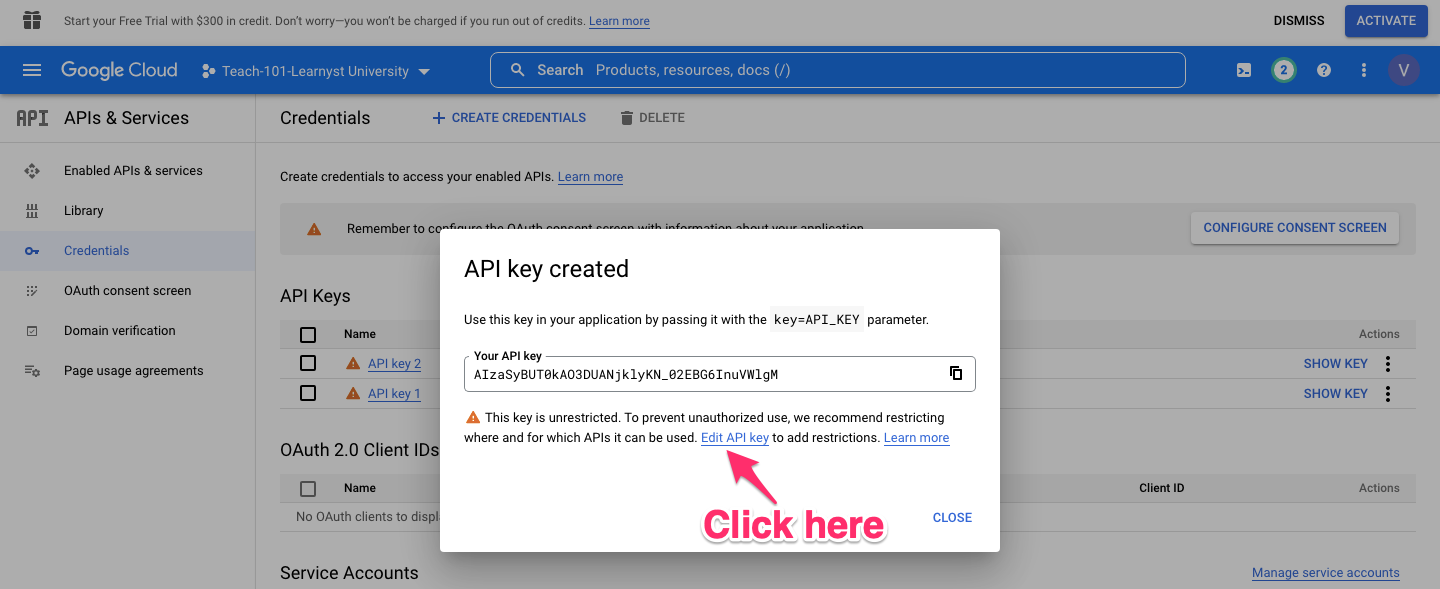
After copying the API key, you need to add some restrictions on it to prevent unauthorized use. To do that, click on the Edit API key option.
-
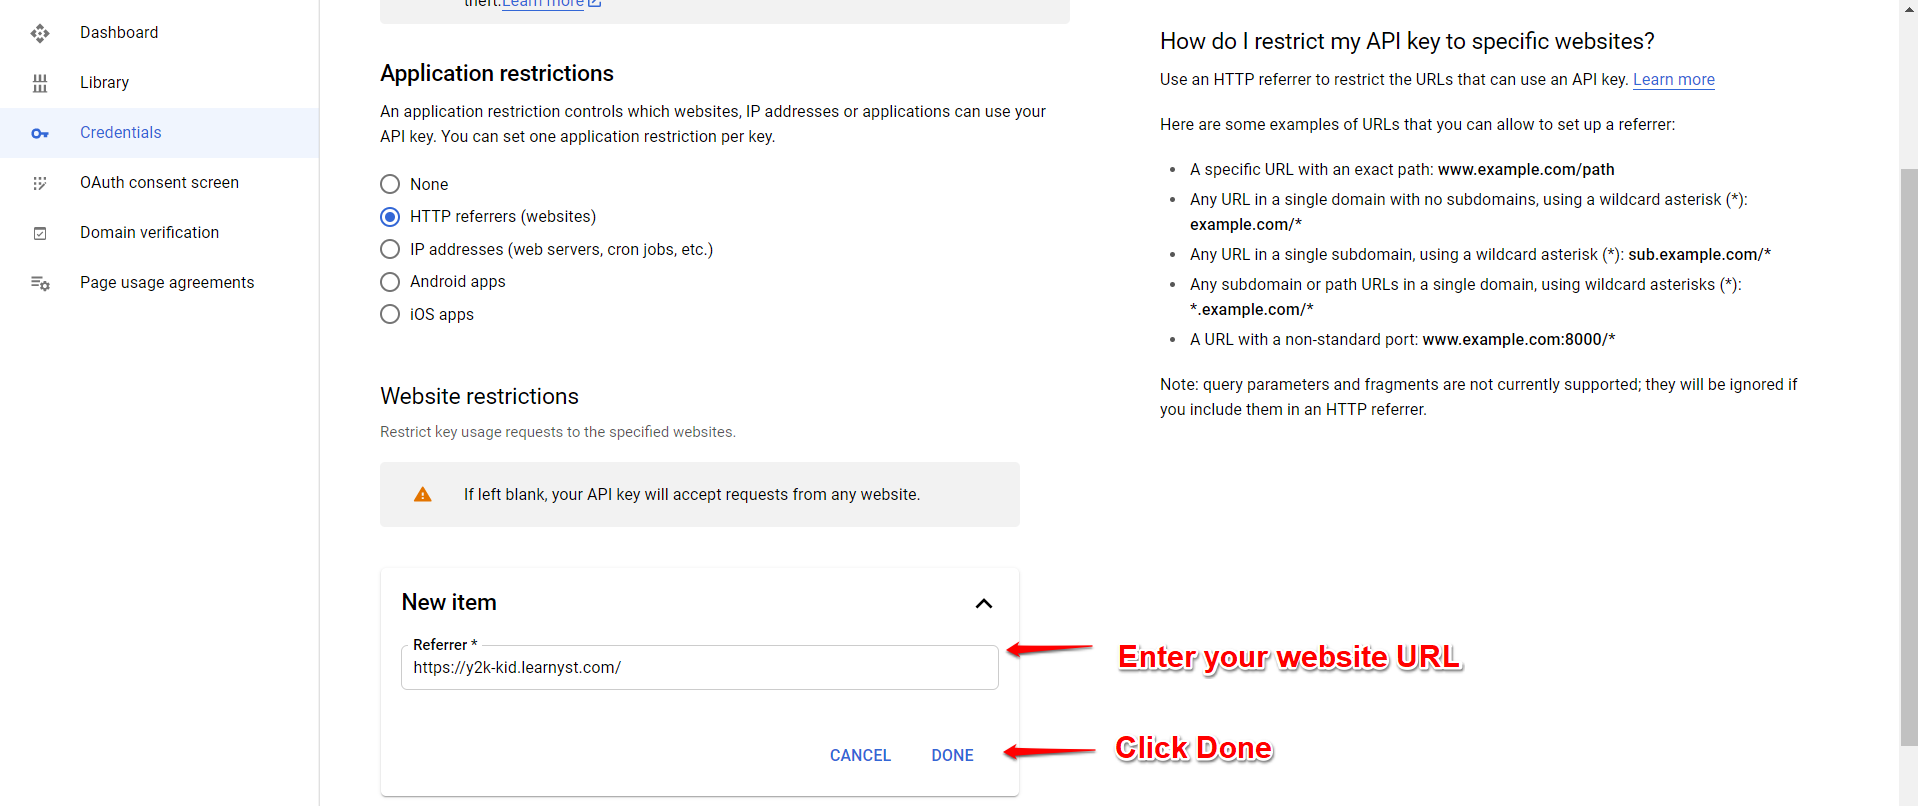
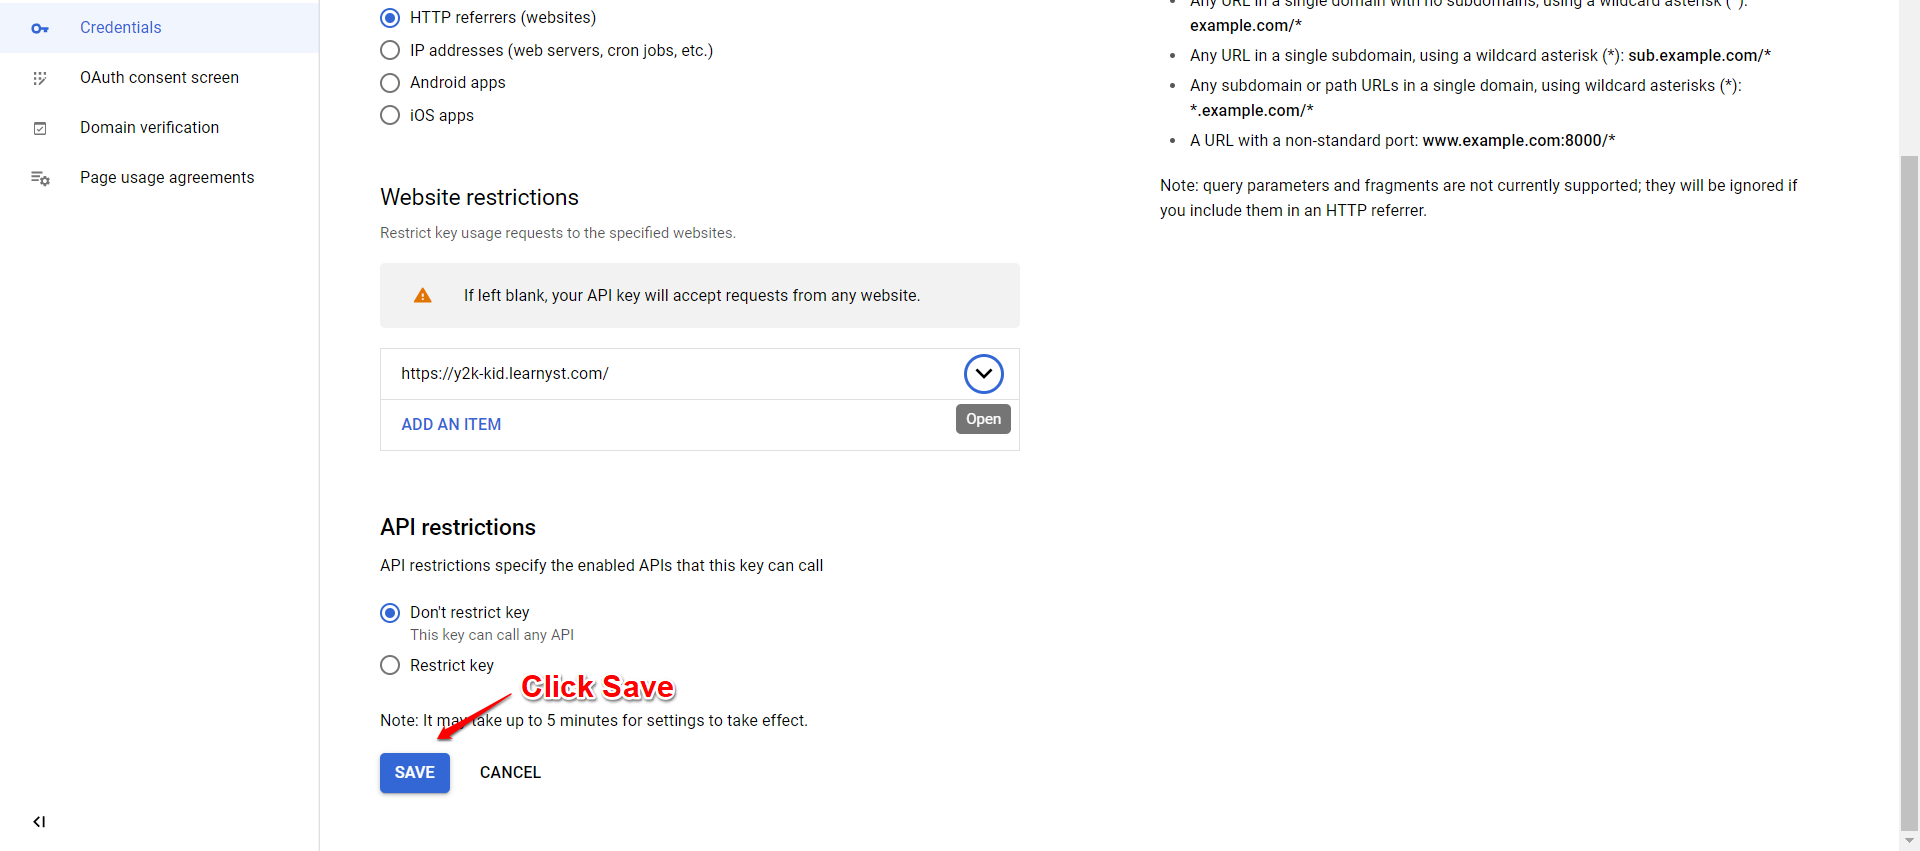
Now, scroll down to the Application Restrictions and select the HTTP referrers (option) and click on Add an Item

-
Now, enter your custom website URL and click on Done
-
Scroll down to the bottom and press the Save button.
-
You can now see the API key added as shown. Next, let us configure this project by creating the OAuth Consent Screen

#3. Configure the OAuth Consent Screen
-
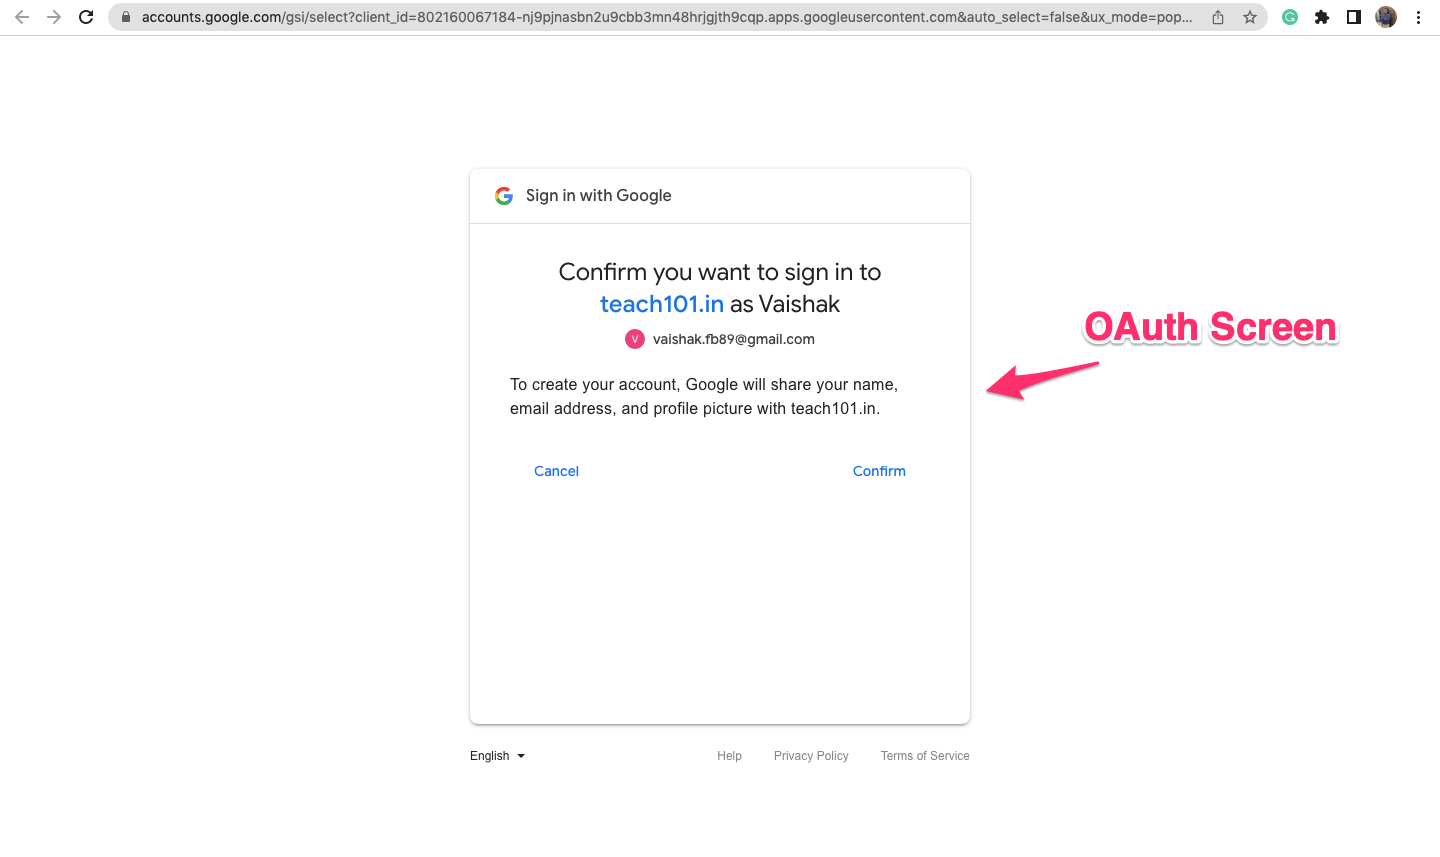
The consent screen tells your users who are requesting their data & what data you are asking for access to. For e.g: the image below
-
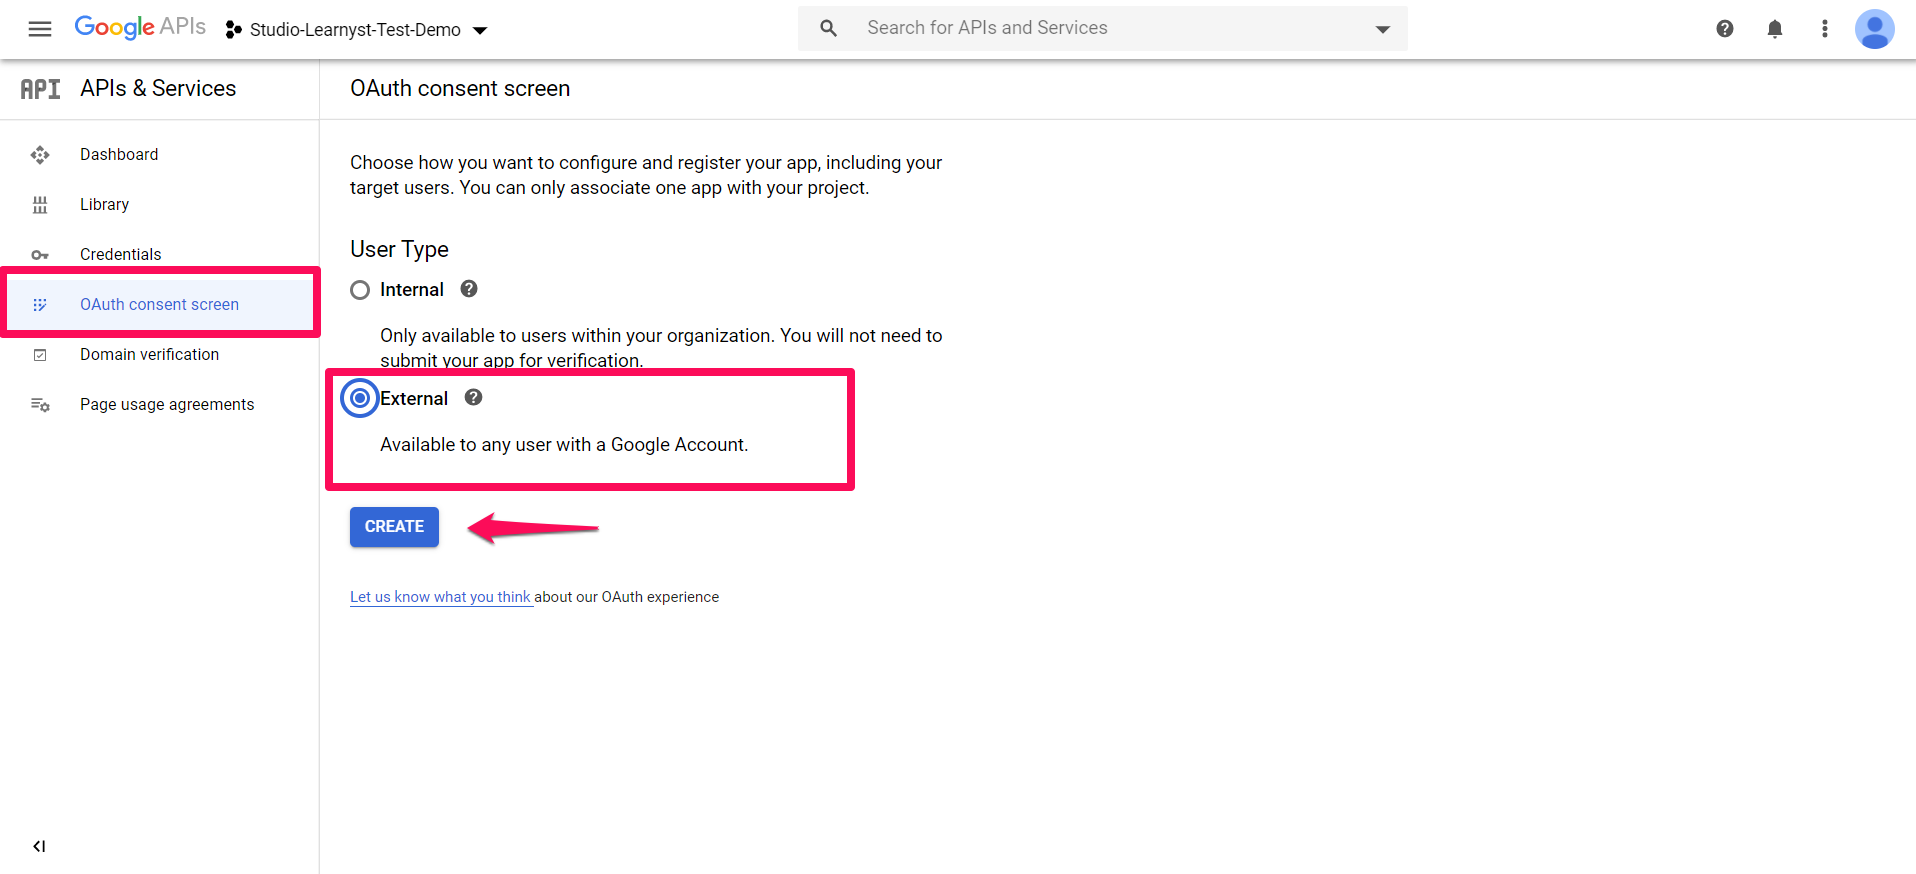
Follow the below steps to create a consent screen. Click on the OAuth consent screen and select the External option and click Create.
-
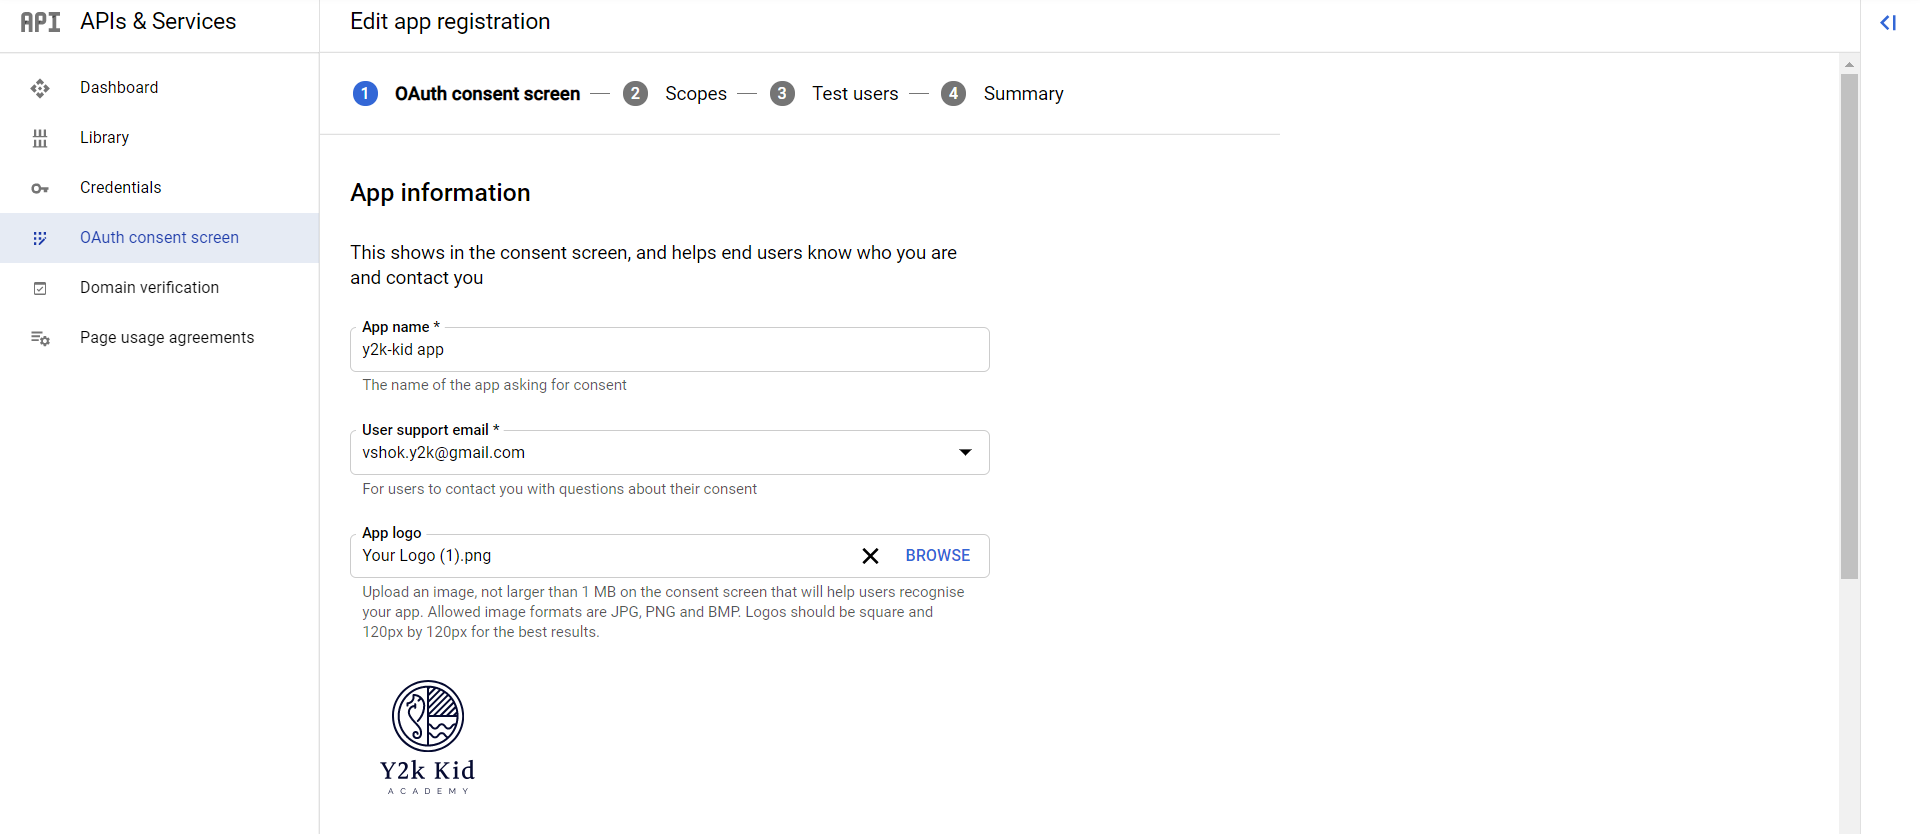
Now, enter your online academy's app name, support email, and logo info as shown.
-
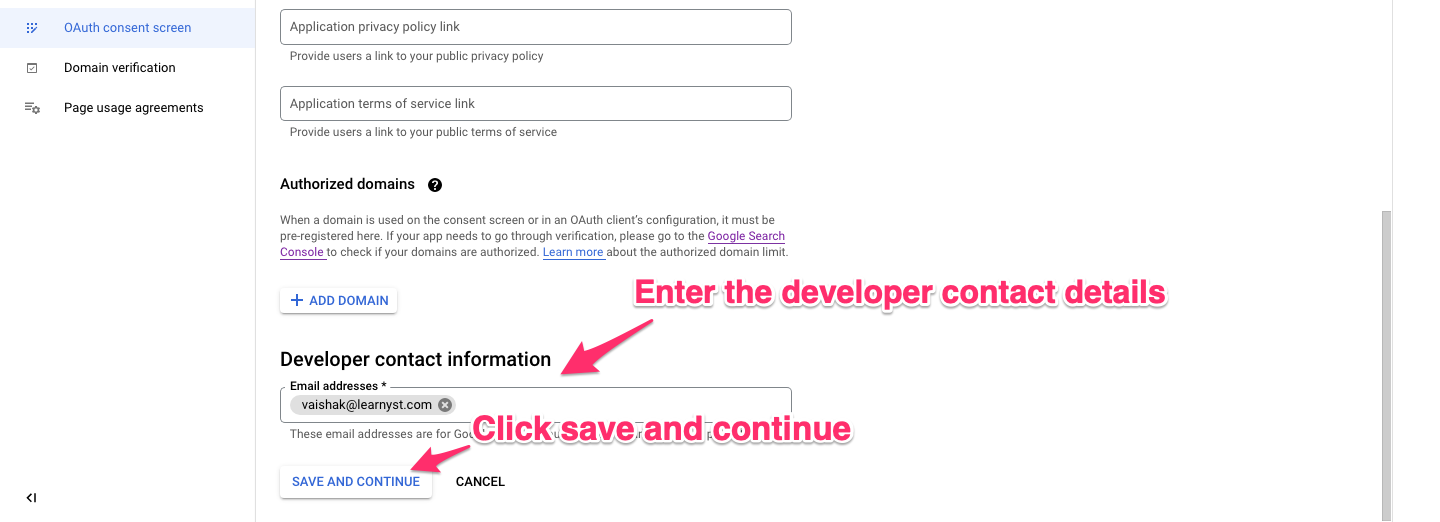
Scroll down the page. Enter the developer contact information and click on Save and Continue
-
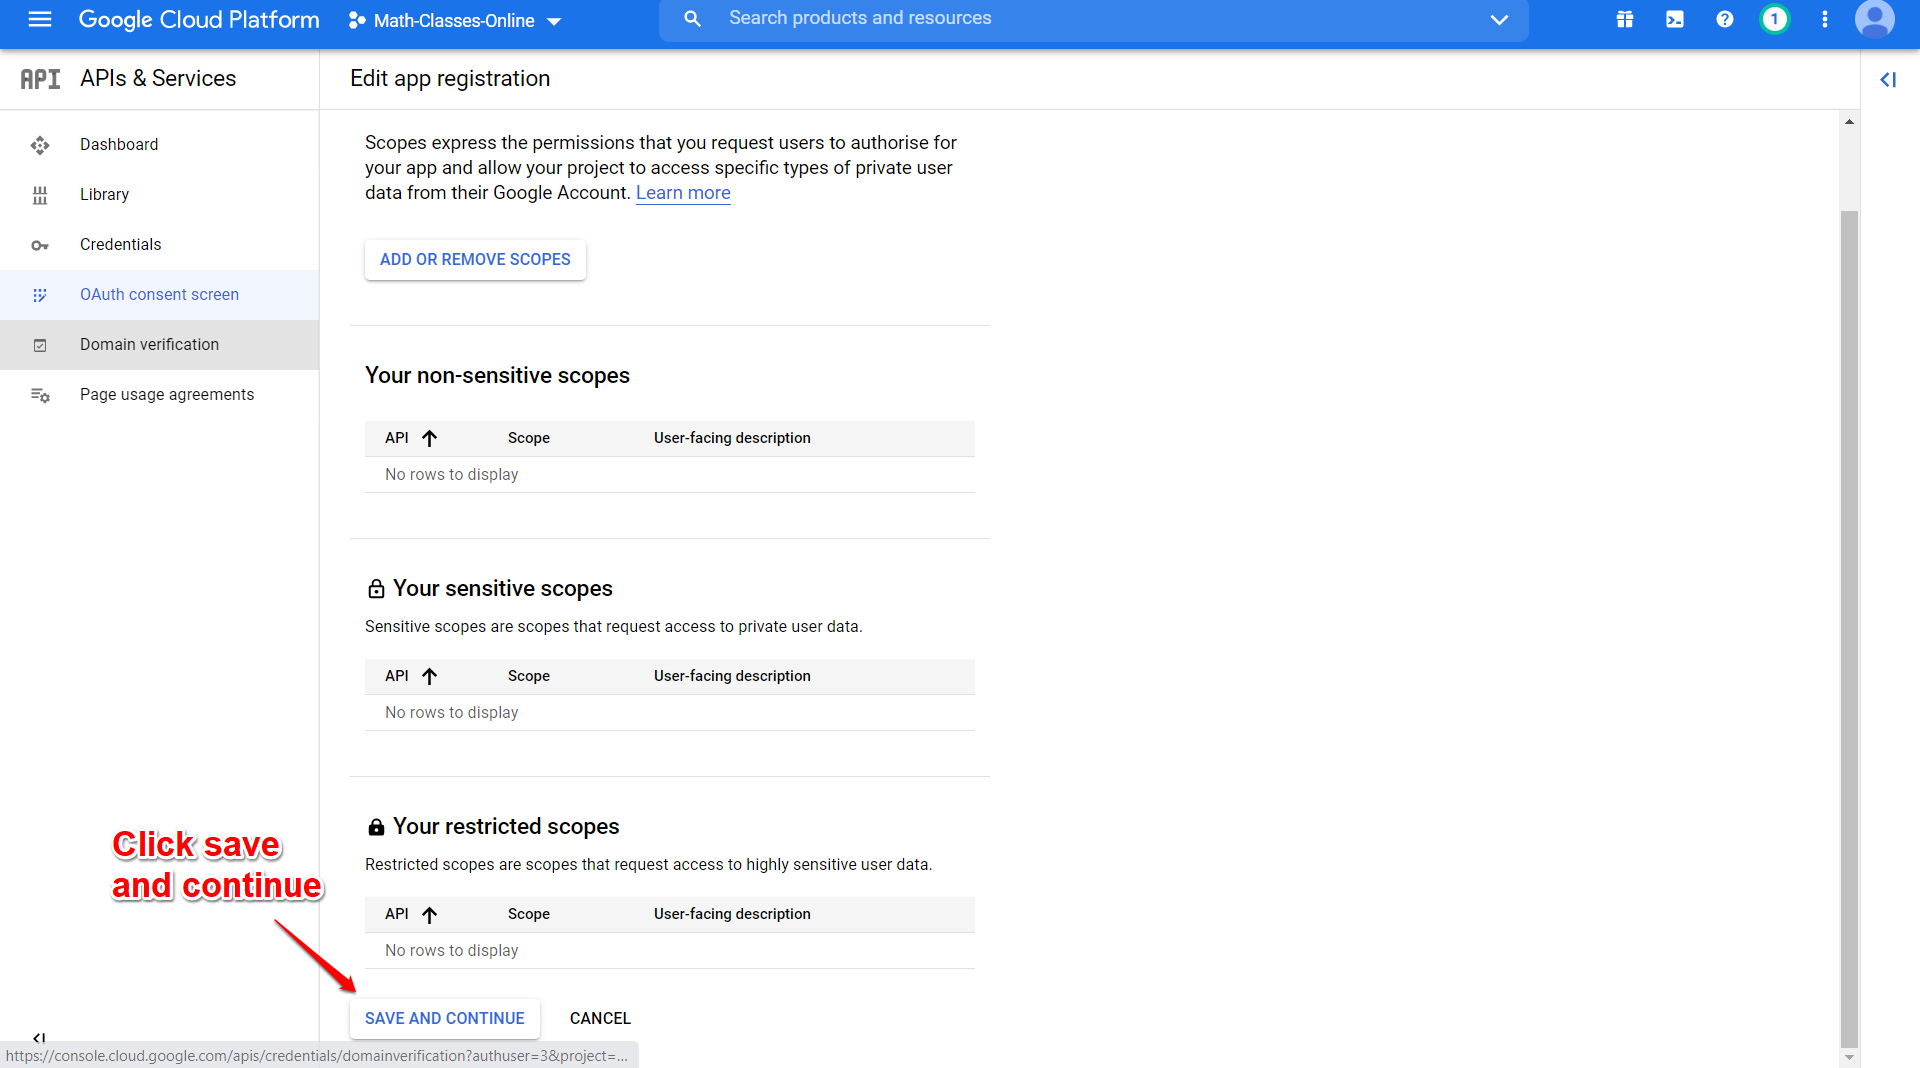
Right now we have completed the Oauth Consent Screen and moved to the Scopes scene as shown.

-
Scroll down the scopes screen and click on next.
-
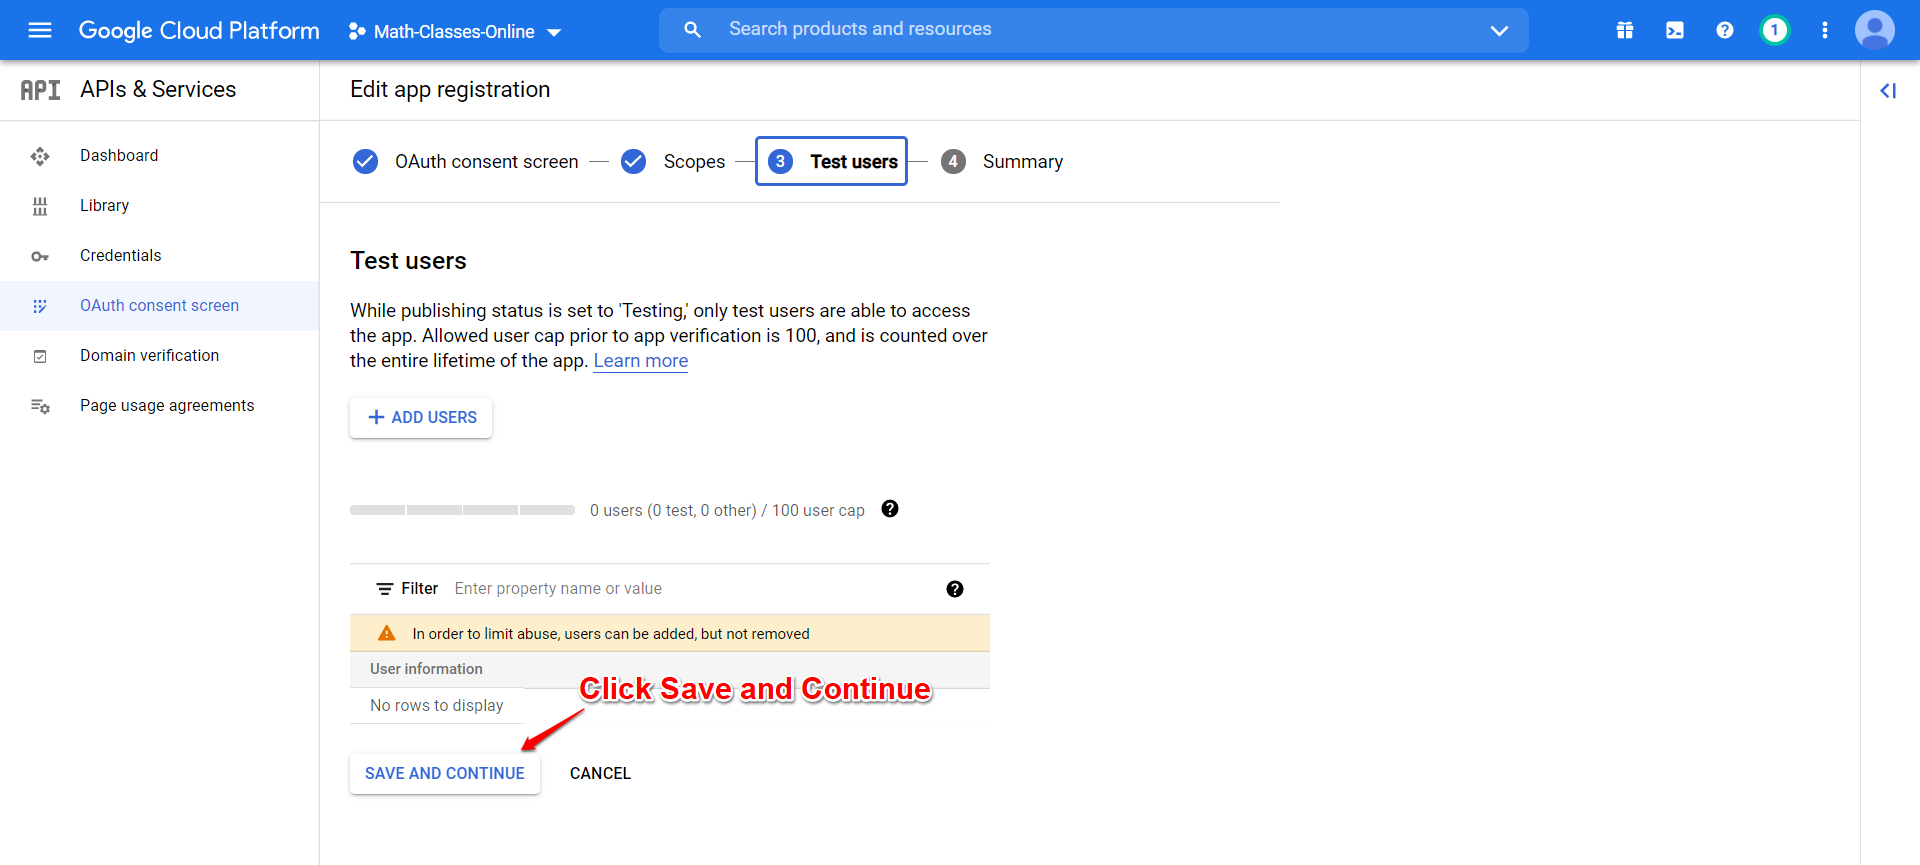
Likewise, click save and continue to test users' screens
-
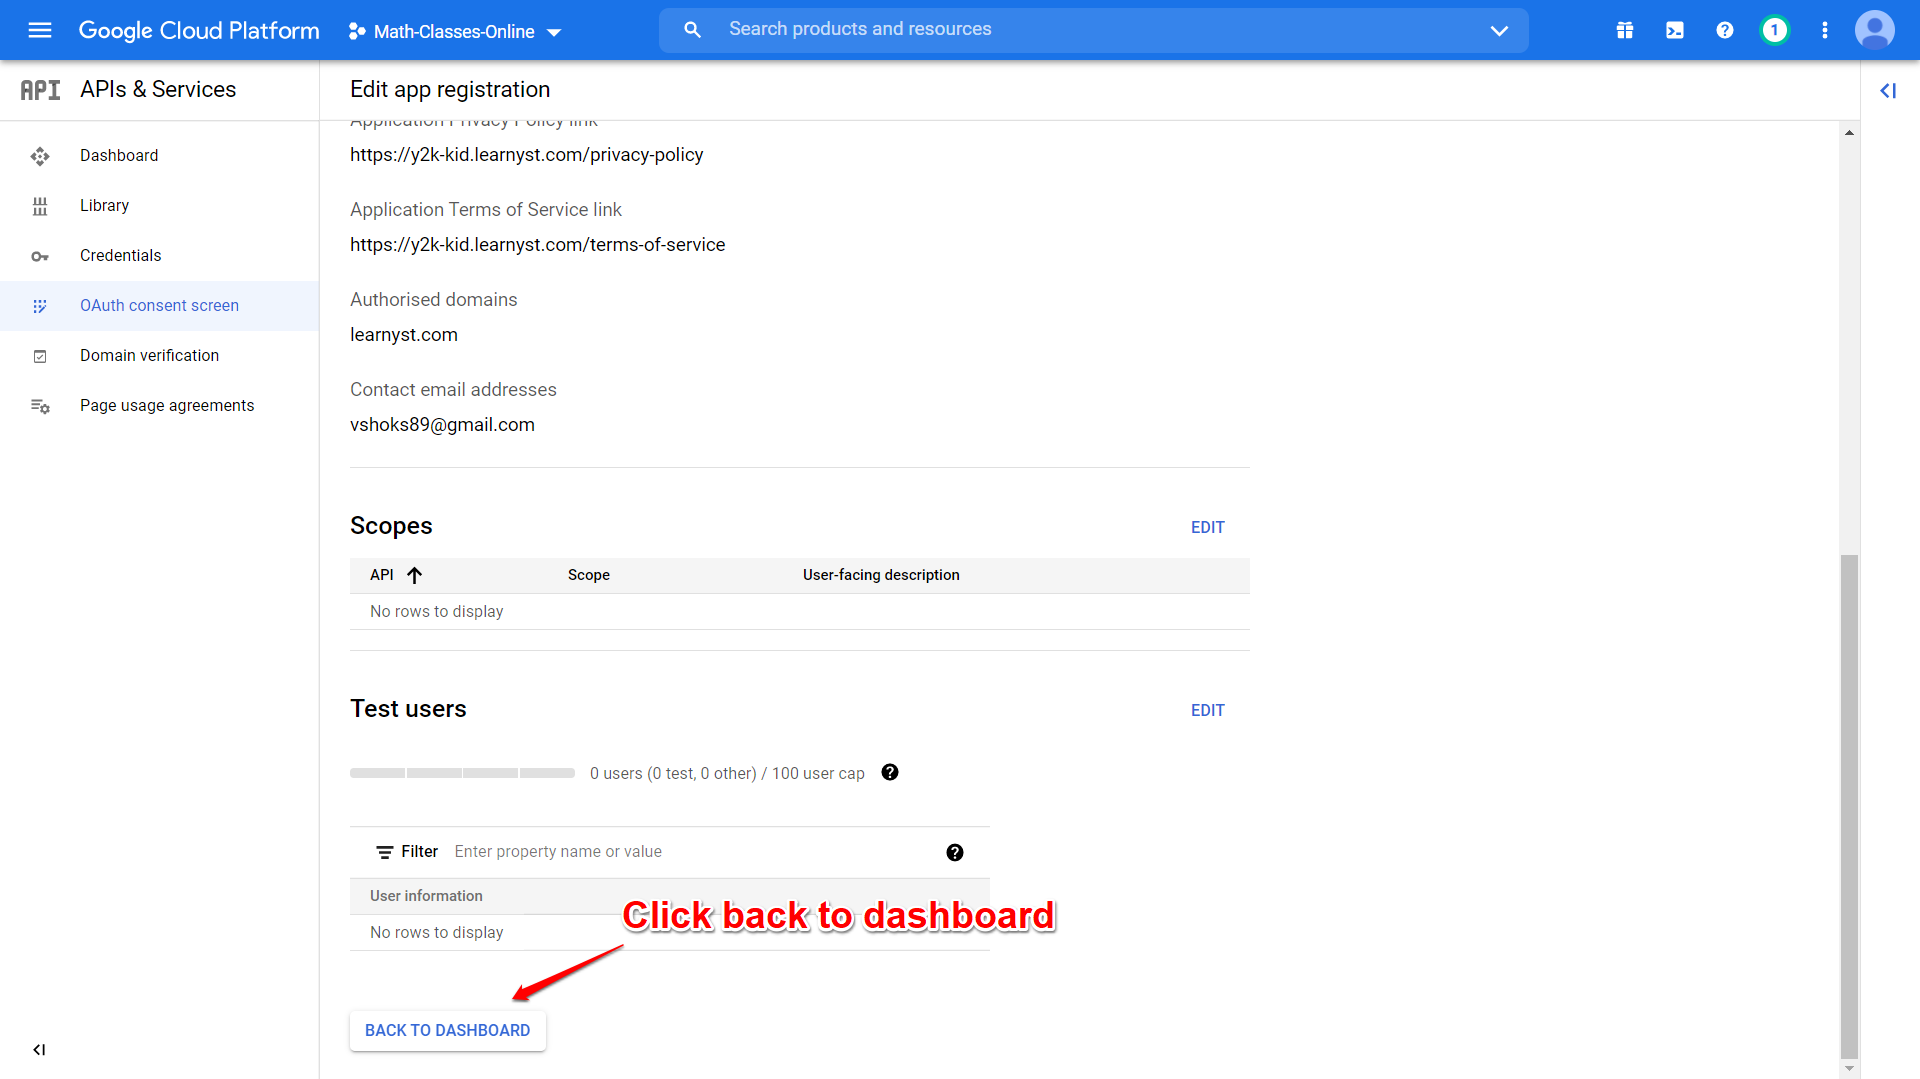
Once you reach the Summary page, click on the Back to the Dashboard button.
#4. Get Your Client Id and Secret Key
-
Later, under credentials choose “OAuth Client Id”

-
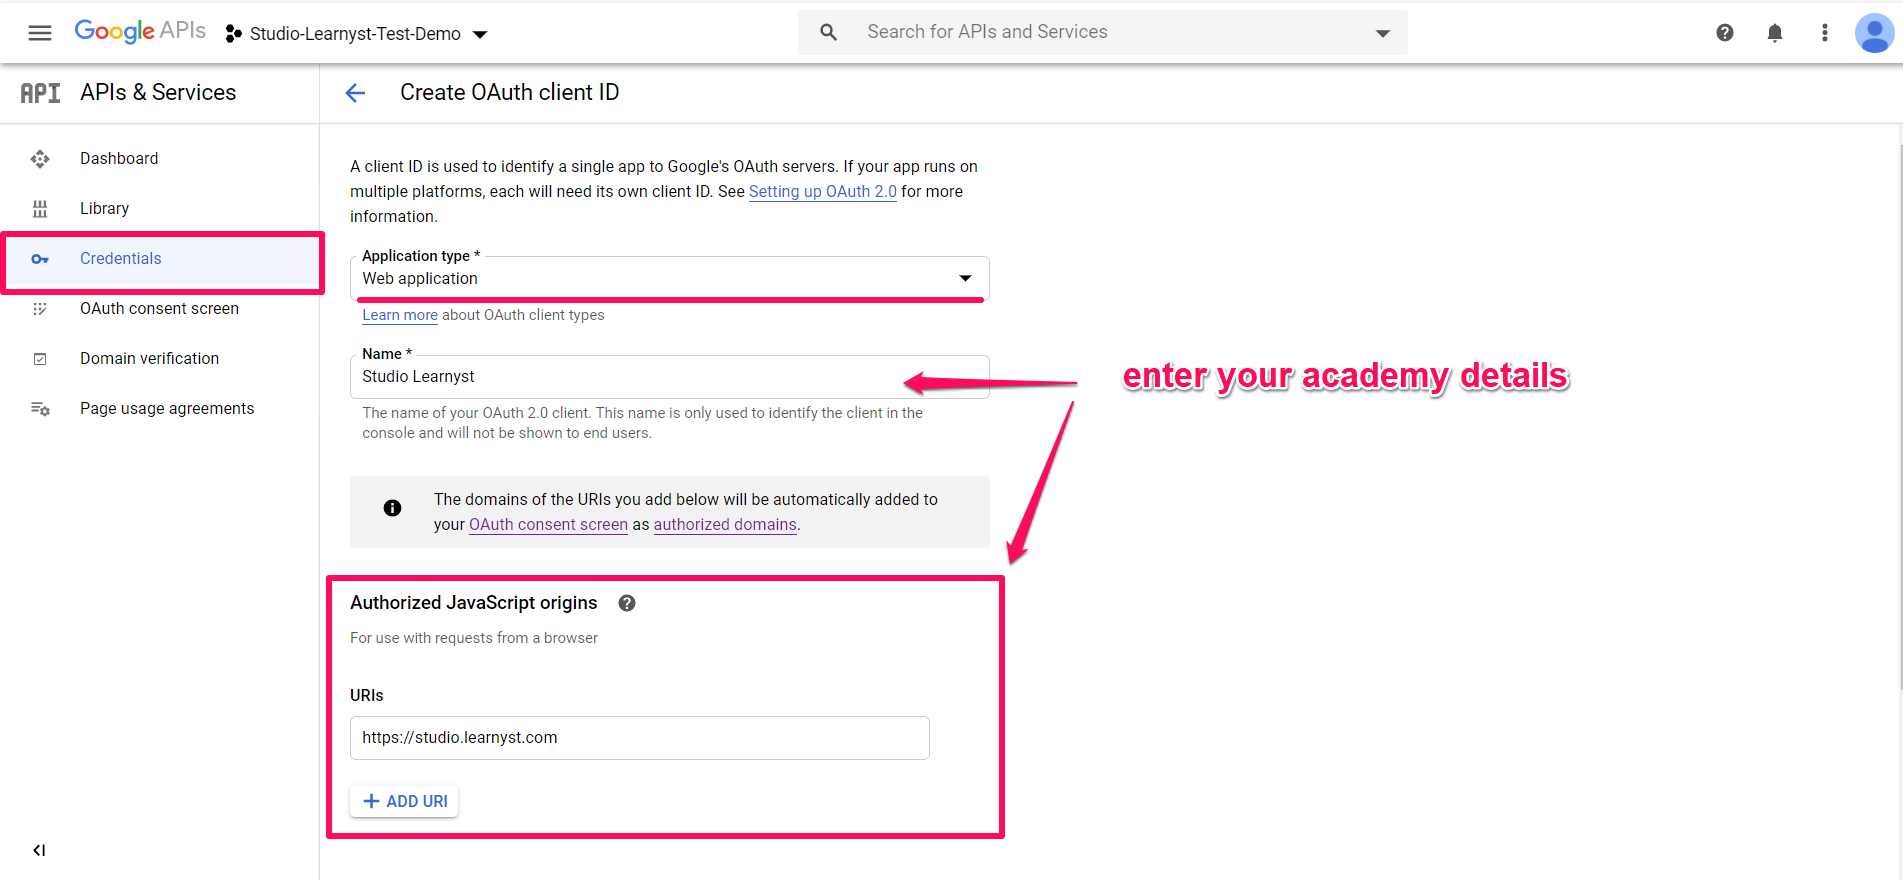
Select “Web application” and enter your website URL under “Authorized Javascript Origin”
-
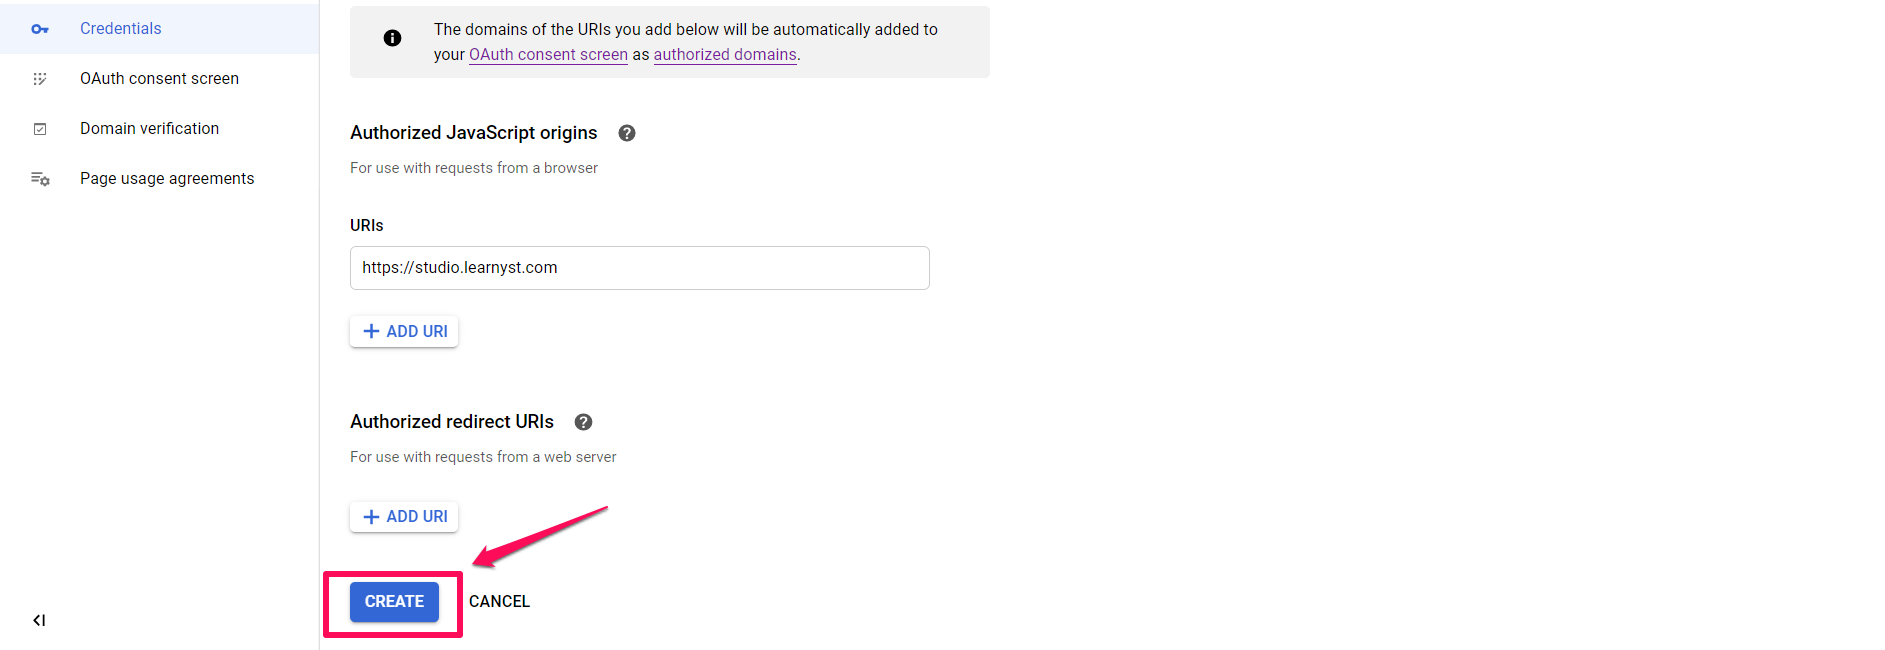
Then click on “Create” as shown below.
-
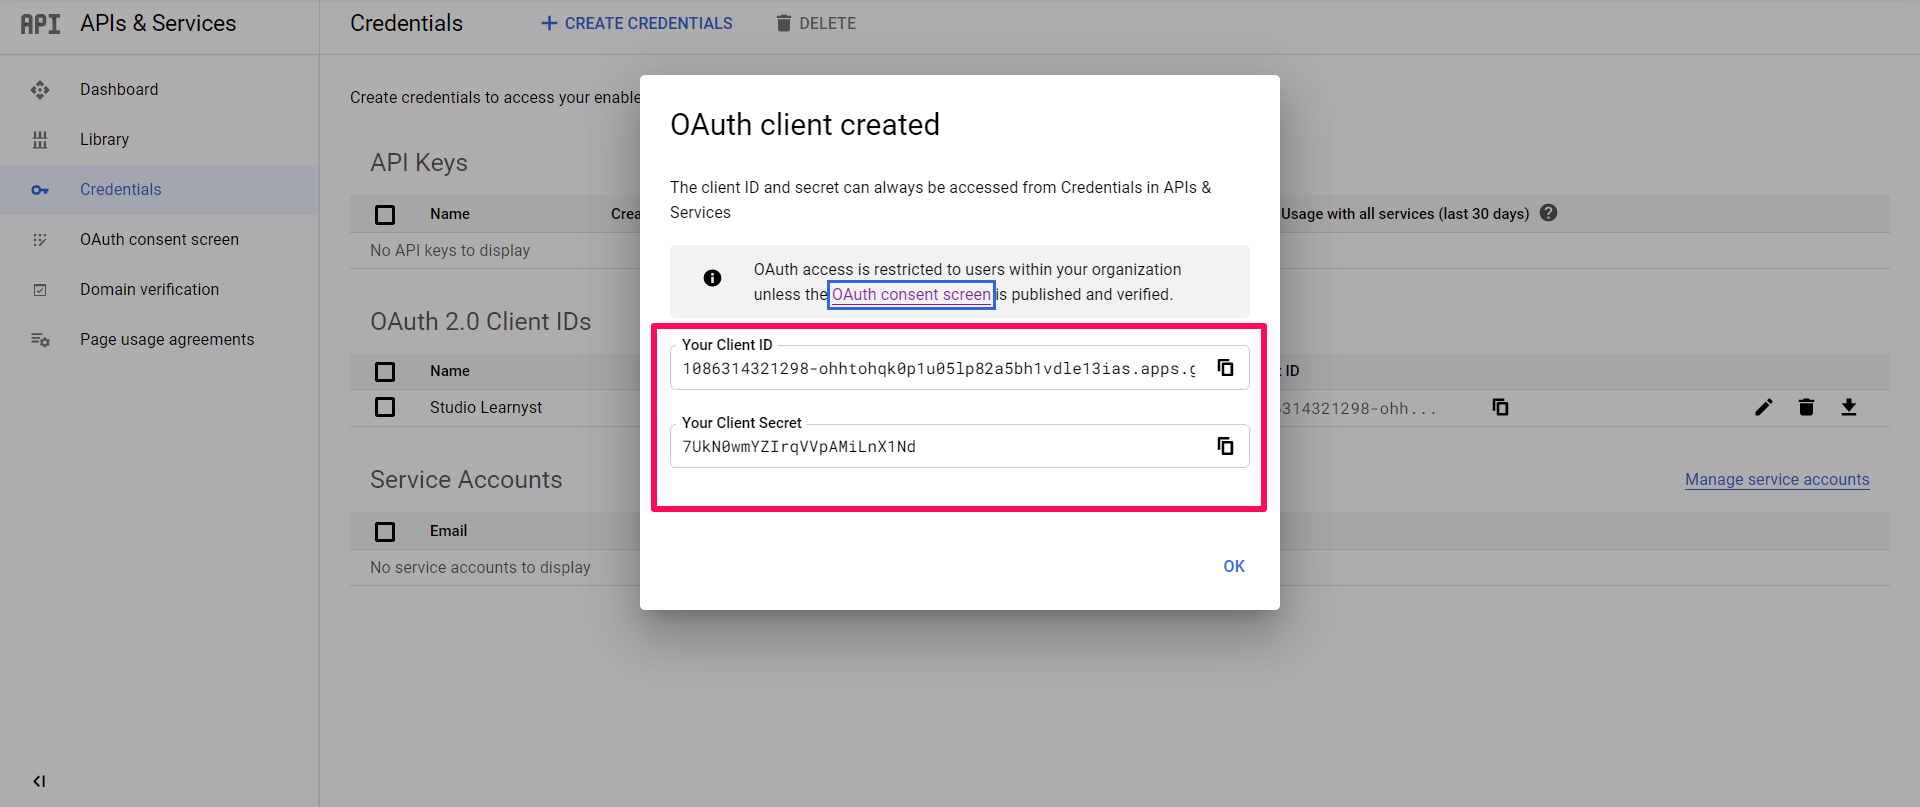
Now your OAuth Client is created. You can copy and save this client id & client secret key & use it later in the Learnyst admin dashboard.
#5. Paste the keys in Learnyst Admin Panel
-
Now go to your admin dashboard and click on the Websites & Apps tab and from the dropdown click on "Signup Settings"

- Now choose the Sign up Settings

- Click on Google option.

-
Here you need to paste the client ID, client secret key, and API key in the boxes provided and then click on “Update” as shown below.

- As soon as you Update, your students will be able to signup from your online academy using their google signup login.
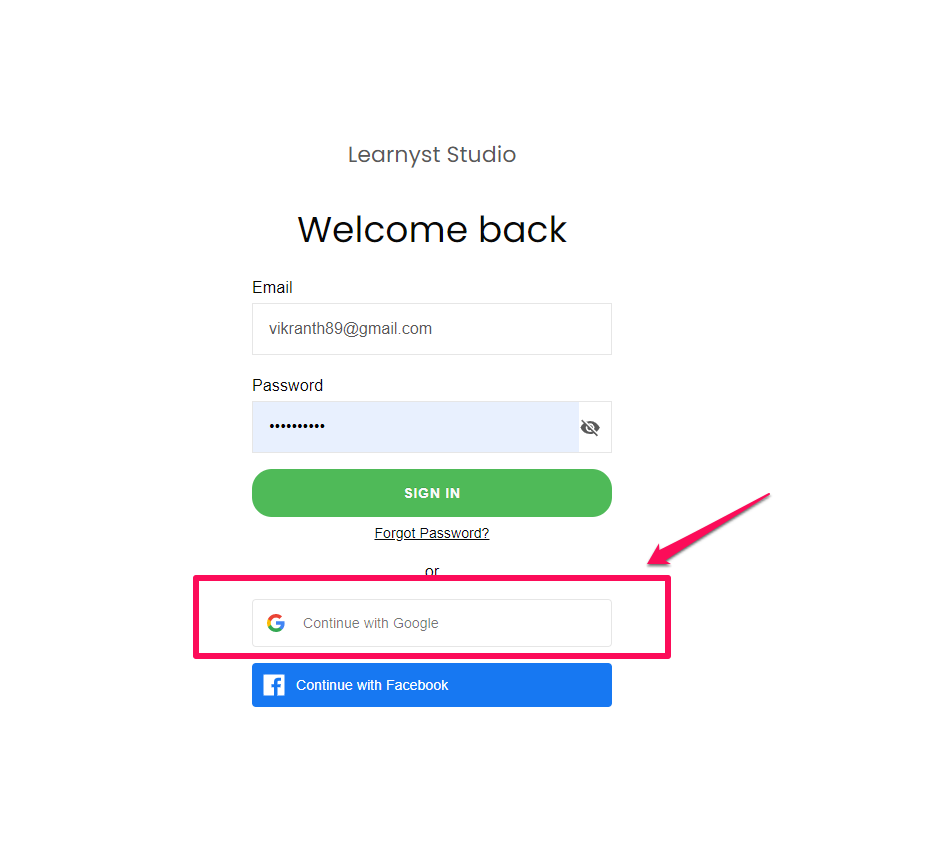
Hope this article, helped you to integrate google signup into your online academy.
To know how to enable google signup from mobile, please refer to Enable students to signup using google - For your Mobile App
You can also check :
Enable these social signups and allow learners to signup easily to your academy.
