-Jun-10-2024-01-31-39-4468-PM.png?height=120&name=Learnyst%20logo%20(2)-Jun-10-2024-01-31-39-4468-PM.png)
The new Learnyst website builder will help you design a multi paged website without any design experience.
In this article, let me give you a quick overview of the headers and footers.
Tables can't be imported directly. Please insert an image of your table which can be found here.
Note: Want help with creating your own course website?
Login to this free online course using your admin email and access the course from our teach101 website.
-Aug-24-2023-01-52-48-2235-PM.png)
Alternatively, you can check this complete YouTube playlist after Feb 3rd, 2023.
Headers & Footers
There are two ways to create headers & footers on your website.
1. Starting with a premade header or footer
The builder comes with premade headers and footers. You can add them like you add any block. Filter the blocks by Headers or Footers in the block popup sidebar and then click on a header or footer to add it on your page.
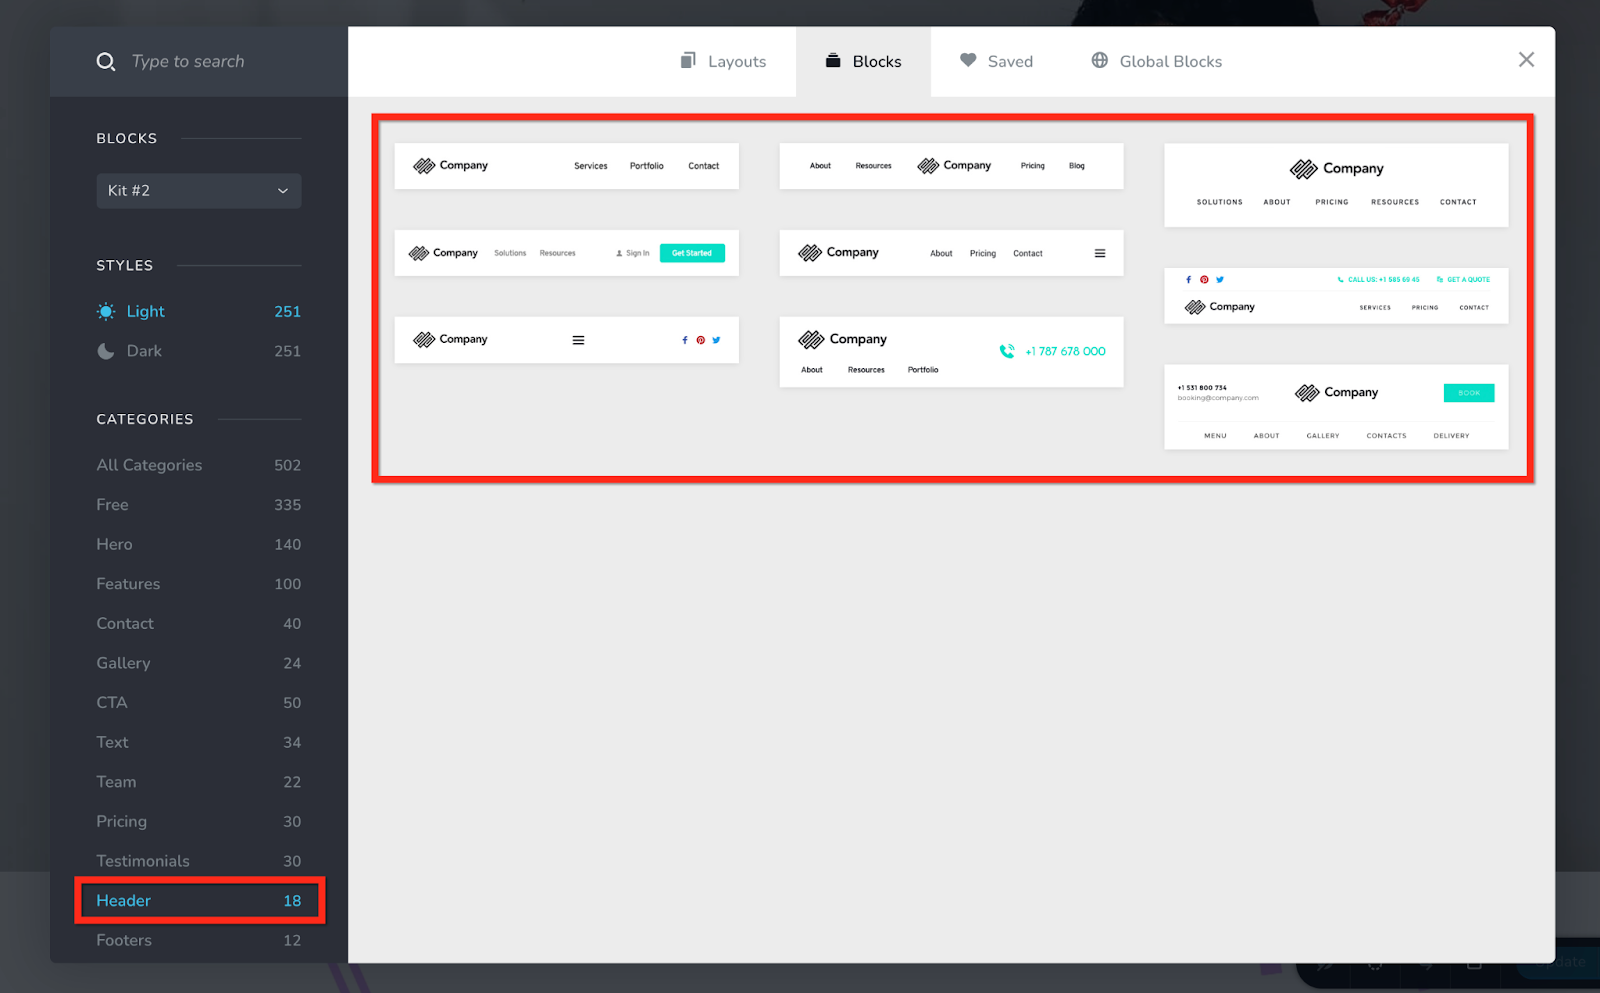
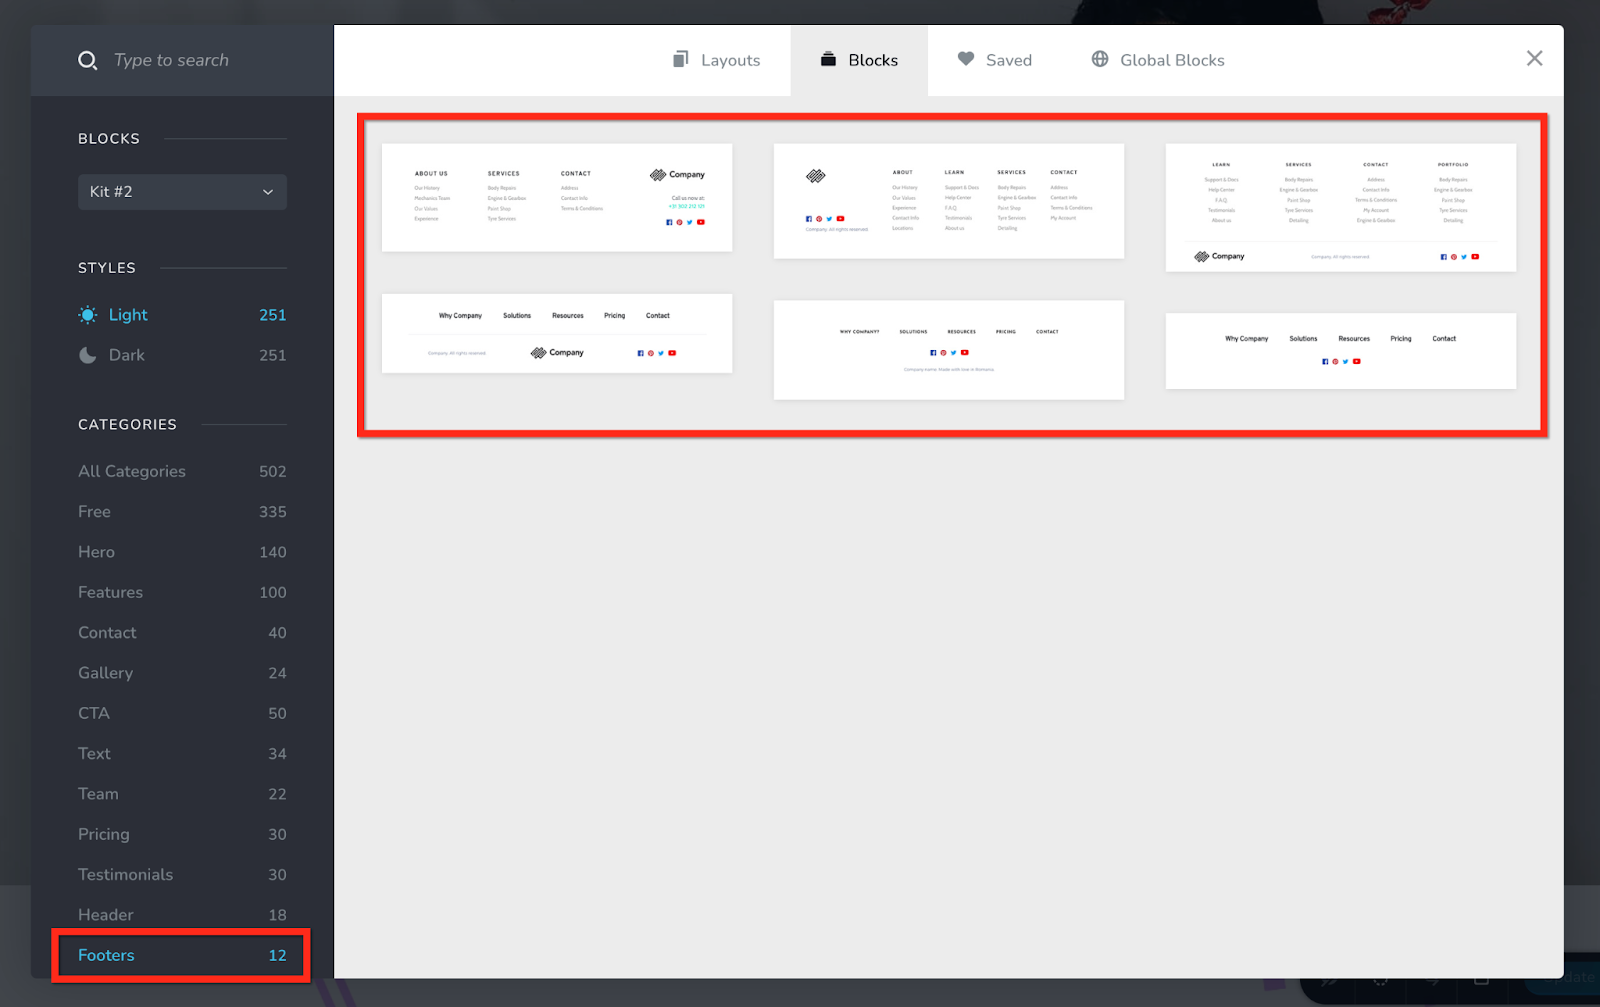
Important: The premade headers & footers are not only premade designs but also come with special options like the Sticky option for the header for example. This option will not appear if you choose to build your header by starting from scratch.
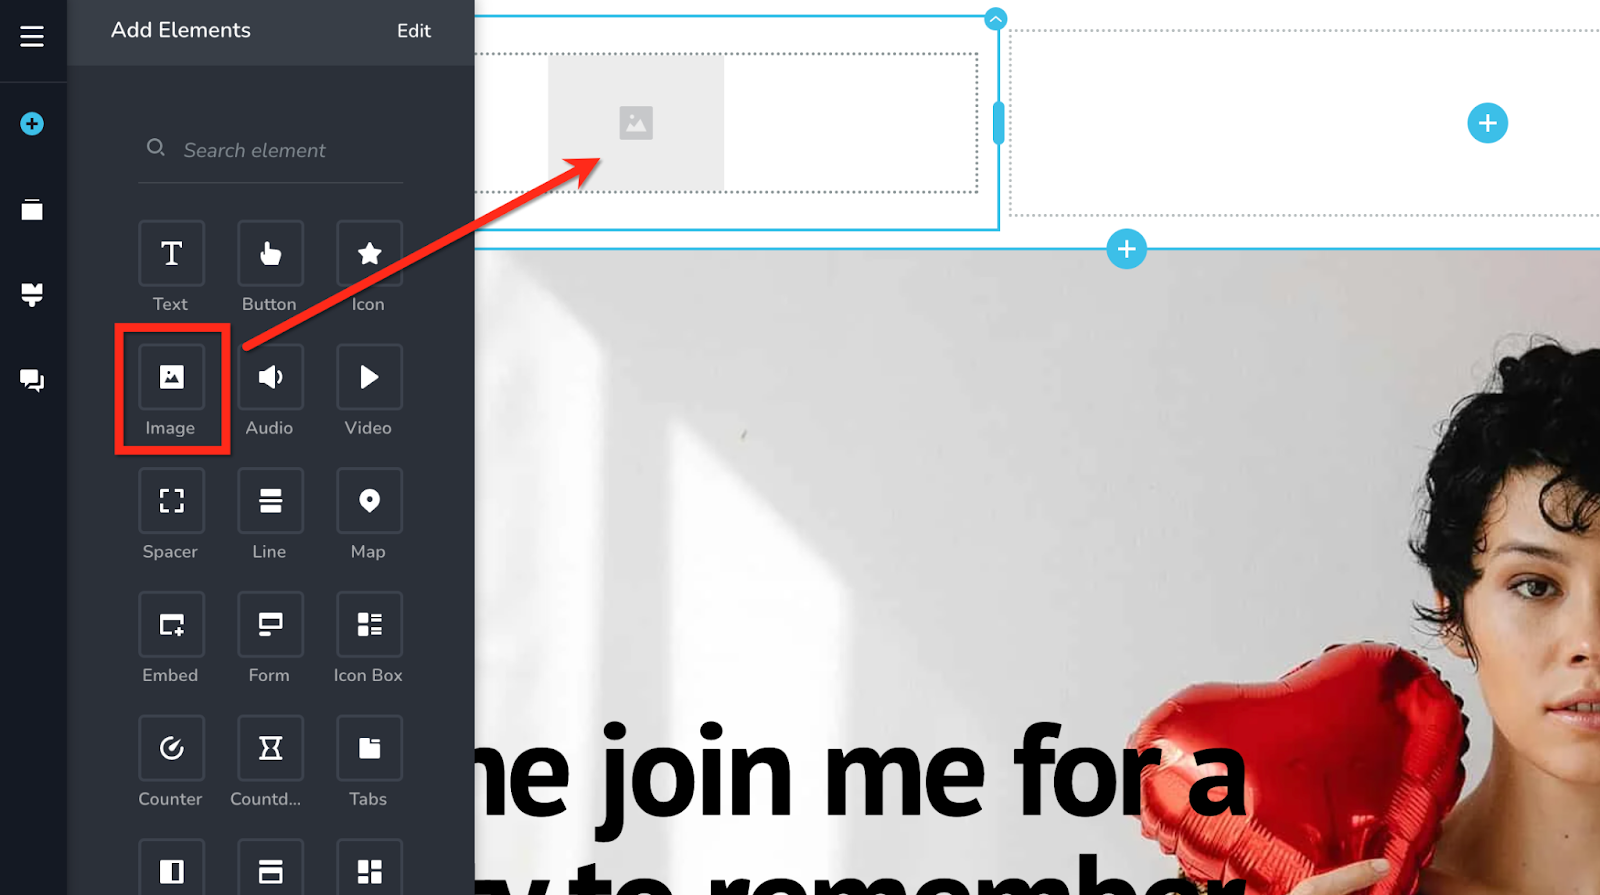
2. Create your own
The second option to build a header or footer is by starting with a blank block and building them from scratch.

Next you’ll add elements like Columns for the structure, Image for the logo, Menu for your main menu, etc.
How to Make a Header Sticky
Once you’ve added a header from the premade library all you have to do is select one of the 3 types of headers from the Header options.
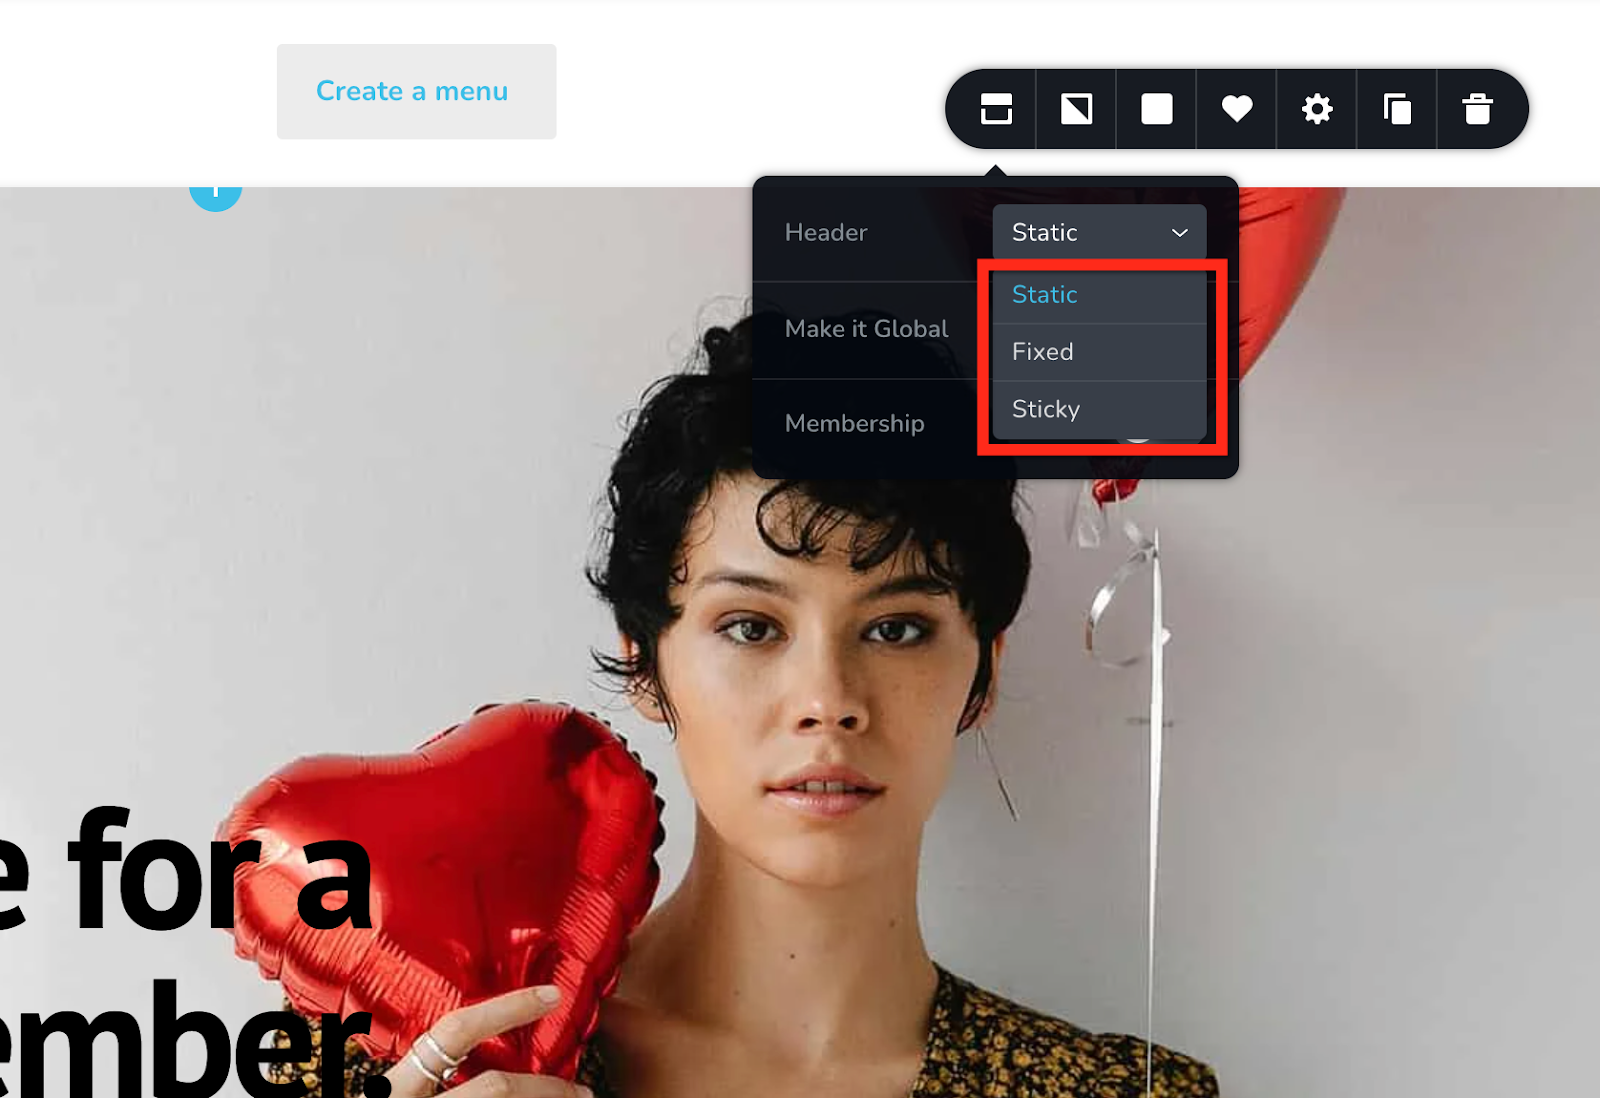
Static - this is a default header that stays static
Fixed - the header stays fixed when you scroll on the page
Sticky - when you scroll a new container appears where you can build anything you want, the same header, or a promotion or anything, by dragging new elements from the element panel
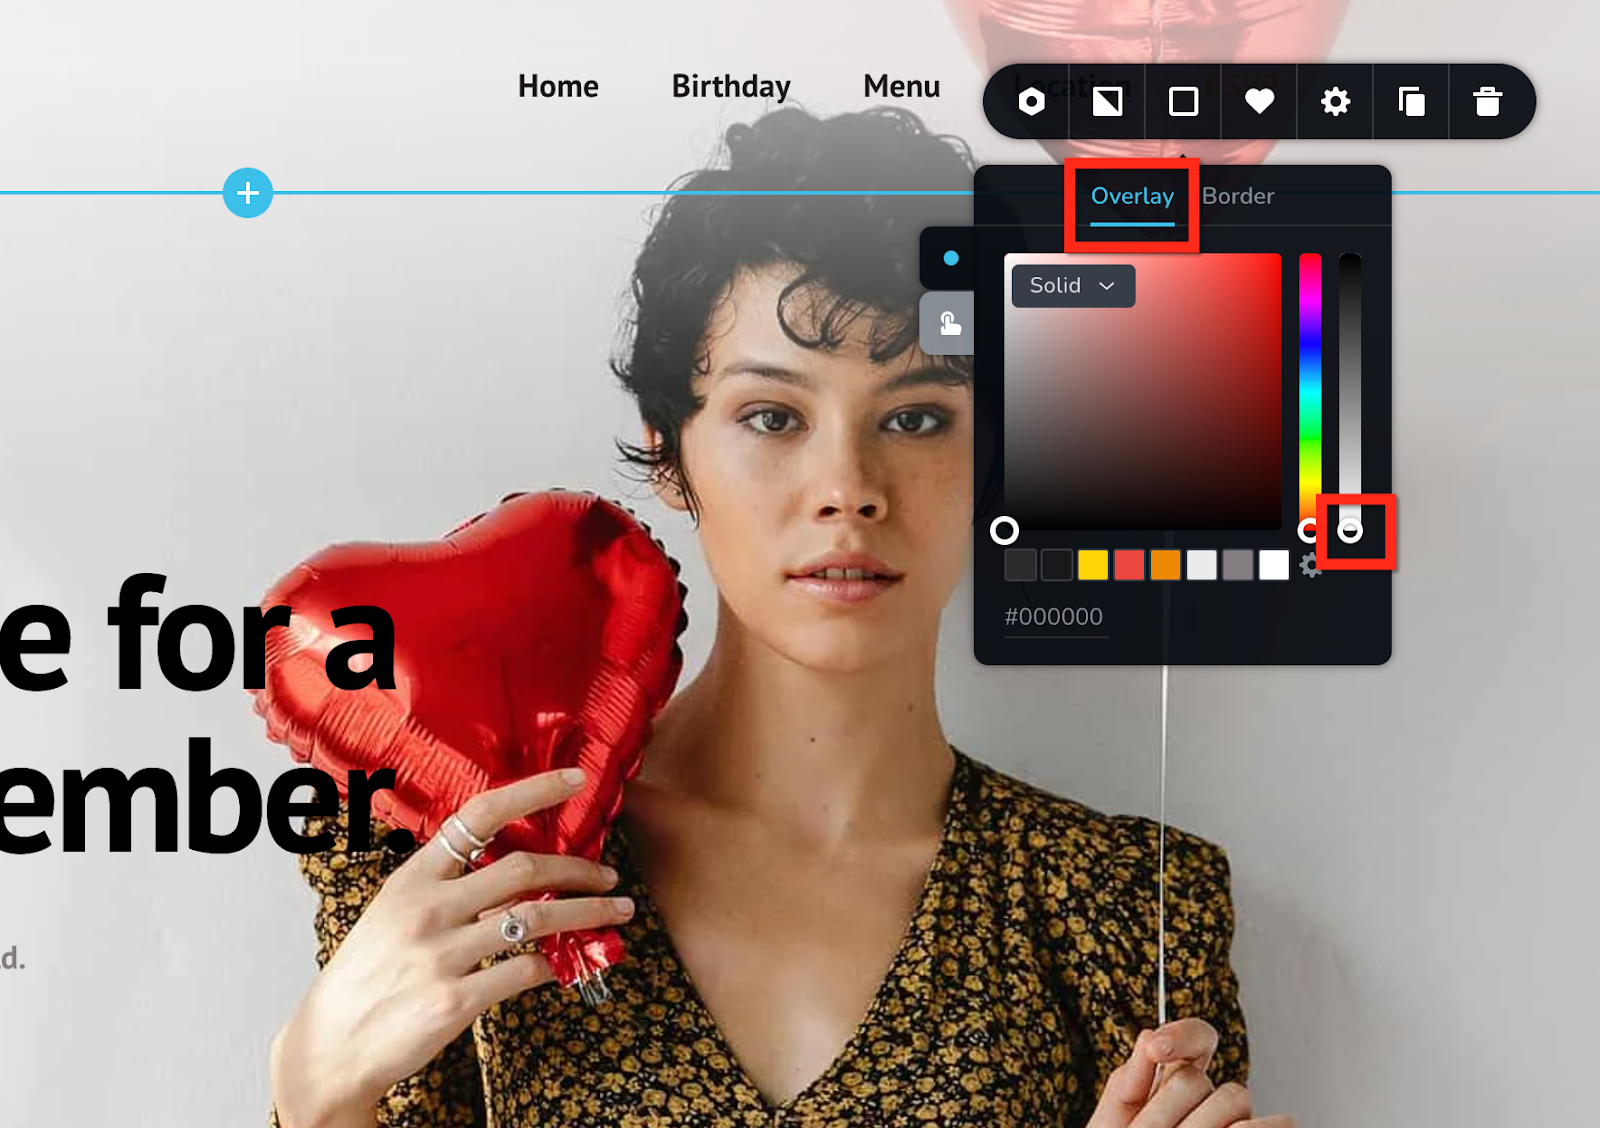
How to Make an Overlay Header
Sometimes you need to create an overlay header that goes over the next section that most likely is a hero block or image.

You do this in 3 steps:
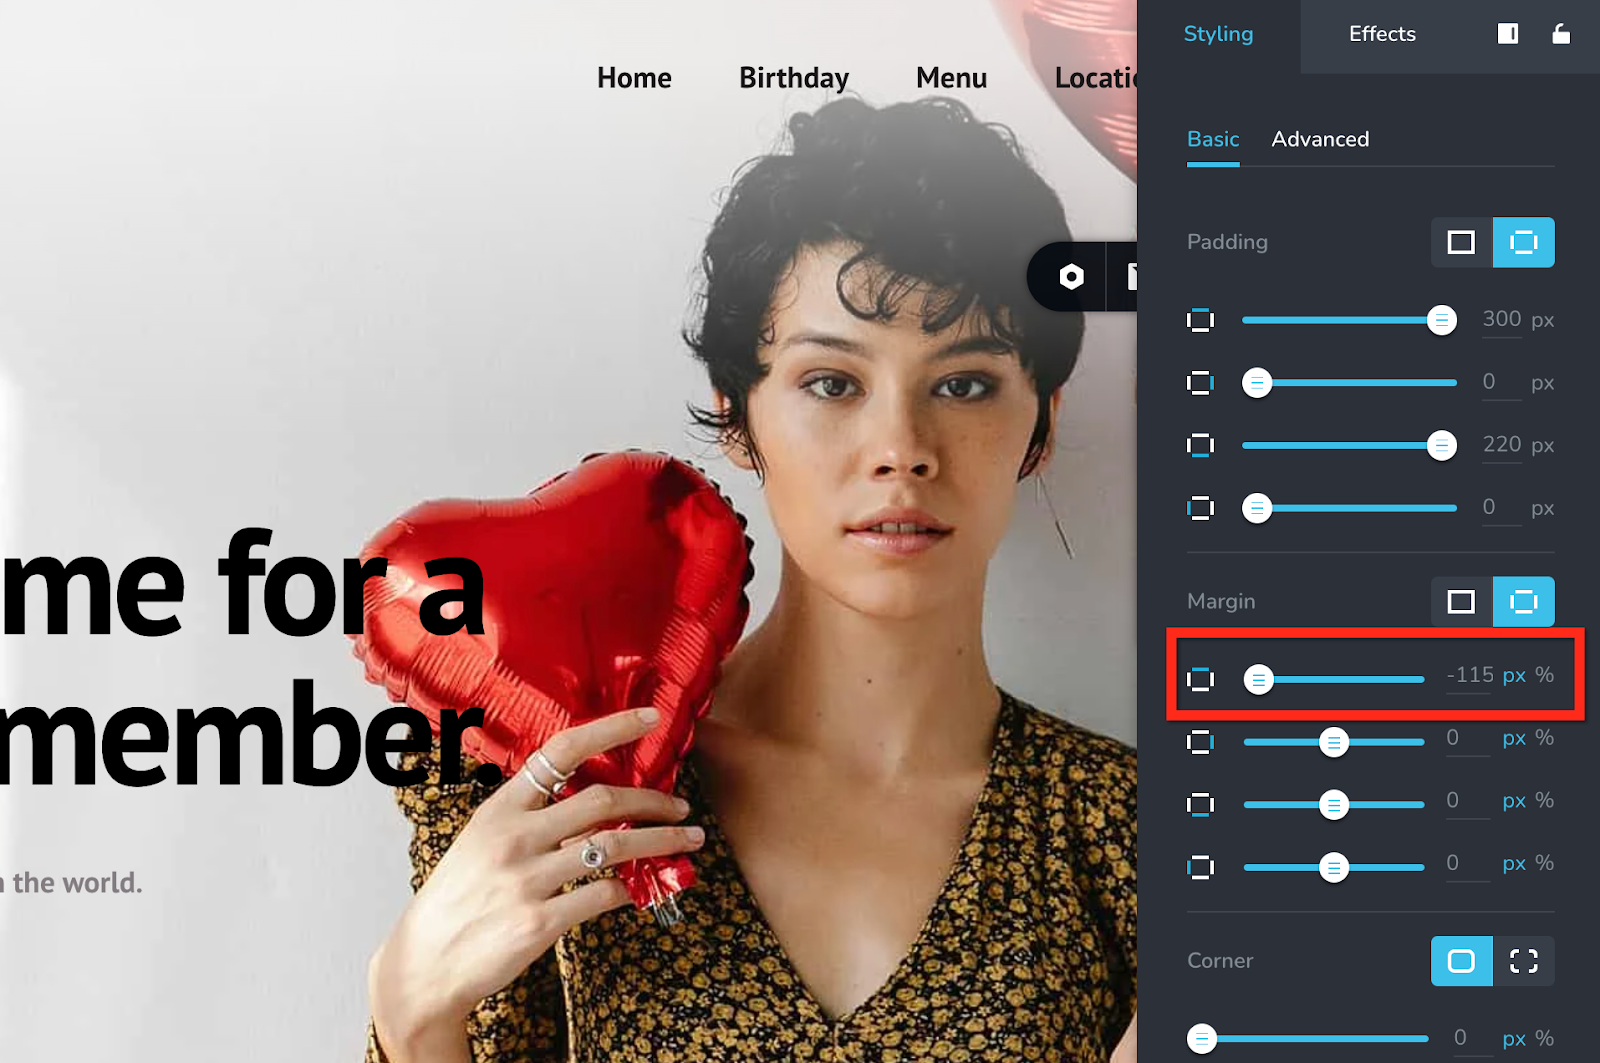
1. Make sure your header block has the overlay opacity set to 0
2. Make sure your z-index option for your header block is higher than the hero block you want to put your header over. It doesn’t matter what value it has, it just needs to be a higher value than the next hero block, this way it will stack on top.
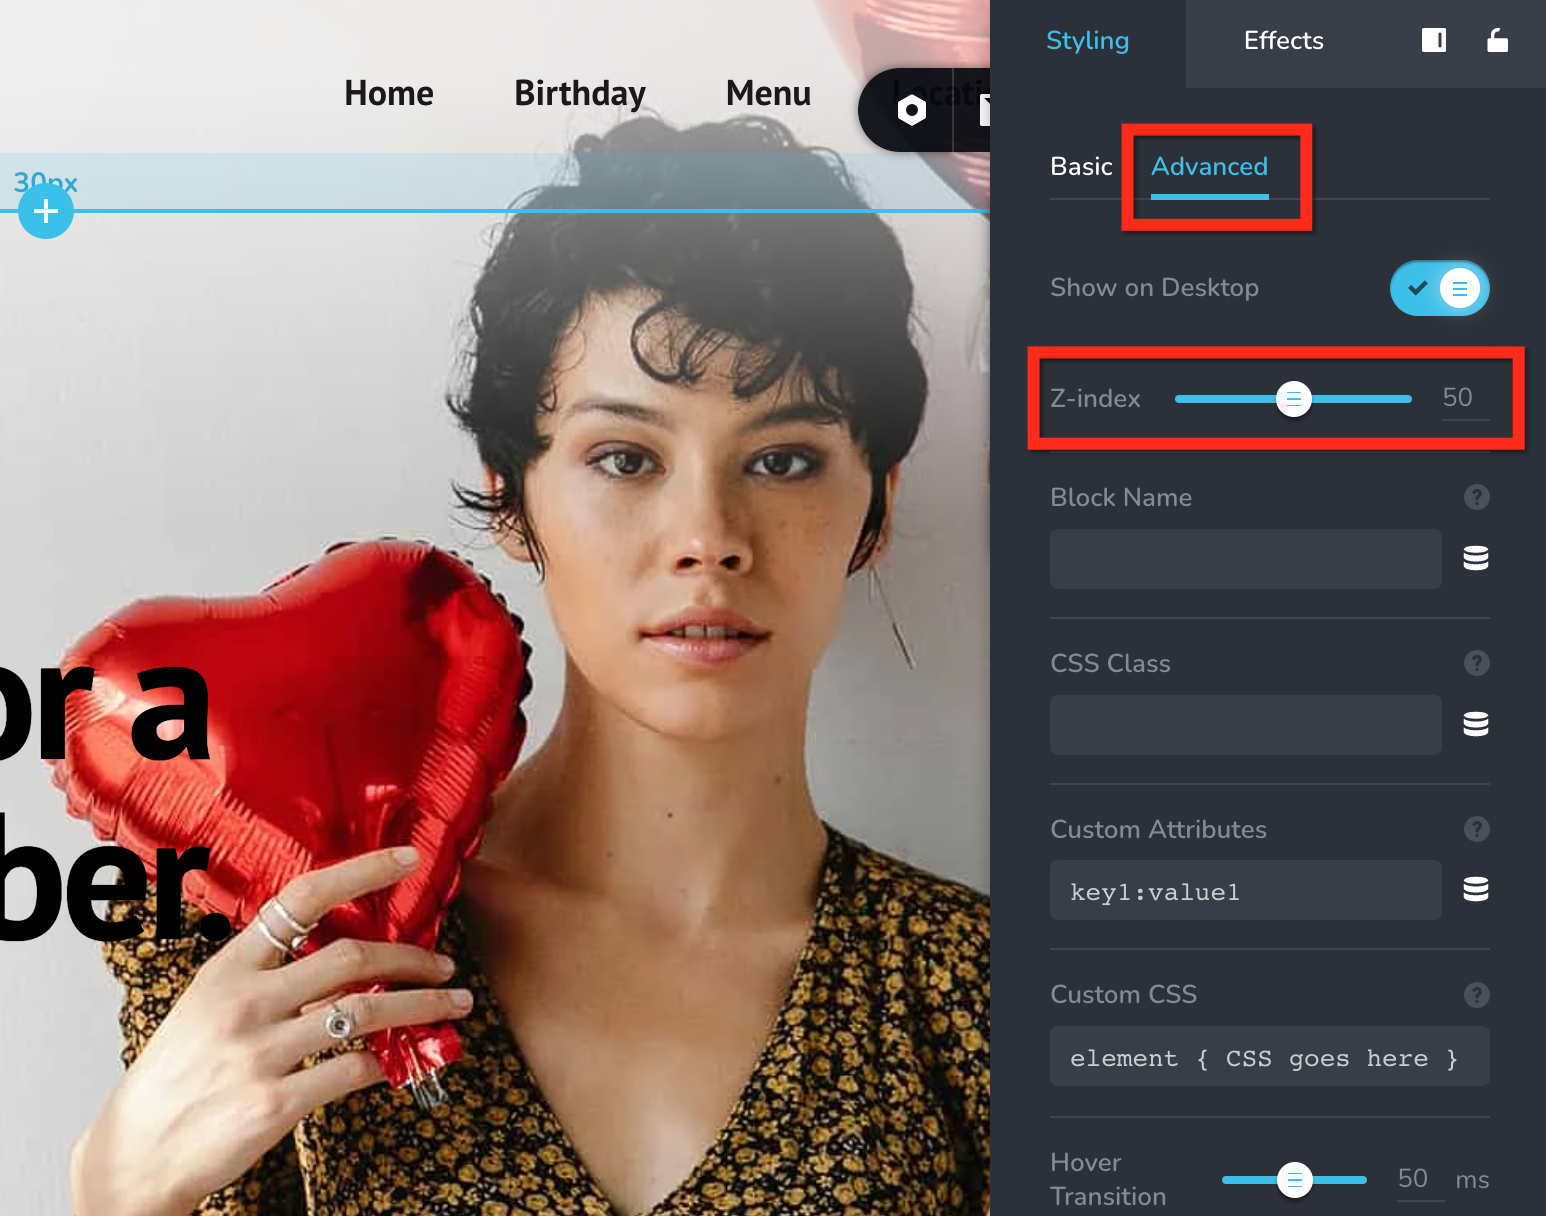
3. On the next hero block, set a top negative margin value, so the hero block will go under the header. The negative value should be the height of the header.
How to Put Your Header & Footer on all the Pages of Your Website
Once you’ve built your header and footer, you’ll want them across all your pages of your website. You’ll use global blocks and display conditions to do that as follows:
1. Making the block global
Activate the Make it global option from the header or footer block.
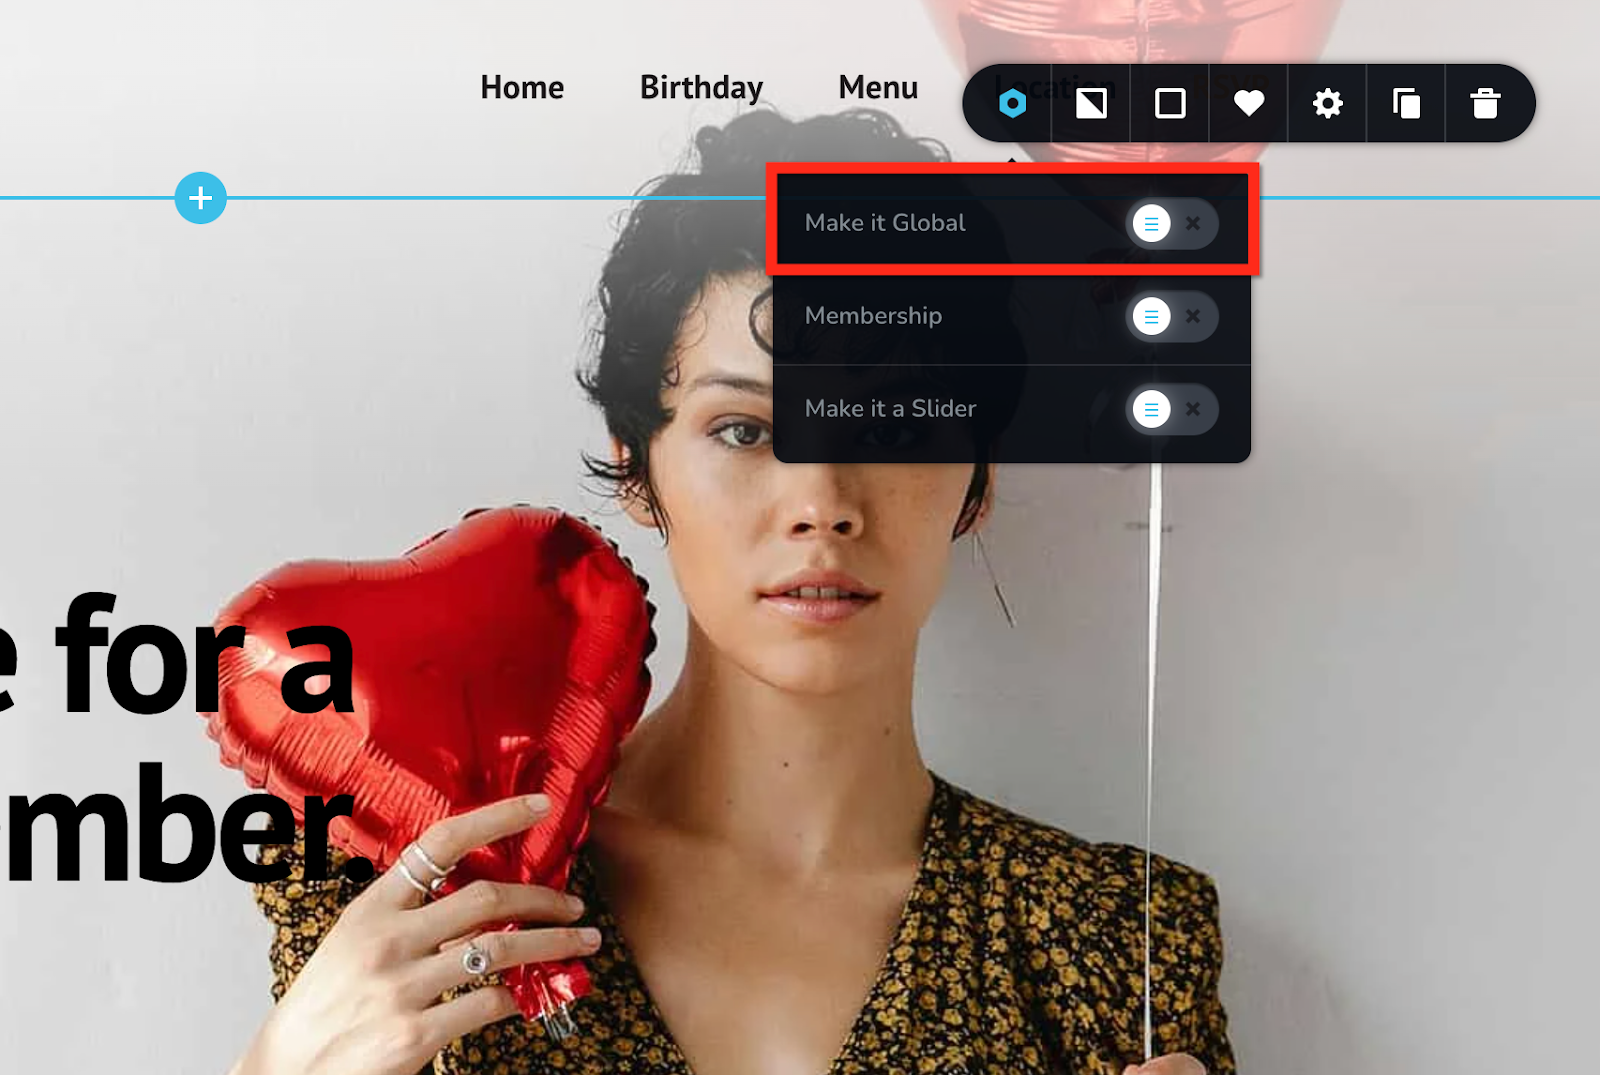
This will make your block global and will let you set global display conditions.
2. Set global display conditions
Once you activate the Make it global option, you’ll notice a new icon appearing on the block. This notifies you that the block is global.

Now access the Display Conditions popup and set up where you want this block to appear. Select Include All.
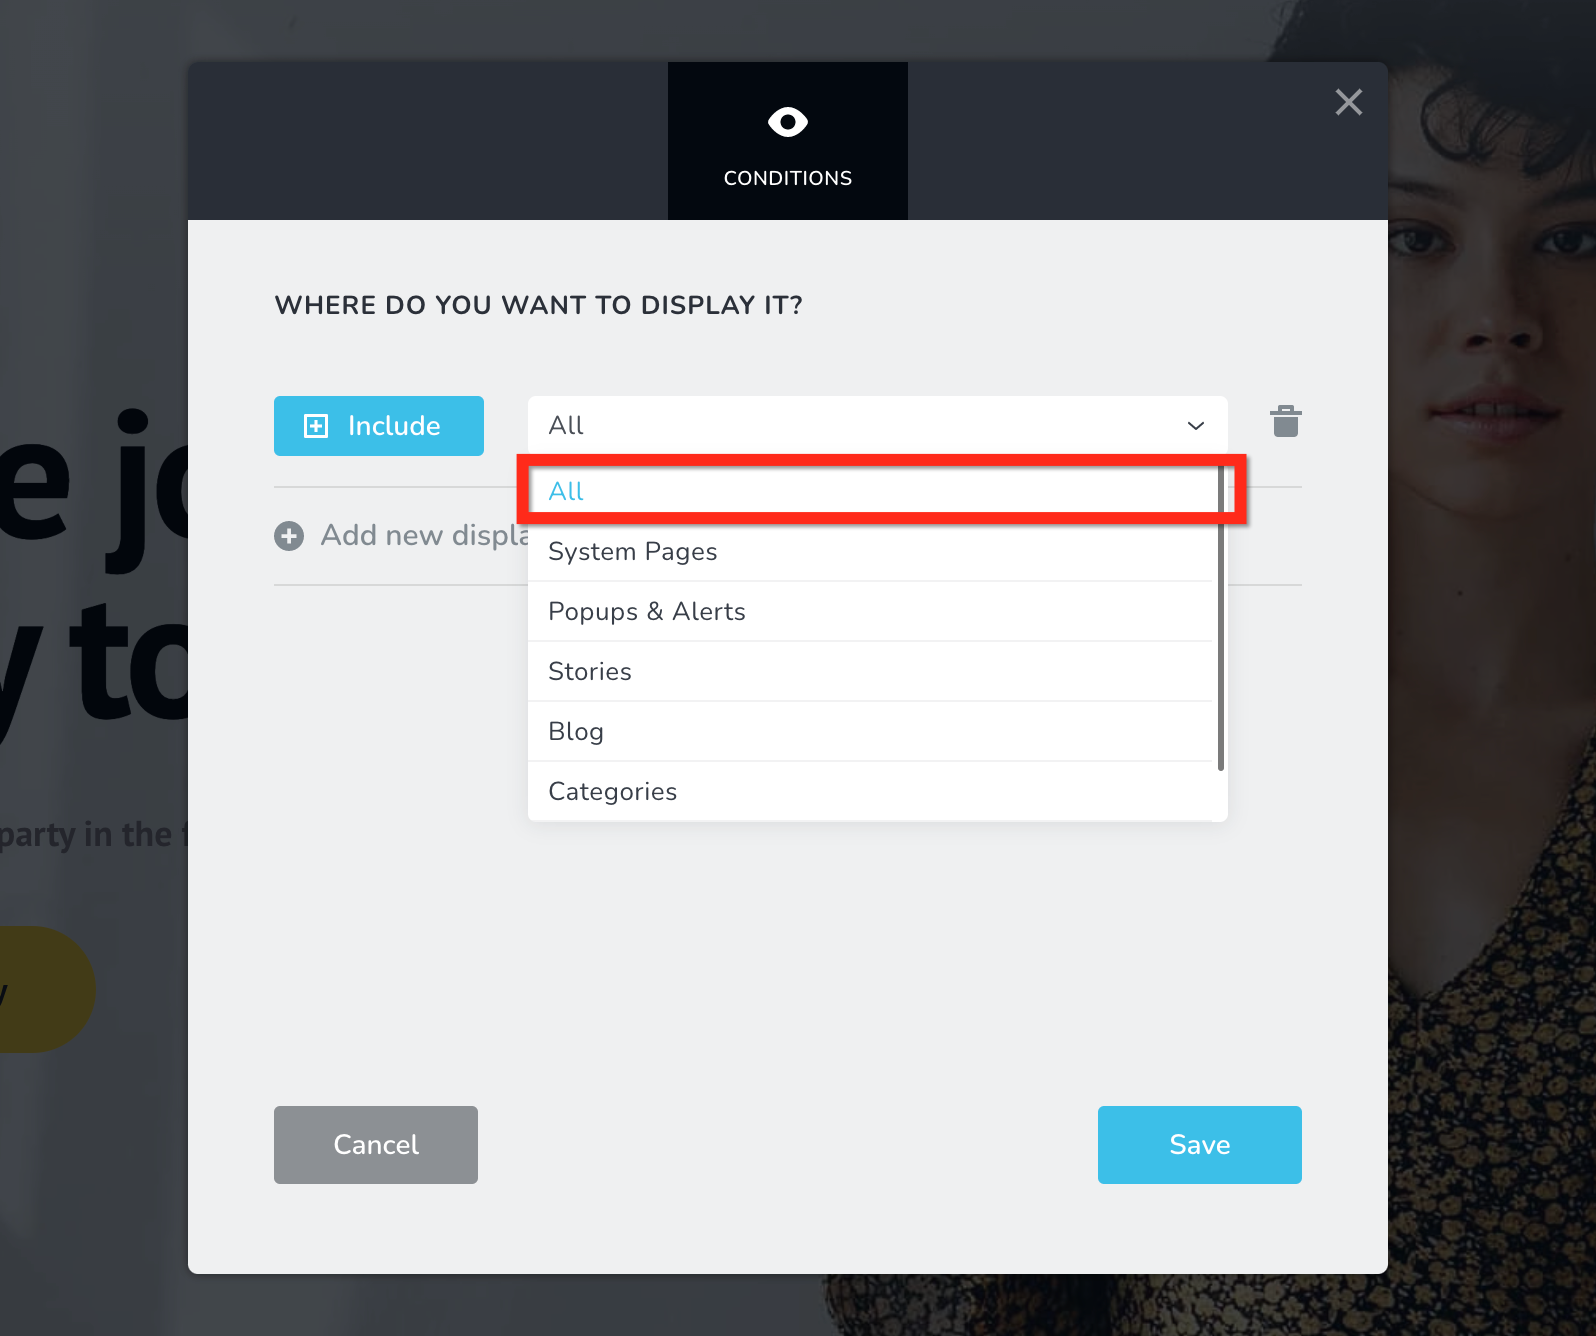
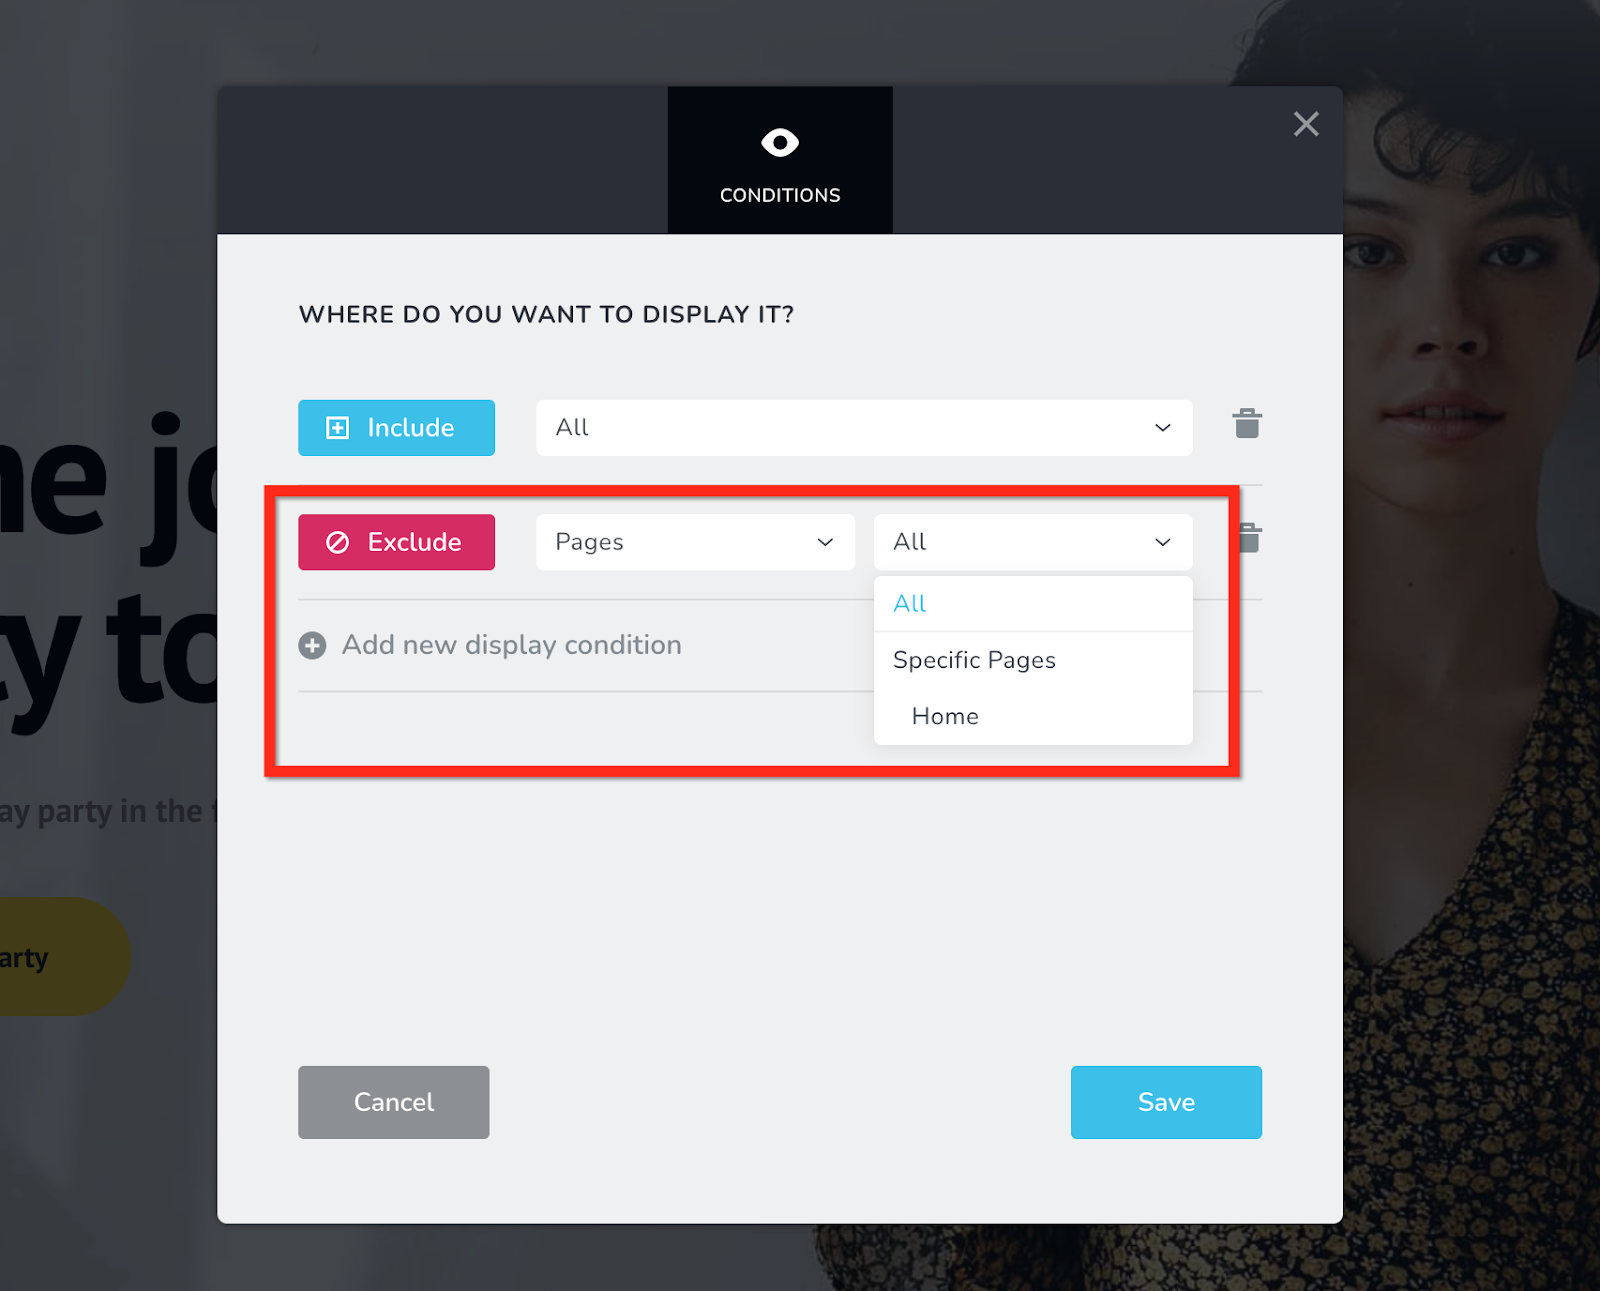
This is where you can play with the conditions, if for example you want on a certain page to have a different header, then you will add a new condition, click the Include button to make it Exclude, and then select from the dropdowns the page you want the header excluded from.
Conclusion
So, this sums up all the key features within the website builder. Now, go ahead and create your beautiful website and start marketing your website.
For more tutorials on how to market your website, check out the course marketing tutorials series below.
Did this answer your question? Thanks for the feedback There was a problem submitting your feedback. Please try again later.Yes No No results found